

When putting together our Fluval EVO 13.5 saltwater build, I spent quite a bit of time considering what all was worth upgrading. I wanted to maintain a balance between keeping initial cost down but providing equipment that would help make this tank a success. One upgrade that quickly rose to the top was an Auto Top Off (ATO) system.
The AutoAqua Smart ATO Lite was introduced just prior to setting our tank up. It’s features and low cost made it the top ATO candidate for our Nano. It has the perfect combination of small size, simplicity, smart design, and low cost. Having used it for over a year now, It has not failed us once and I think it’s the piece of equipment I’d recommend the most for a saltwater nano.
In this review, I’ll explain what an ATO does, why it’s such a valuable piece of aquarium automation, and of course I will dig into all specifications, setup, and experiences using the AutoAqua Smart ATO Lite.
Benefits of an Auto Top Off System:
All aquariums experience water evaporation that, over time, reduces the volume of water in the system. In our freshwater Spec V aquarium, it’s not that big of a deal – the risk that particular All In One tank is that if the water get’s too low (after about a week of not replacing evaporated water), the pump will run dry.
Dealing with evaporation is as simple as occasionally topping off the tank with makeup water. Our EVO 13.5 marine nano experiences the same phenomenon, but the stakes are higher in a saltwater system.
The challenge with marine aquariums is to provide as much stability as possible. I discuss this in my article on Saltwater Cycling and Basics of Reef Water Parameters. The two most basic of parameters to maintain are temperature and salinity.

For any body of water, only pure water evaporates. As freshwater disappears (and the salt is left behind), this skews the ratio of water to salt and causes the salinity to increase over time.
Dealing with this can be the same as with our freshwater nano – just add new RODI water to replace what is evaporated over time. However, in an effort to maintain stability, the water level would need to be checked not just daily, but perhaps multiple times every day. I couldn’t see performing this task consistantly over time. Add to this the issue of leaving your beloved aquarium to go on vacation.
Our EVO evaporates more than a gallon of water a week in the summer. Even a few days away from the tank would cause a significant increase in salinity before top-off water is replaced manually.
This clearly shows a need for an Auto Top Off (ATO) system. Any ATO system simply detects when the water volume of a aquarium has decreased (from evaporation) and then automatically adds makeup water to replace (by way of a small pump drawing fresh water from the ATO system reservoir). These systems are always on and always working to keep your total aquarium water volume constant.
ATO’s can be used on any aquarium including freshwater, but for all the reasons discussed, they really prove their worth in saltwater tanks.
ATO System Reliability and Performance Considerations:
For all the positives that an ATO offers, there are a few risks and concerns for operation.
An ATO system needs to make accurate and repeatable measurements of the water level, and this needs to occur for both low level (to start the makeup water pump) and normal level (to shut off the makeup water pump).
The risk in an ATO system that is not accurate and repeatable are many. If the ATO doesn’t detect a low water situation, salinity will rise. Worse is if the ATO doesn’t de-energize the pump once the water level is restored. This would lead to dropped salinity and potentially an overfilled tank (and a wet floor).
For these reasons, a good ATO will have a very accurate method of sensing water levels, it may have redundant sensing capabilities (to safeguard in the event that one sensor fails), and it may have other means of safeguarding against overflow situations.
ATO Shopping List for Our Nano Aquarium:
For our Nano Reef Aquarium, I was looking for a few ATO system characteristics. There isn’t much room for equipment in an All In One (AIO) nano, so I wanted a system with a compact water level sensor. Redundant level sensors would be nice, but would work against the constraint of space and also cost.
Our nano reef was built on a budget, so I wanted the ATO to be as cost effective as possible. Finally, I did not want the ATO to use a mechanical (float) style water level sensor. I know many marine aquarist like this style of sensor; however, I’ve heard they can get fouled up with salt over time and fail to operate. This leaves optical sensors as preferred.
AutoAqua Smart ATO Lite – Description and Features:
I was thrilled to discover the AutoAqua Smart ATO. Then the ‘Lite’ version came out and it was even better (in my opinion). I’ll discuss the differences between the two models in a bit.
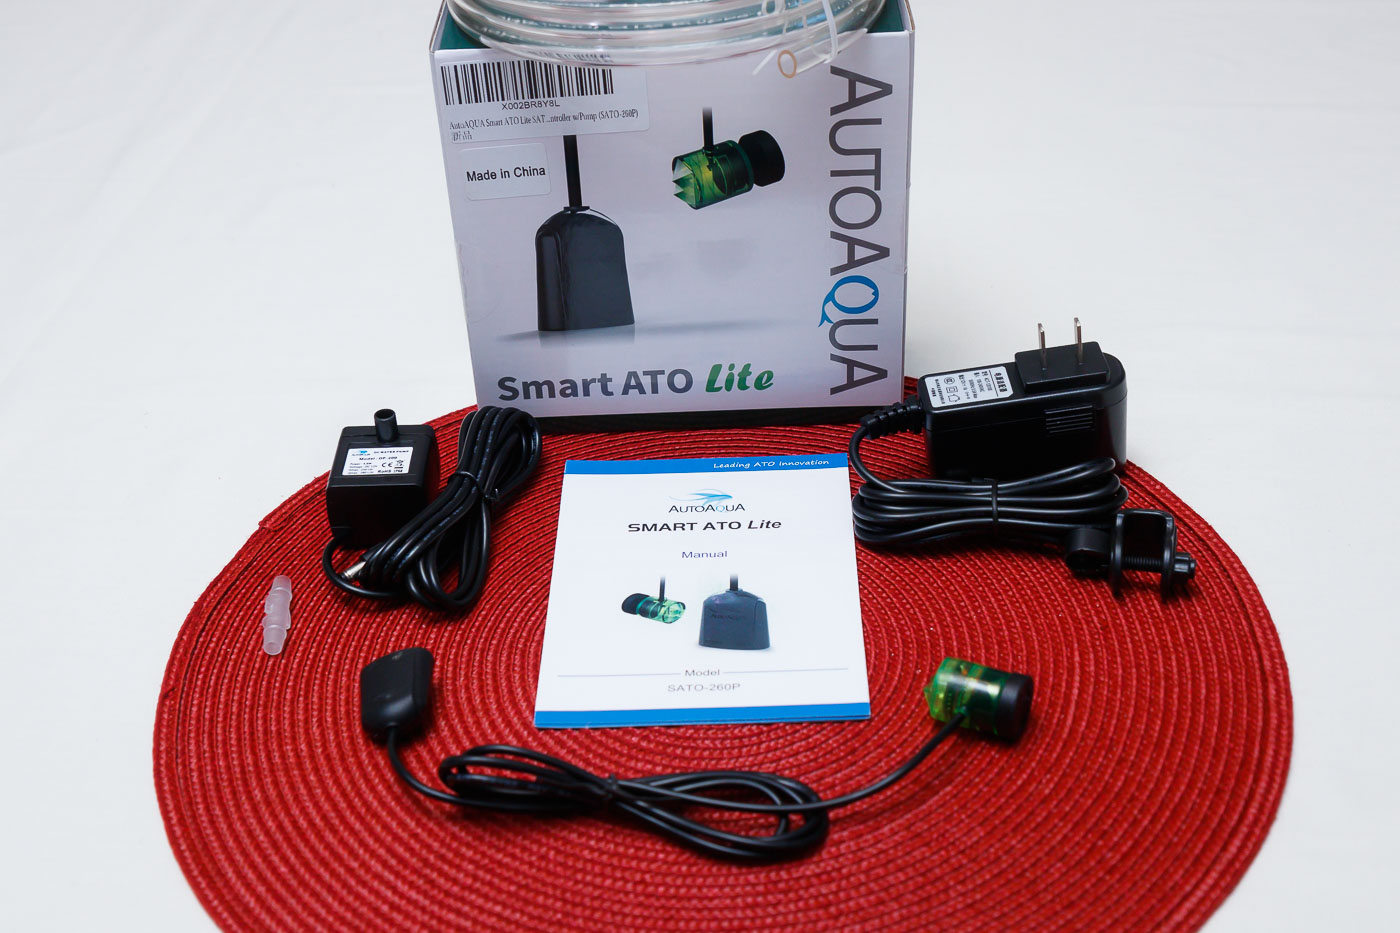
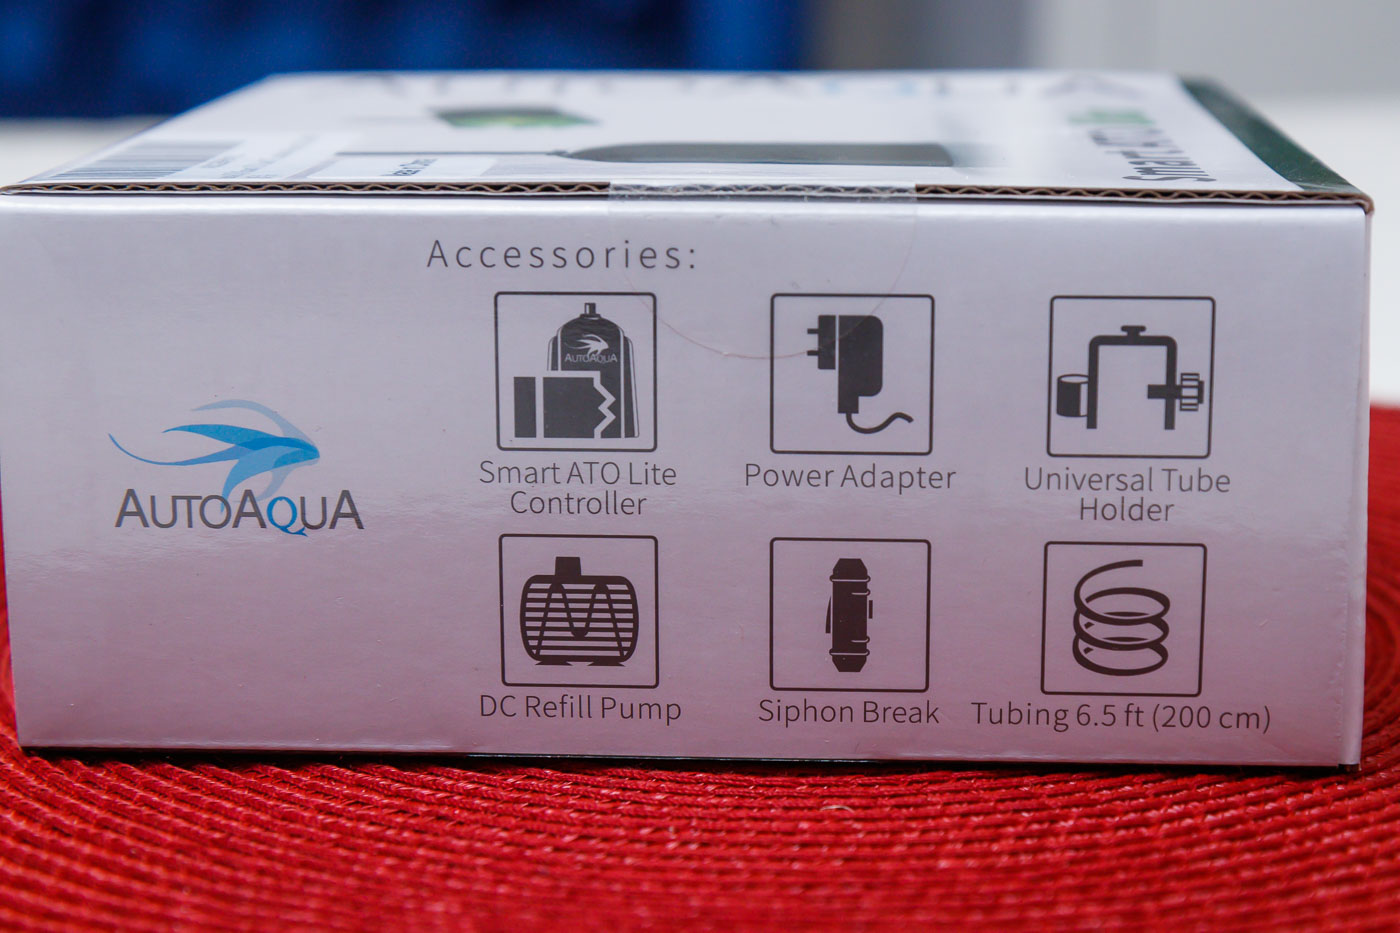
The AutoAqua Smart ATO Lite comes with the following components / features:
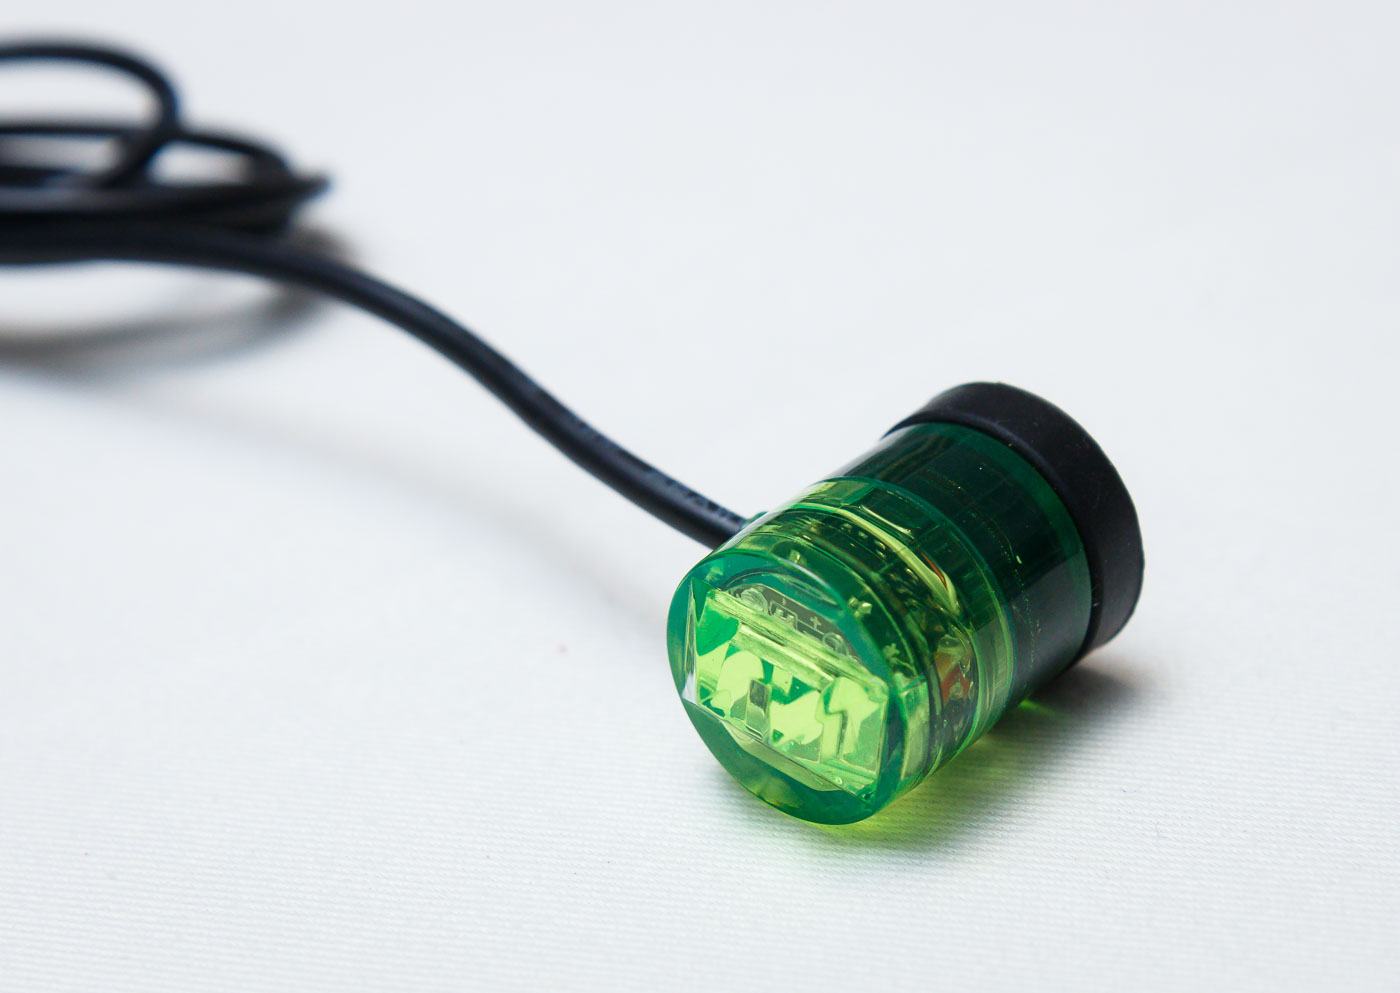
- Water Level Sensor: This optical sensor is held in place on the glass with a magnet. At the opposite end of the sensor is a junction box that receives connections to the power adaptor and the pump.
- Power Adaptor: This is a 110v AC to DC power adaptor (for the USA version reviewed).
- Pump: The transfer pump is a submersible model that is labeled as follows: 4.8 Watts, 250 cm (8.2 ft) of head (lift), Max flow of 280 Liters/Hour (74 Gallons/Hour).
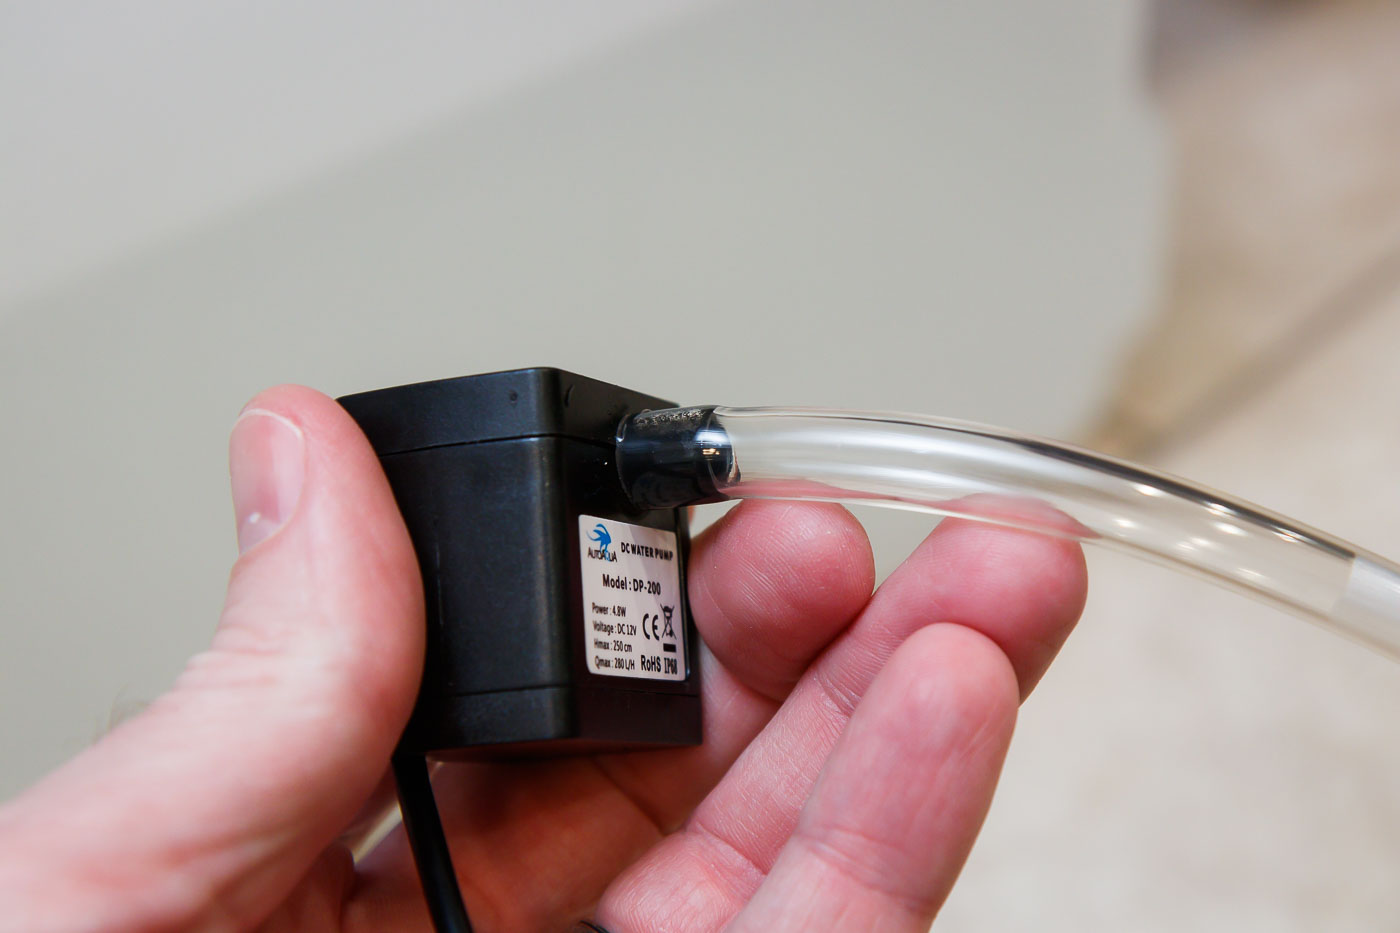
- Tubing: The kit includes 80″ (203 cm) of clear vinyl tubing. I’m not sure of the size, but I measure it as equivalent to 3/8 in. O.D. x 1/4 in. I.D.
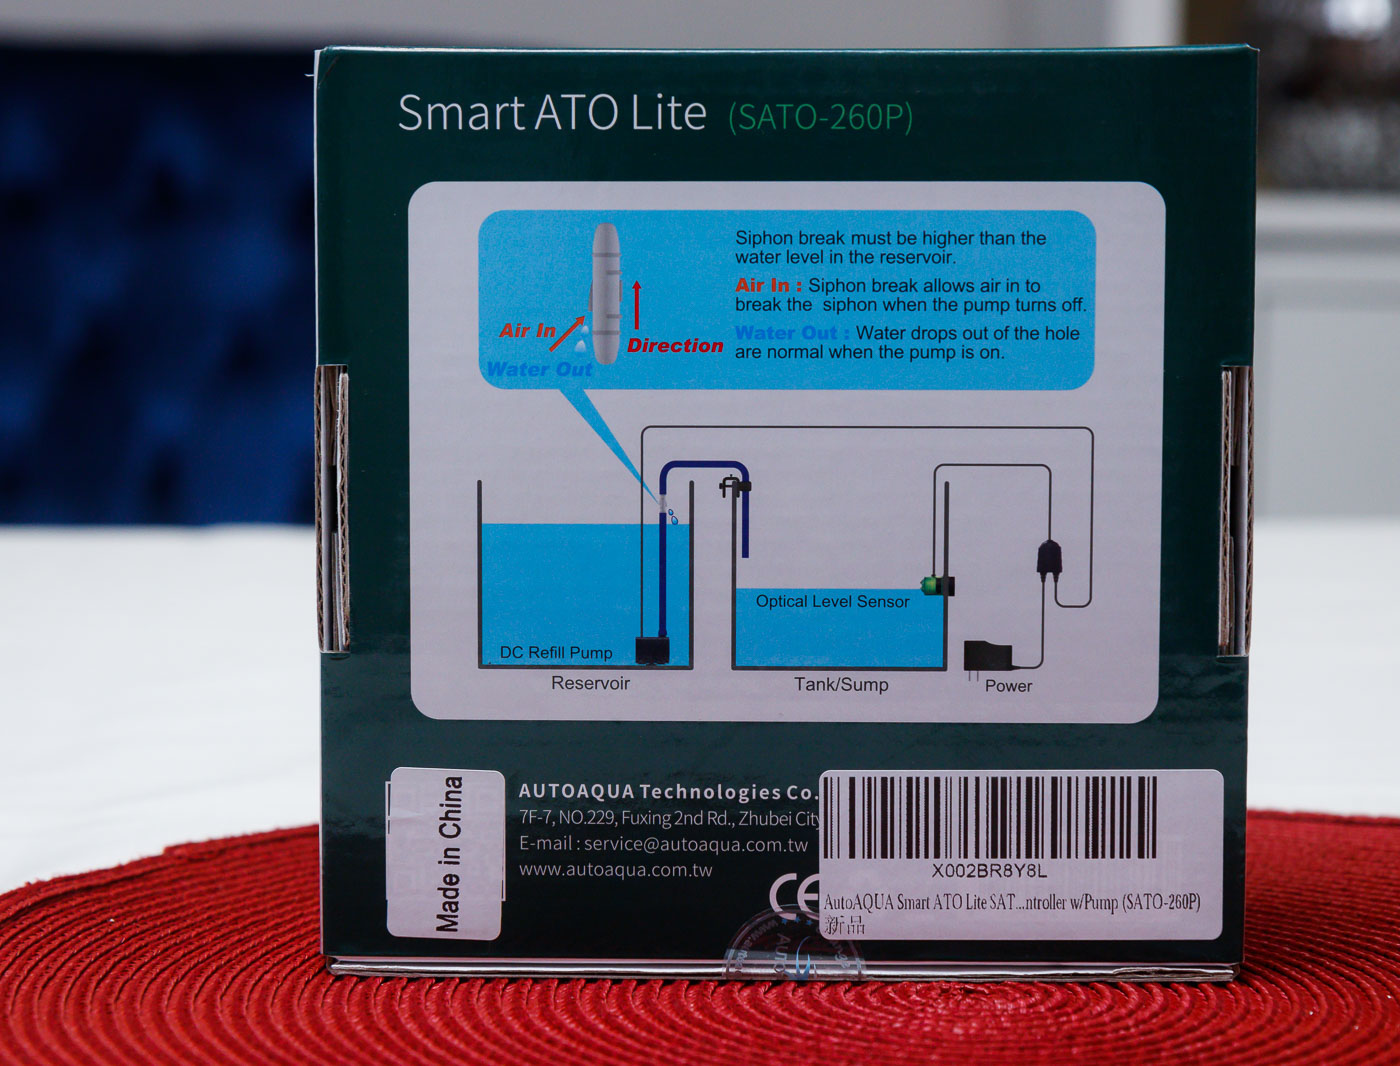
- ‘Siphon-Break’ Fitting

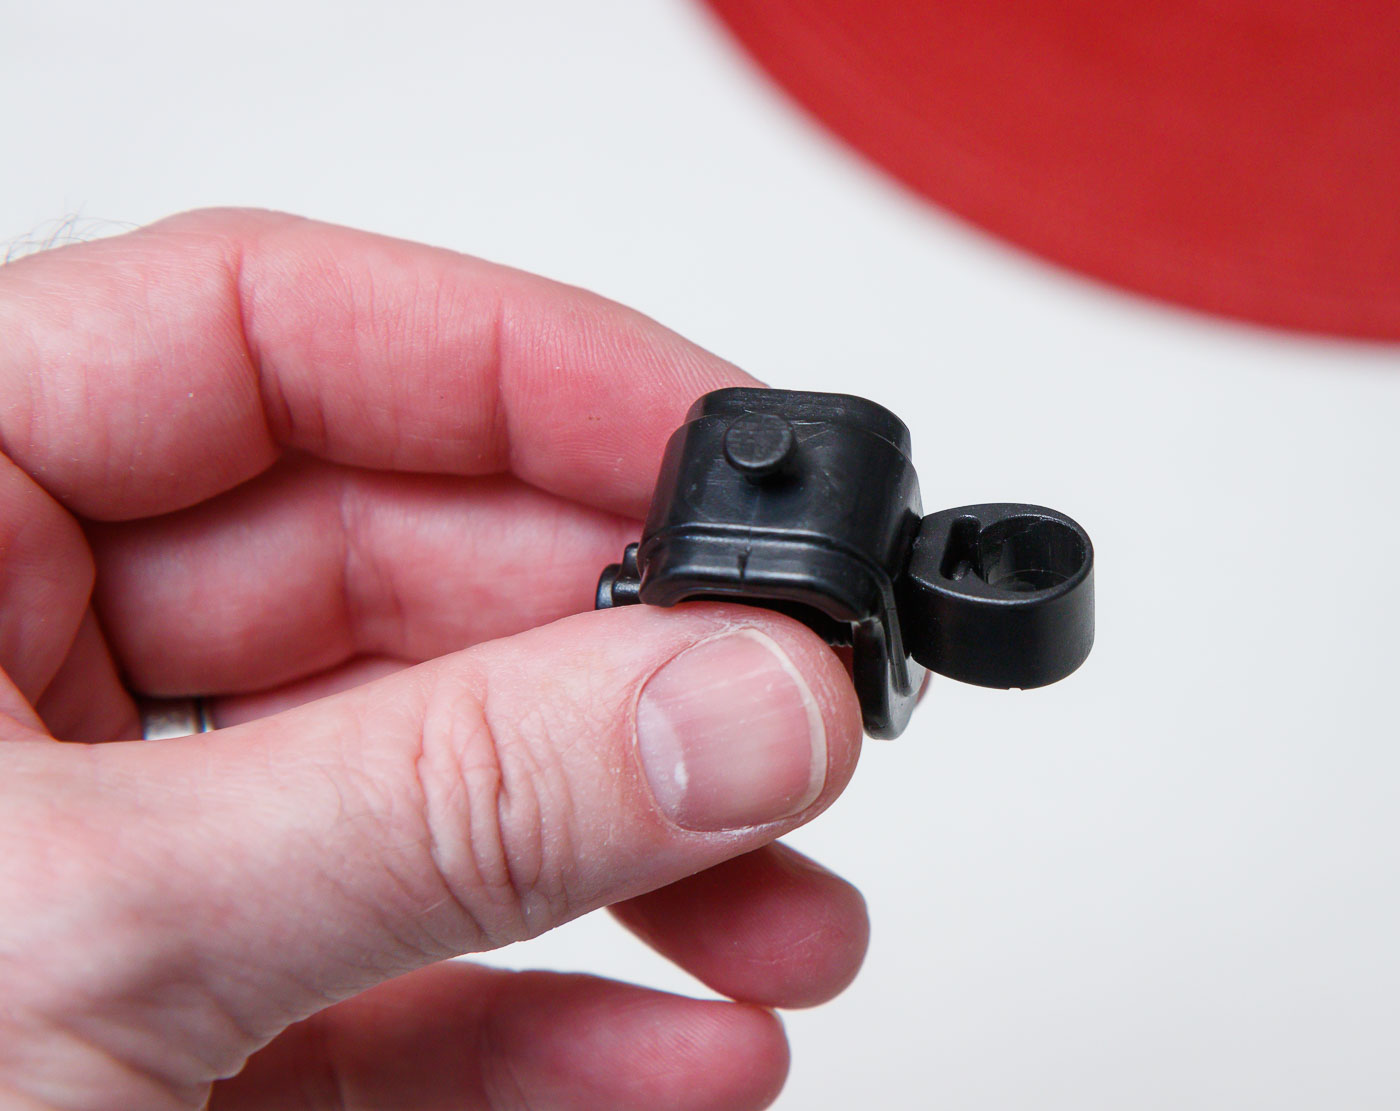
- Tubing Clamp: This is a simple screw clamp fitting to hold the tubing secure to discharge into your aquarium.
- Instruction Manual
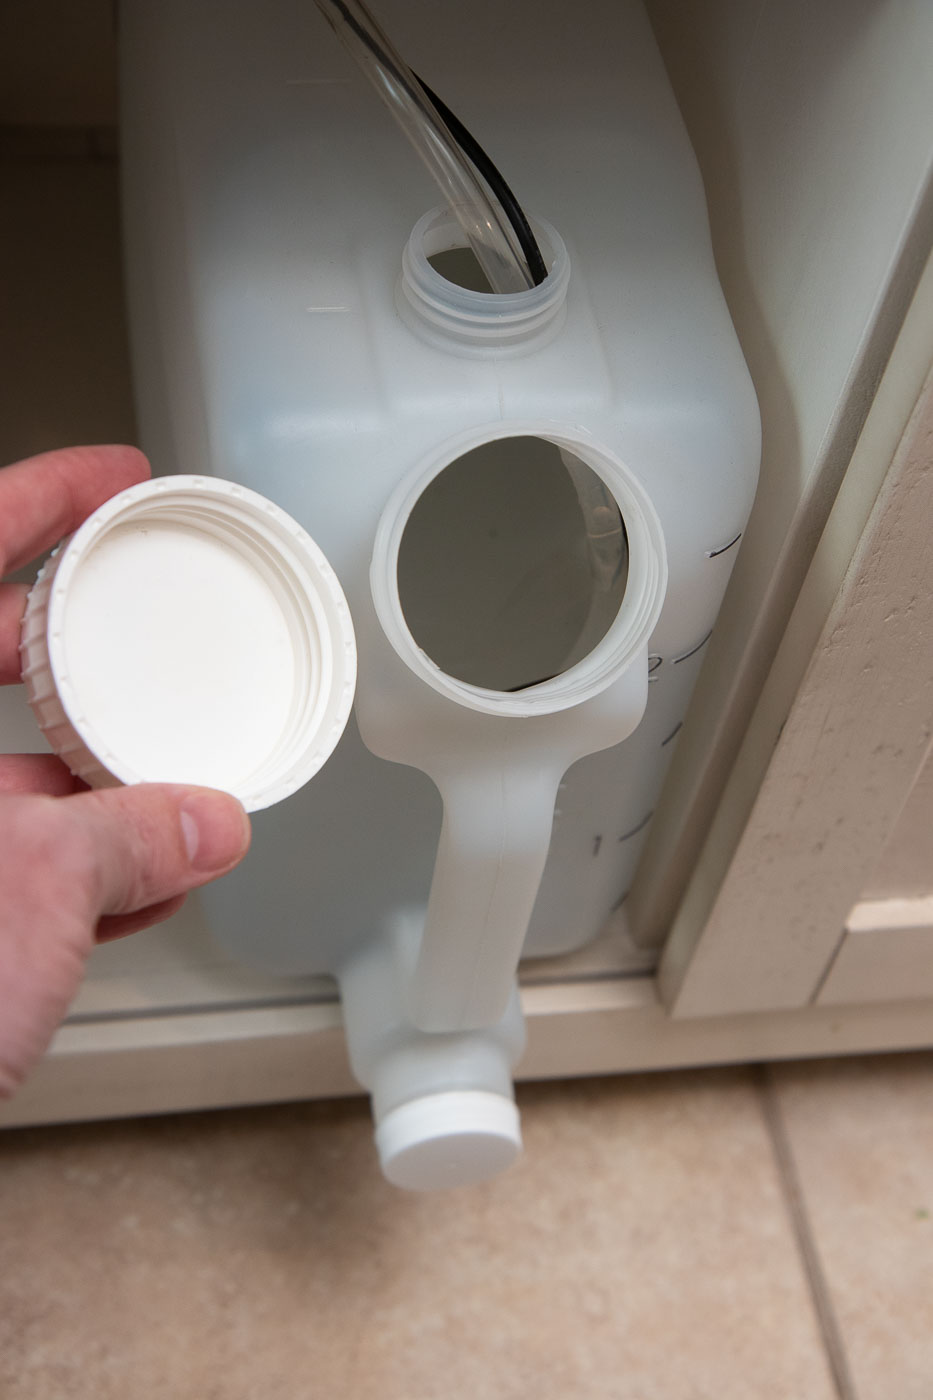
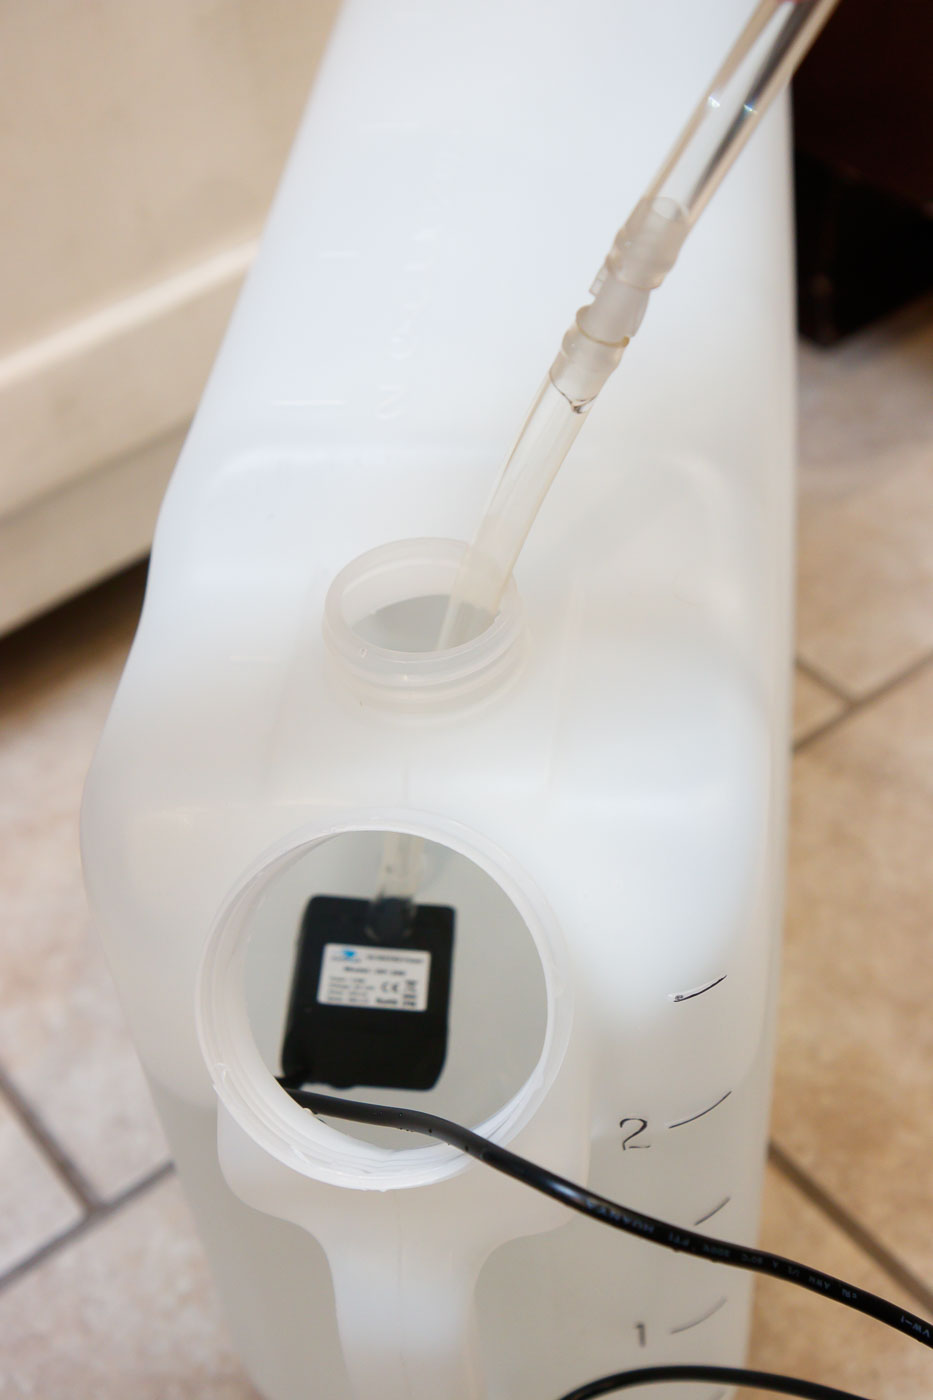
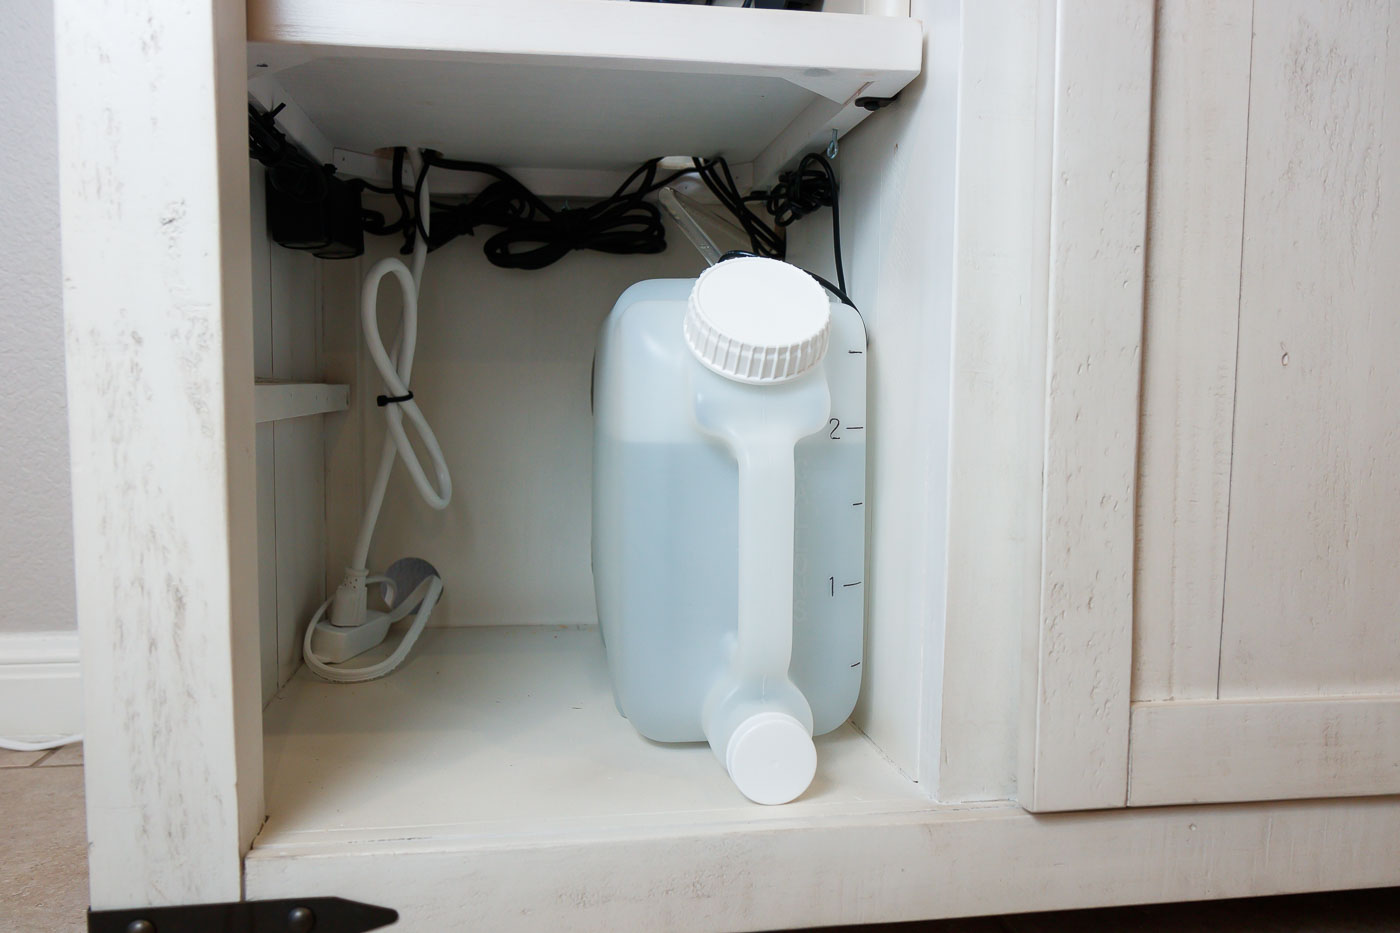
The system is complete with exception to a reservoir of some type for the makeup water. You can use anything from a 5 gallon bucket with a hole cut in the lid to even a plastic milk container.
I wrote in EVO Marine Accessories and Upgrades page about my extensive search for a container that would fit in our stand and be a good balance of enough volume without taking up too much space. This 2-1/2 Gallon container that I found has been perfect. It has an opening for the outlet tubing to pass through, another (large) opening to refill, and it sits upright to save shelf space.
AutoAqua Smart ATO Lite Dimensions:
Here are some measured dimensions of the AutoAqua Smart ATO Lite. All dimensions provided are from my measurements (to the nearest mm and converted to inches). There is possibility for error in my measurements (I do my best to be accurate) and also some variability between product samples.
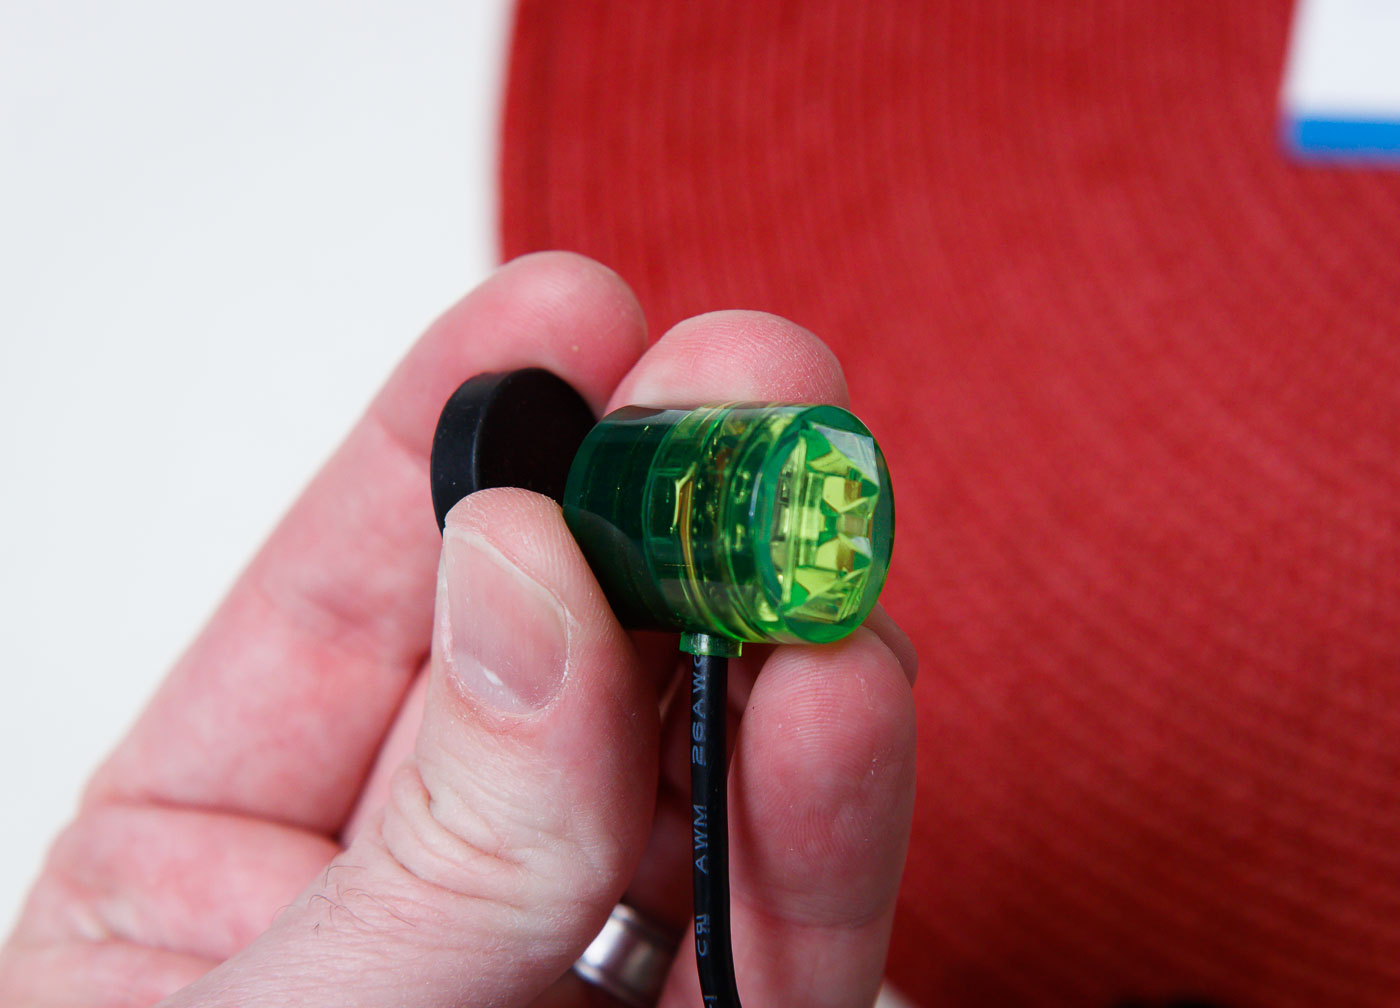
- Water Level Sensor: 0.79″ (20 mm) Diameter and 1.0″ (26 mm) Deep
- Sensor Magnet: 0.79″ (20 mm) Diameter and 0.24″ (6 mm) Deep
- Cord from Sensor To Controller: 46″ (117 cm)
- Controller Junction Box: 1.3″ (32 mm) x 0.98″ (25 mm) x 0.5″ (13 mm)
- Power Brick: 2.9″ (74 mm) x 1.9″ (47 mm) x 1.2″ (30 mm)
- Power Brick Cord (to Controller Junction Box): 66″ (168 cm)
- Pump: 1.5″ (38 mm) x 1.4″ (36 mm) x 0.87″ (22 mm) Tall
- Pump Cord (to Controller Junction Box): 71″ (180 cm)
- Hose Length (uncut): 80″ (203 cm)
Setup and Operation of the AutoAqua Smart ATO Lite:
Setup of this ATO requires a bit of planning to consider placement of all the components: Wires, reservoir, tubing, and the sensor.
Electrical connections are simple – just plug the power supply and pump connectors into the sensor’s junction box.
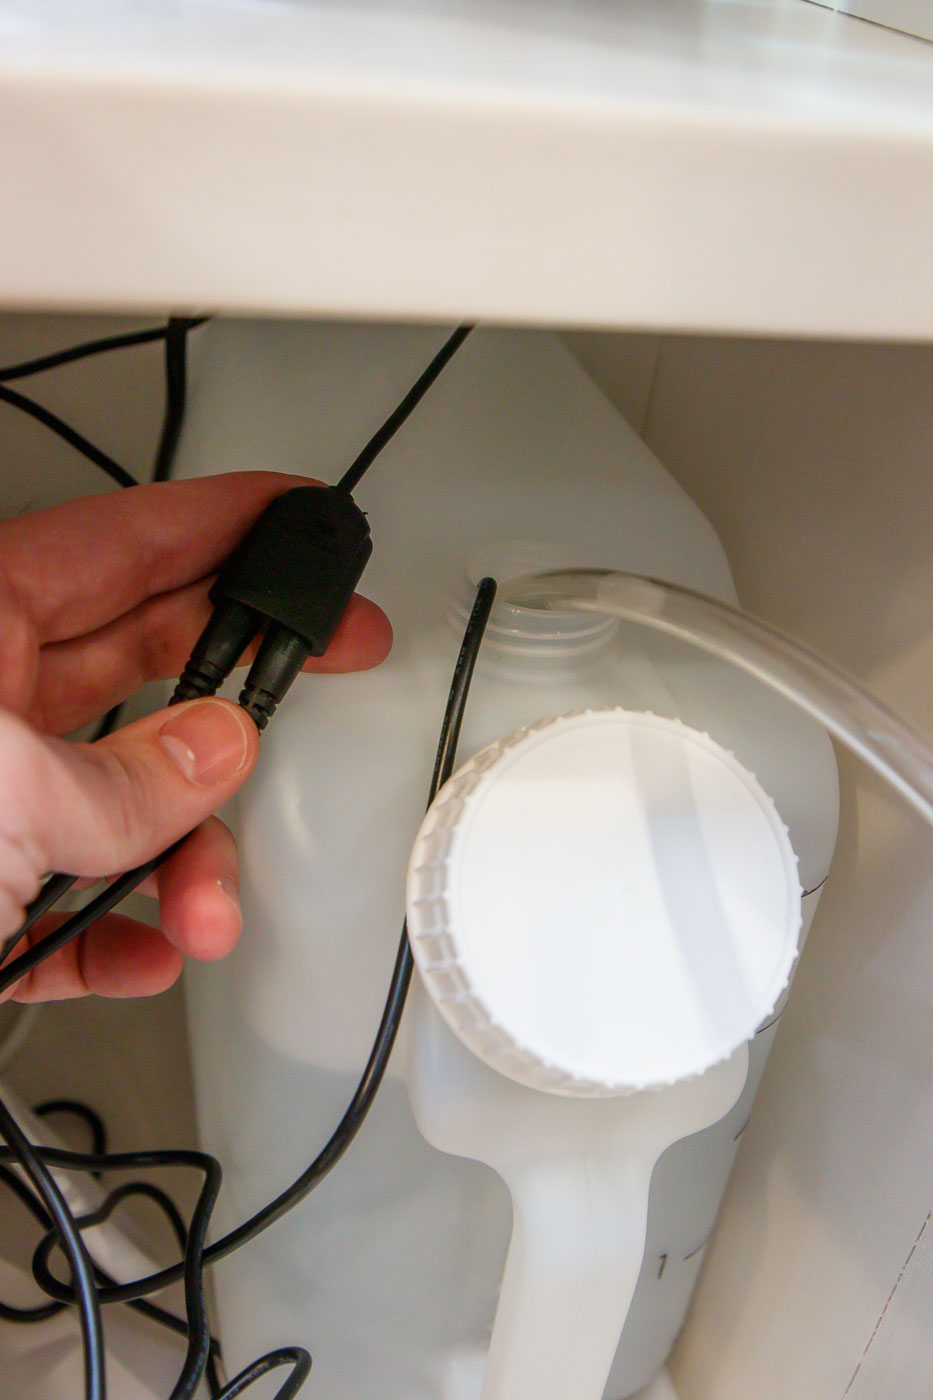
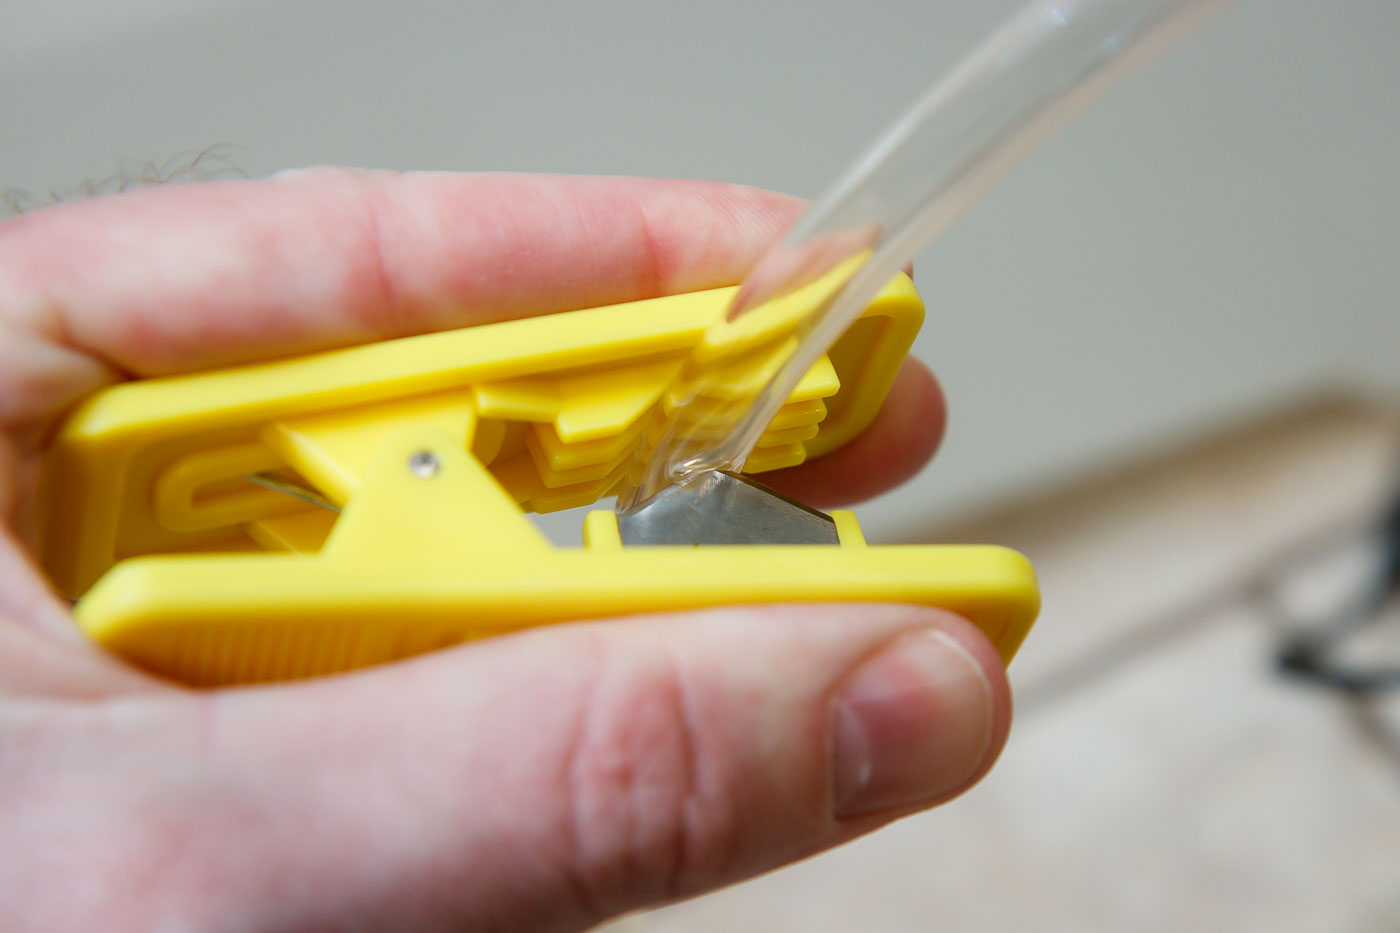
Next up is getting the pump installed in the reservoir. Note the diagram in the instructions describe correct placement of the ‘siphon-break’ fitting. It needs to be place inline in the tubing, above the water level, but below the top rim (where it can drain back into the reservoir). The fitting is directional – mount with the arrow indicator pointed up. I used a tubing cutter to make clean cuts for installing the ‘siphon-break’ fitting and to cut the final tubing length.
Get the tubing routed up to your tank. Consider leaving a bit of excess initially in case you change your mind. Try to install such that there are no elevation dips where the tubing goes up, down, up. Now is a good time to tidy up the wiring as well.
Secure the tubing with the provided clamp. It’s best for the water to discharge into the same chamber that the sensor is located in, but should not dump water directly on the sensor.
Take care that the end of the discharge tubing is not submerged in any operating state (including with various pumps turned off). If the tubing ever becomes submerged below the water surface, a siphon can ensue and backwash saltwater into your makeup water reservoir (not good) and potentially overflow onto your floor (really bad).
AutoAqua Smart ATO Lite Sensor Installation:
Getting the sensor installed take a few simple steps:
- Turn on all the aquarium pumps and wave makers. The intent is to get the water elevations at their normal operating levels.
- Add/Remove saltwater as necessary to get the desired operating levels. In our EVO 13.5, I know the water volume is correct when water just submerges the Poly filter floss at the top of the In-Tank’s Chamber 1 Media Basket
.
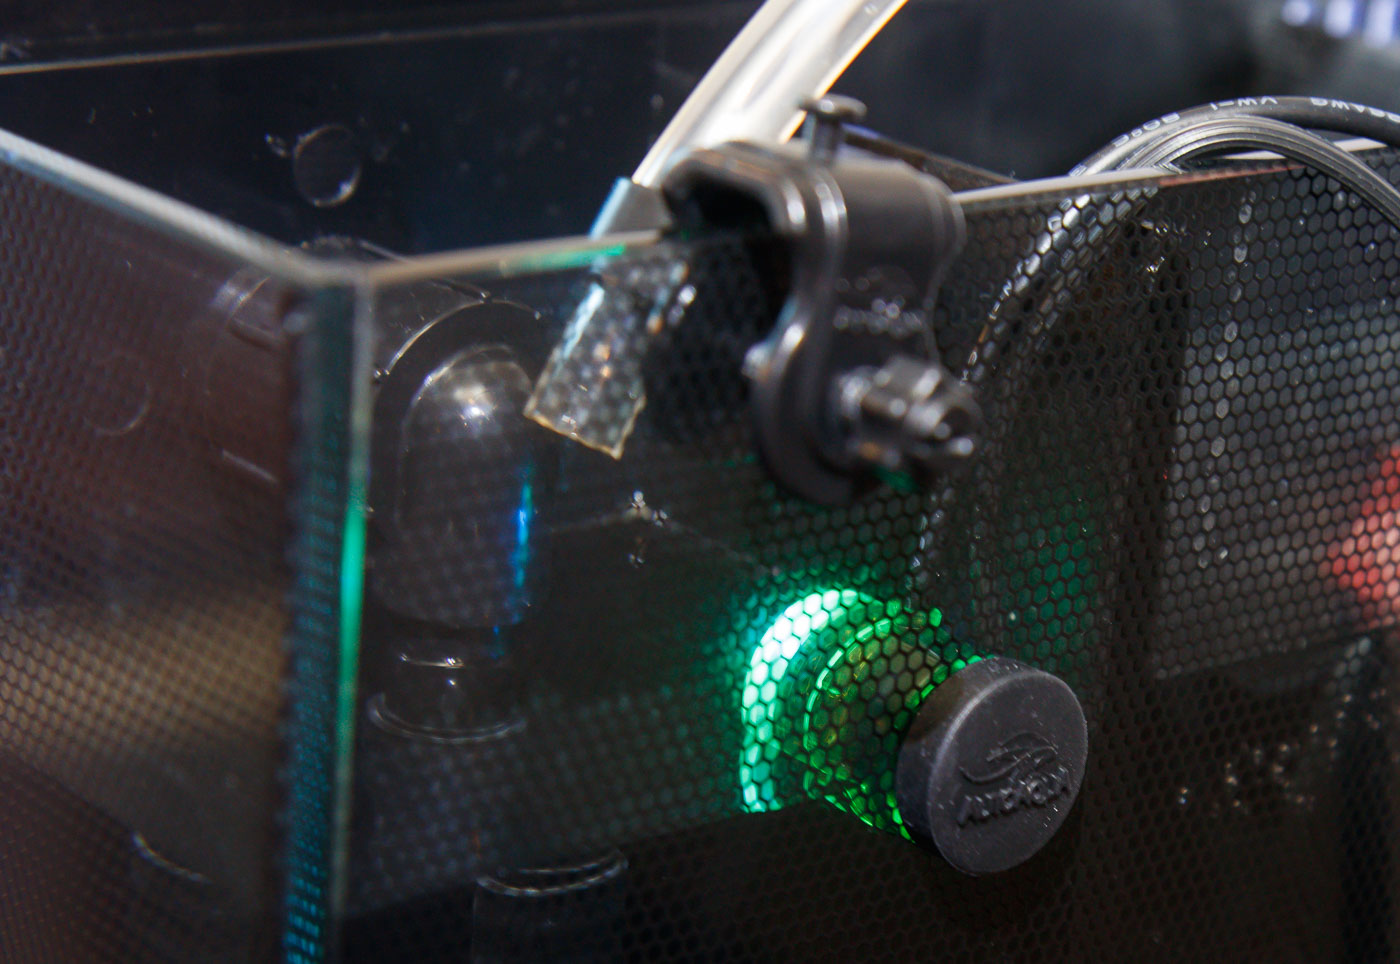
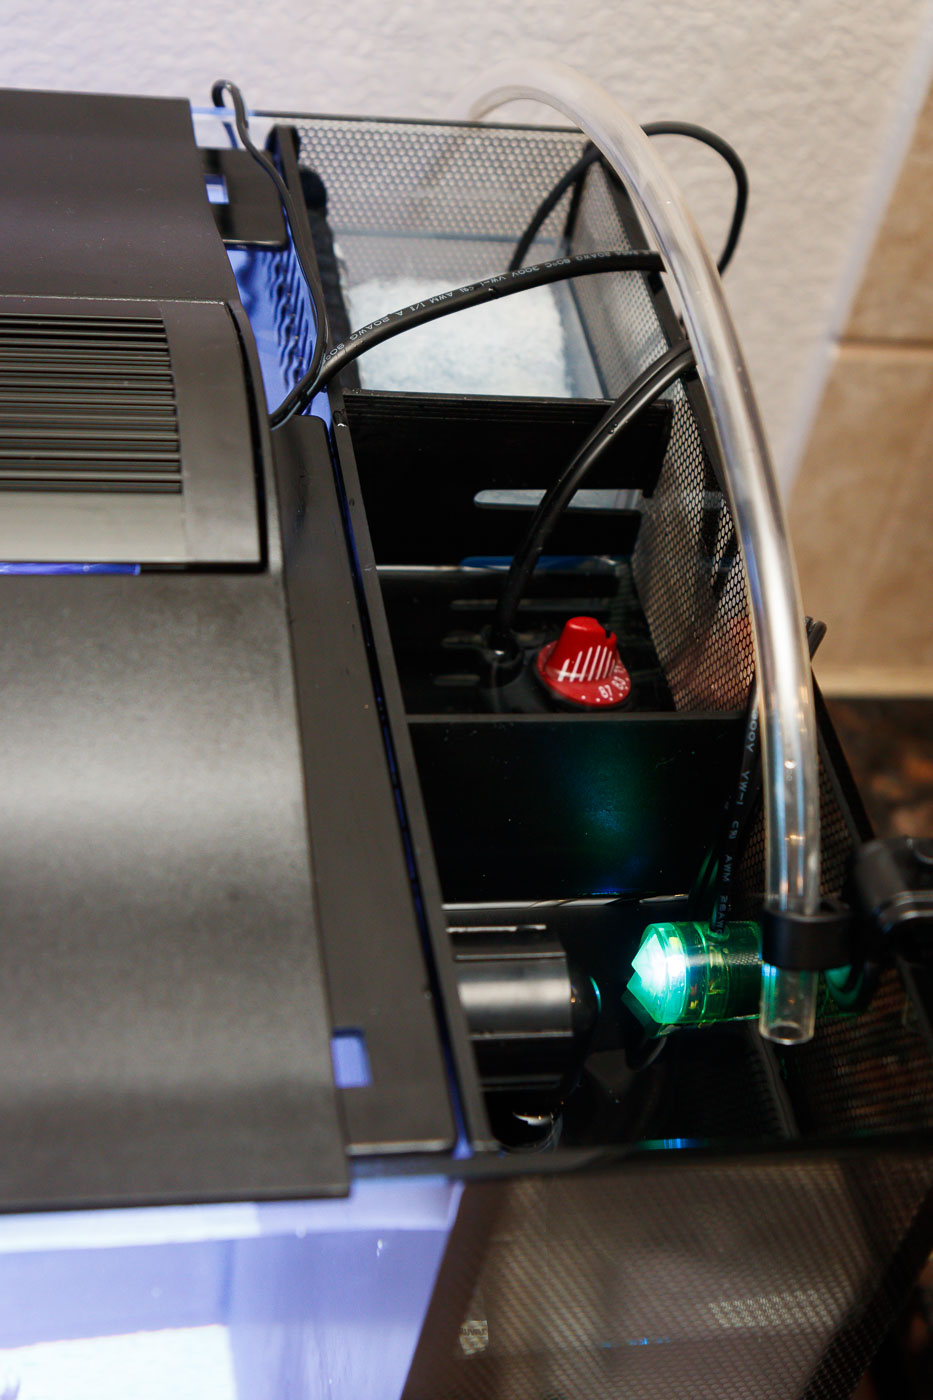
- Mount the Sensor in the Aquarium. There are a few considerations as to where the sensor should go. First, place the sensor in a location where the water depth drops with evaporation. Second, place in an area that has stable water depth (not undulating excessively with wavemaker or return pump action). For the EVO 13.5, the best place I found is on the back of the tank in the pump section. With the ATO power off, secure the sensor in place with the magnet. The cord of the sensor should be pointed up.
- Adjust the Sensor Height: The sensor face has two points – one low and one high. The lower point is actually where the sensor will detect water and maintain the level. Move the sensor up or down until this lower point is at the current water level.
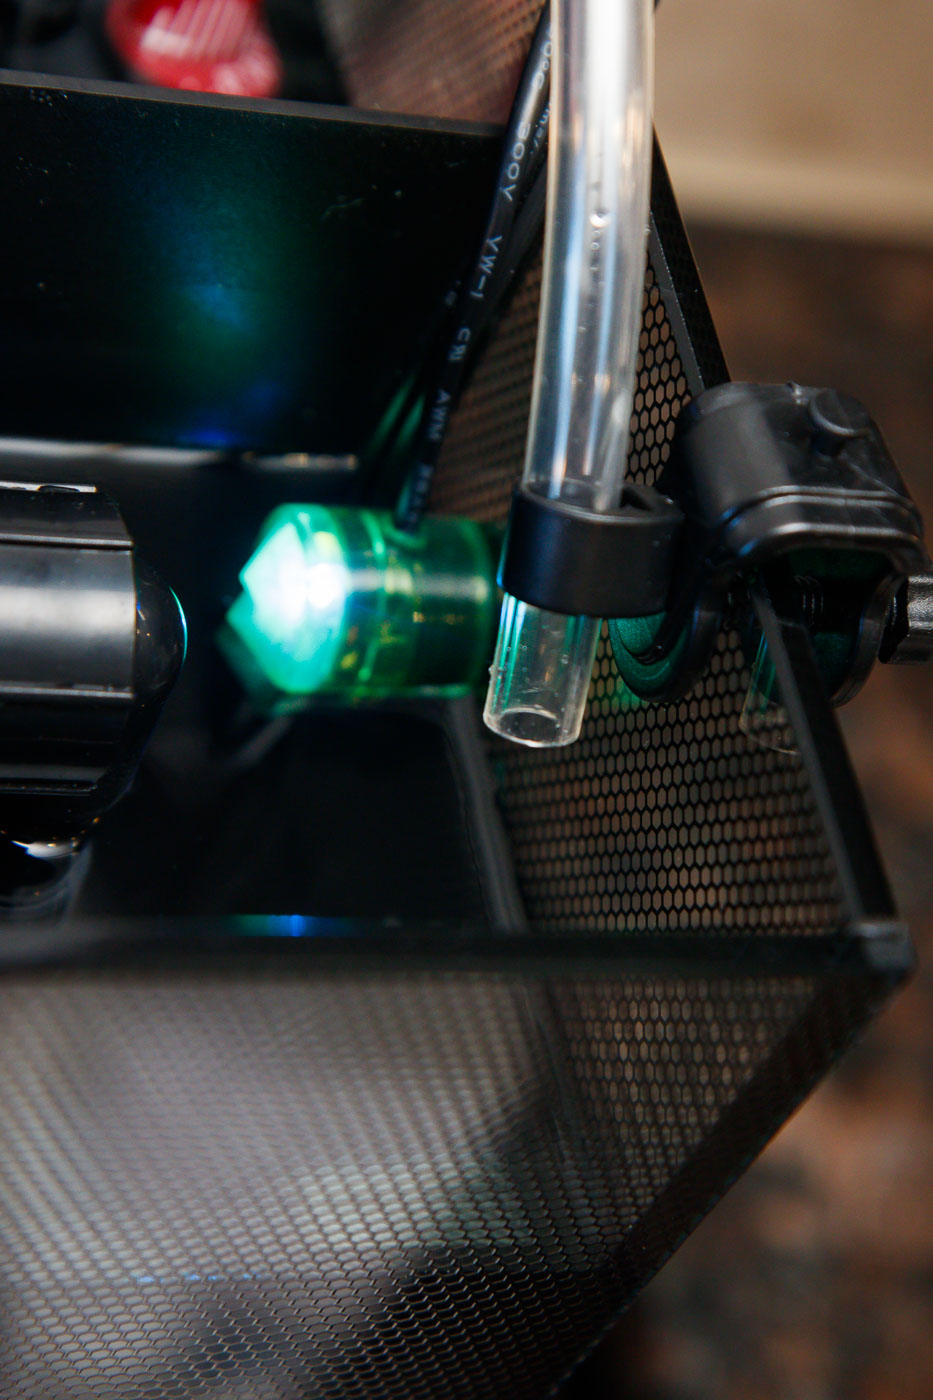
- Power the ATO: LED’s in the sensor will flash Blue/Red during start-up. Afterwards, you will either see a solid Blue LED (water level normal) or the ATO will flash Blue while enabling the pump (water level low); after the water level is raised up to just past the lower point on the sensor, the pump will turn off and the LED will change from flashing to solid Blue.
At this point, your ATO is setup! You can walk away and bask in your newly automated Auto Top Off system.
AutoAqua Smart ATO Lite Failsafe Features:
I discussed earlier the need for safety measures in an ATO to prevent overfilling. The AutoAqua Smart ATO has a very simple yet ingenious bit of programming to reduce the change of an overflow.
The unit will record the duration of the first refill. From then on, it times subsequent refills. If any refill duration ever exceeds six times the initial fill, the unit will stop pumping water and notify with a flashing red LED. It will not enable any auto top offs until the error is cleared by powering down and back up.
If your makeup water reservoir runs dry, the AutoAqua Smart ATO will respond similarly with a flashing red LED.
Differences Between the AutoAqua Smart ATO (SATO-280P) and Smart ATO LITE (SATO-260P):
There are only three differences (that I know of) between the Regular and LITE versions of the AutoAqua Smart ATO’s.
- When the Regular (non LITE) version goes into either of the two alarm conditions (dry pump or excessive fill time) in addition to a flashing red LED, the unit sounds an Audible Alarm.
- The time duration to alarm (for excessive fill time) is three times (3x) the first fill instead of six times (6x) on the LITE version. I haven’t tested the Regular version so I can’t confirm this and I don’t know why they chose to make this change.
- The LITE version is less expensive; it is priced at $77 USD vs. $140 for the non-Lite. That is a significant difference in price with a very small difference in function.
The decision between the two was easy for me. I actually don’t want the audible alarm as it is (almost) guaranteed to go off in the middle of the night. A low reservoir or other malfunction can wait until morning. The red flashing LED is hard not to notice.
ATO Maintenance and Use Tips:
The most complex part of usage is getting the sensor setup (already discussed). Beyond that, there’s not much to keeping this ATO going.
Obviously, you need to keep RODI water in the reservoir. For convenience (so that I’m not constantly filling), I selected a reservoir sized for about 2 gallons. For our 11 gallon system, that is enough water to last at least 10 days (during the high evaporation summer months) and several weeks during other parts of the year.
Make sure to unplug the ATO prior to maintenance and water changes; otherwise, the unit will start to fill inadvertently.
As part of your tank maintenance regimen, regularly clean the optical sensor. If deposits are allowed to build up, accuracy can be affected. Weekly, I rinse it with RODI water to cut deposits a bit. Once a month, I take it out of the tank and wipe it down with a microfiber cloth. If it has significant calcium deposits, soak it in a 1:1 water and white vinegar solution. Never use anything abrasive on the sensor housing – scratches could negatively affect function.
Optional – My Modifications to the ATO Flow Tubing:
The tubing and clamp that comes stock with the unit is fine, but I had a few issues with it for function and aesthetics. The clear plastic tubing doesn’t flex and needs to be routed in a smooth arc. On our EVO 13.5, it ended up traveling over the top of other equipment sections in our EVO, thus blocking access.
The clamp (that secures the tubing discharge at the aquarium) is ok but I envisioned it falling off and directing water on the floor at some point.
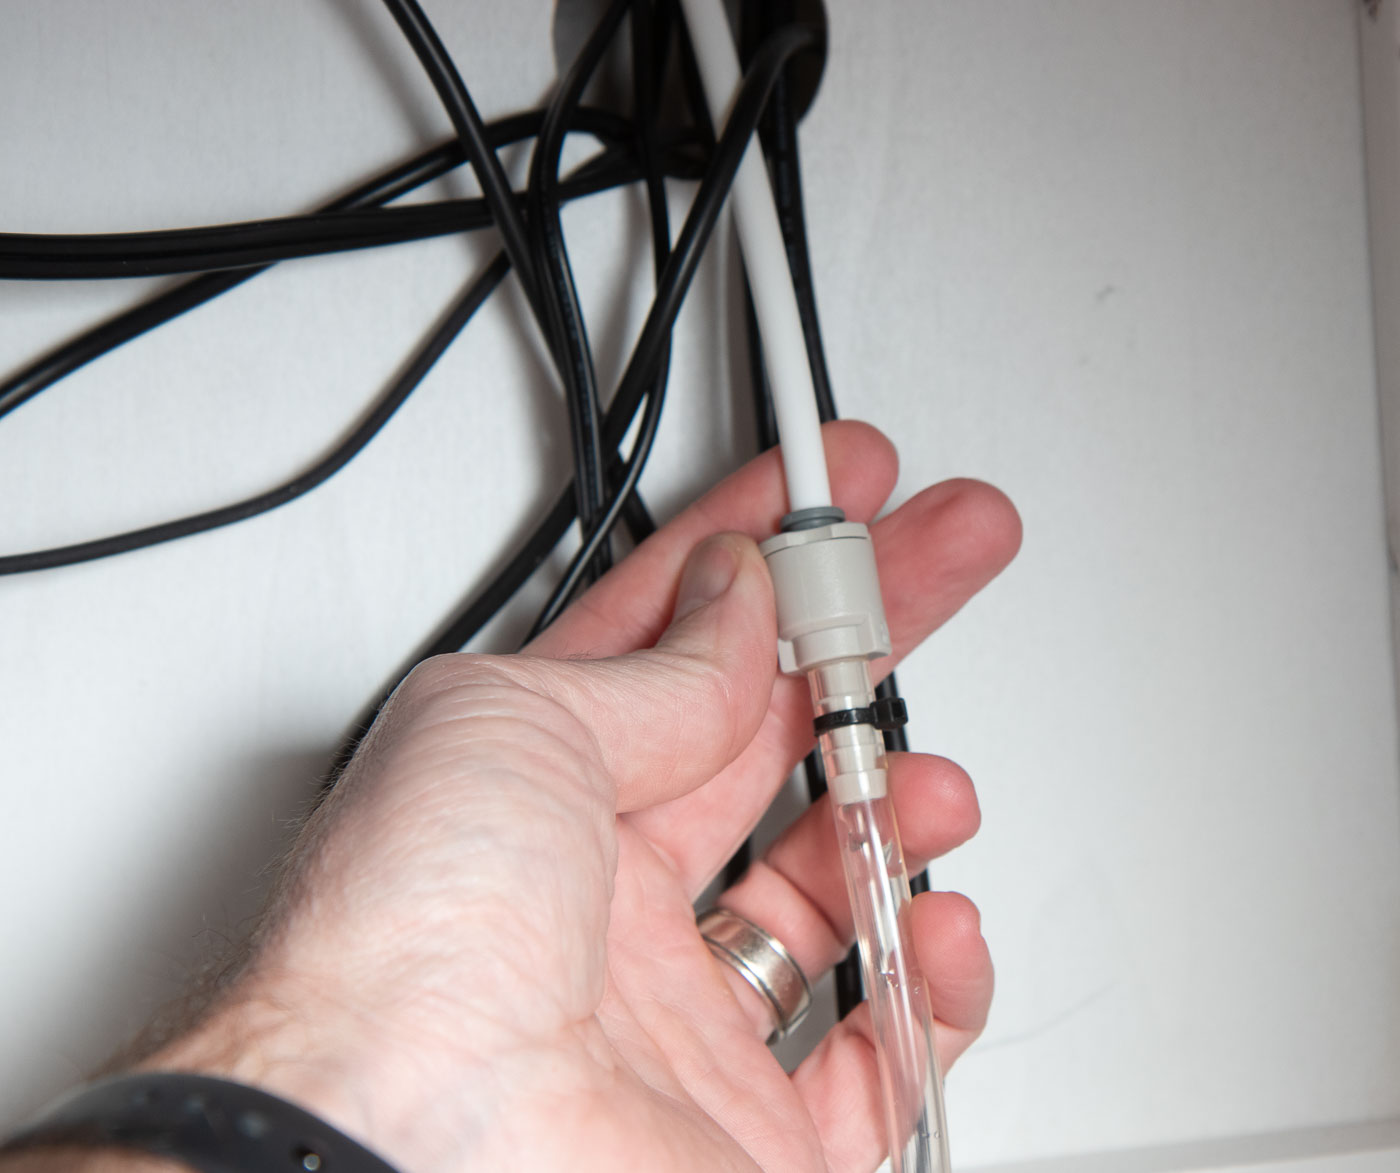
I thought that 1/4″ push fit tubing and fittings (just like what is used on RODI systems) would be worth a try instead of the stiff vinyl tubing.
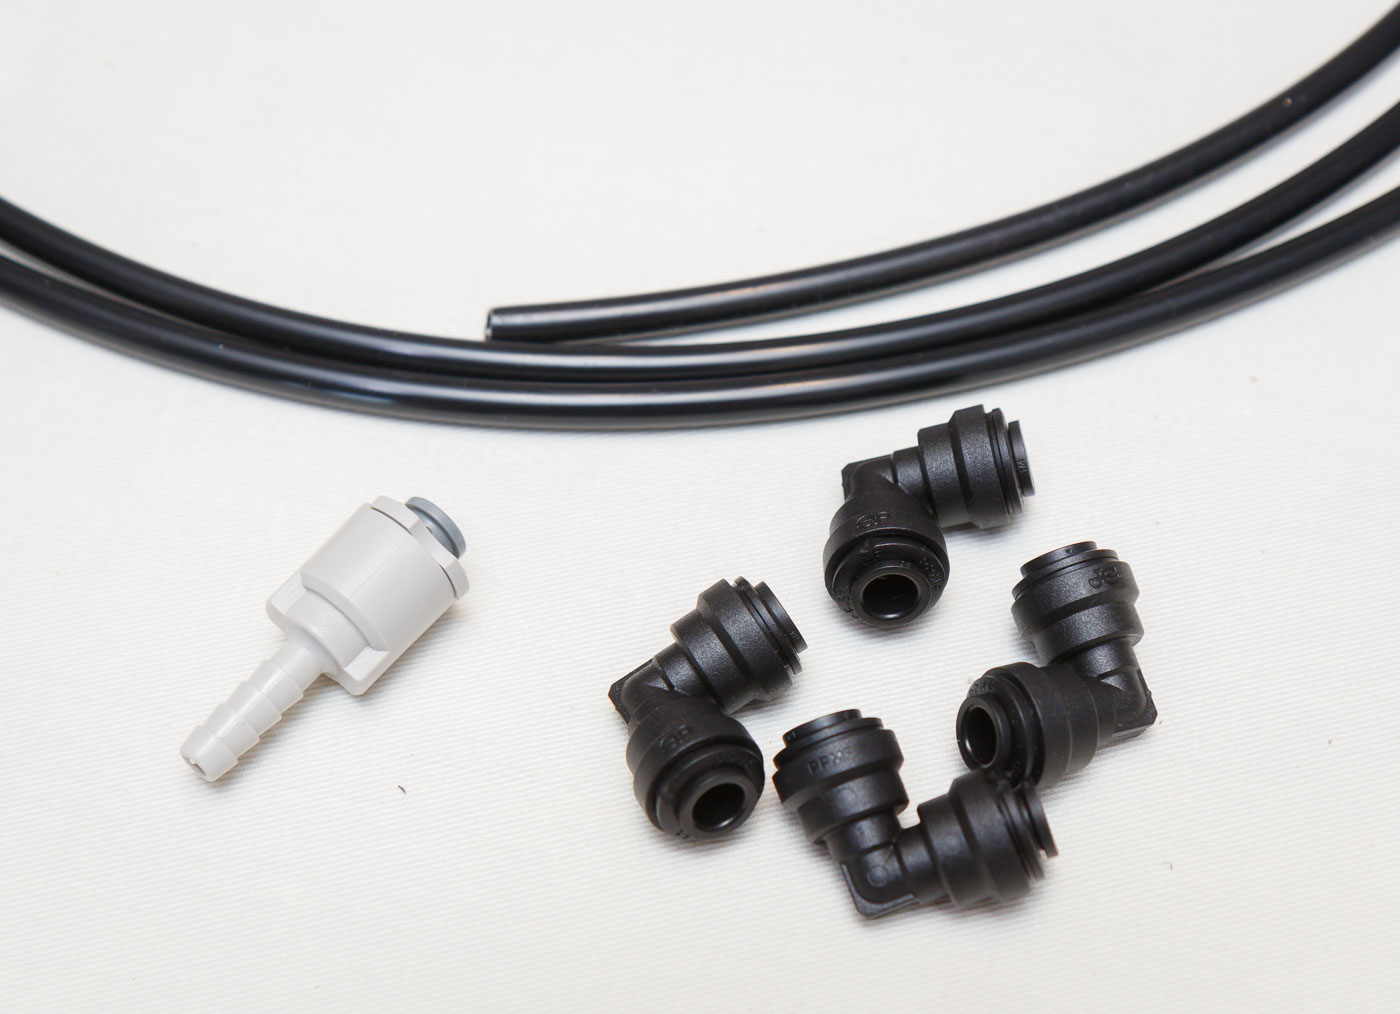
The mod was a success. I used the following fittings and tubing:
- 1/4″ ID Barb to 1/4″ Push Fit Union – This fitting allows a transition from the stock tubing from the AT’O pump to the 1/4″ Tubing and
- 1/4″ OD LLDPE Polyethylene Tubing
- 1/4″ Push Fit Polypropylene Union Elbows
I put the barb to 1/4” push fitting about halfway up to the tank (hidden in the stand).
From there, I used the 1/4” polypropylene tubing and the elbows to make a tidy path up to the back of the EVO.
I used a pair of elbows and a short piece of tubing to make a piece that holds onto the edge of the tank and directs makeup water down into the pump section.
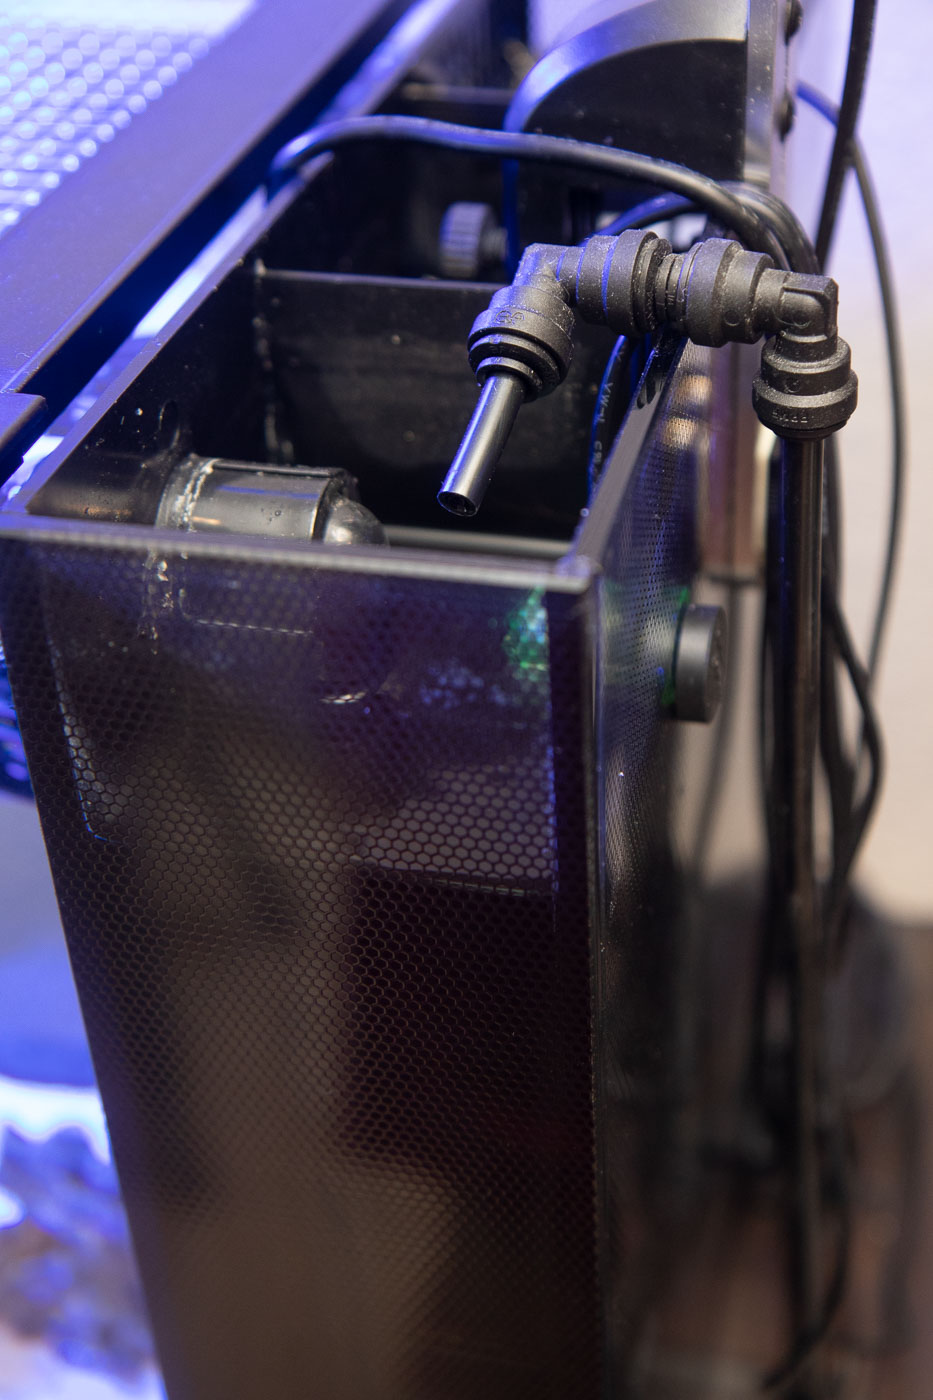
The mod looks better and is more secure (I’m confident it will stay in place). The only downside is it’s a bit noisier (gurgles upon completion of a fill cycle) than the stock tube.
Pros / Cons and Final Thoughts on the AutoAqua Smart ATO LITE ATO:
There are no cons. Only positives for this product. Especially for a nano aquarium where a small, inexpensive, and simple ATO is desired. . . there is none better. I honestly can’t think of anything I’d like to change for this product.
About the only concession to the AutoAqua Smart ATO is it is intended for smaller aquariums. If you have a large tank, the small pump (and safety limit for pumping duration) might not be able to keep up with the evaporation of a large system. Additionally, a larger tank generally has more on the line (for expense of livestock) and it would be more appropriate to get a system with redundant level sensors.

Fantastic write up mate! You’ve convinced me to purchase one for my planted tank with sump!
Seeing your a month in with this setup any niggles?
I’m actually more like a year in with the EVO setup with this ATO. No problems at all. The only weirdness was one time I had the tube sitting below the water level of the tank. It siphoned some saltwater back to the ATO reservoir. Not a big deal – I heard it gurgling and figured out what happened when I tested salinity in the reservoir (was over 1 SG).
That episode was entirely my fault. It has not failed me yet and salinity is rock solid.
Hi Nate, can you measure the distance from the top of the glass to your water line in chamber 3 for me? did you ever do any tests to see if it running for 6x the first run still kept all the water in the tank? I think I would feel comfortable knowing that even if both sensors fail (or a child simply pulls the optical eye out of the tank) that it would stop before overflowing the tank. I don’t understand 6x, still seems like a lot to me
6x is based on the flow of the first fill after you power the unit on. If it’s setup properly (sensor in place, water levels correct . . . prior to plugging in) you will get as small an initial fill possible. Let’s say it’s fills (for the first time) for a few seconds to add 2 ounces. The 6x would be roughly 12 ounces. (I’m just making numbers up to illustrate).
Each user has to manage the risk for their own setup. It’s not a perfect means of redundant protection, but it’s better than nothing. Overfilling has never been a concern in our EVO 13.5 in over two years of use with this ATO.
I don’t know what the level (drop) of chamber 3 is – it will vary based on setup and how dirty media is (filter floss in our case). Remember that the main display and the rear chambers are connected – adding water to the back chambers will not overflow those first – it equalizes through the entire tank.
Thanks Nate!!! I actually just did a test and put the water outflow into a separate bucket to see how much 6x would be on the next refill, then I poured that back into the tank to confirm it wont overflow, not even close! the tank sits on my desk right next to my laptop, so my biggest fear was a failure in the on position and an overfill. I am glad to see that even in the case both sensors failing, it wont overflow.
As usual, your equipment picks are spot on! Thank you for taking others so detailed through your thought process. If your goal was to teach others and make this easier for new comers to the hobby, mission accomplished!