I have been using my new temperature controller, the Inkbird ITC-308, for 5 months now on our Spec V aquarium. I think it’s time to report how the unit has worked for me, explain what all it does, compare it to my home build DIY temperature controller (that uses the STC-1000 / ITC-1000
), and tell of any shortcomings. Here we go. . .
Who needs a Temperature Controller:
Temperature controllers like the STC-1000 (that you wire yourself) or the Inkbird ITC-308 are used to control external heating and/or cooling devices. They have a probe that detects temperature; when the temperature is below a setpoint, it energizes one electrical outlet, when the temperature is above a setpoint, it energizes another outlet. It is up to you to plug whatever you want controlled into the two outlet plugs from the controller.
Homebrew aficionados use temperature controllers during the fermentation process. I’m not into homebrewing, but I gather you need a temperature controller to keep a constant temperature during fermentation. They can also be used to control temperature in a keezer or kegerator.
Using a temperature controller for an aquarium is much more near and dear to my heart. Most aquarium heaters come with their own internal thermostat and controls. The quality and accuracy of these controls varies greatly from unit to unit. However, they all put you at risk for failure – if the thermostat or controller acts up, you risk the heater going bezerk (by failing in the ‘on’ condition) and killing all your aquarium inhabitants with high heat.
A temperature controller takes over and removes the heater electronics from the equation. With its own probe and controls, it dictates when the heater turns on. If the probe temperature gets below the setpoint, the outlet is energized and the heater turns on. When the probe temperature rises above the setpoint, it kills power to the outlet and the heater can’t turn on. You just have to set the thermostat on the aquarium heater very high to ensure it calls for heating anytime power is applied, thus removing its role in control. The mode of failure when using a temperature controller is no heat, which I think is better than having it locked into a heating mode.
A temperature controller like the ITC-308 also has an outlet for controlling a cooling device if the temperature rises above the setpoint. For aquariums, this can energize a chiller or an evaporative fan.
For myself, using a temperature controller (controlling a heater and a fan) on our little aquarium has been a revelation – temperatures stay rock solid, not varying more than half a degree (celsius) in all seasons.
Features and Specifications of the Inkbird ITC-308:
The Inkbird 308 works similarly to the bare-bones ITC-1000 (or older STC-1000) but adds a few very notable features.
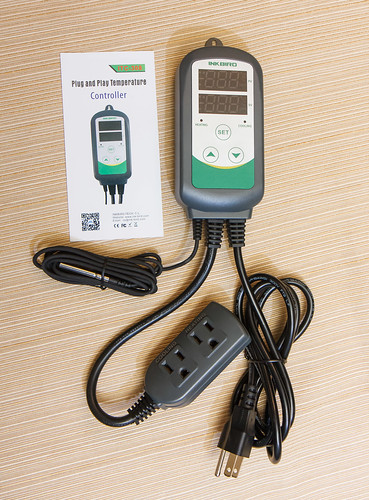
- All in one unit – nothing to wire like the DIY temperature controllers.
- Dual Relay – this unit has separate on/off control for two outlets; one for heating and one for cooling.
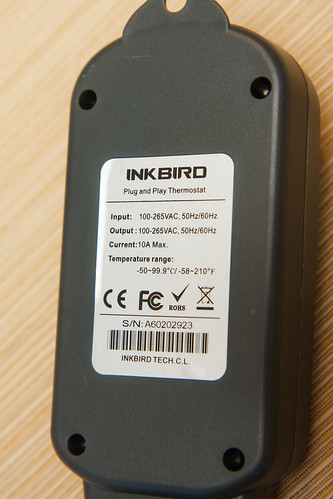
- 10 Amp Capacity – This means the controller can have a maximum 10 Amp load connected to the cooling and heating outlets. Since they are never on at the same time, this works for both cooling and heating (in other words, you can have a 10 amp load on the heating outlet and 10 amp load on the cooling outlet). For the 110V version, this works out to 1,100 Watts.
- It has a temperature control range from -50°C to 99°C (-58°F to 210.2°F).
- It can work in ambient conditions from -30°C to 75°C (-22°F to 167°F). This is talking about the environment that the controller electronics are housed in (not the environment you are measuring at the probe.
- Operation in Celsius and Fahrenheit. I’ll discuss this more later on.
- Listed temperature resolution (what is displayed) of 0.1°C.
- Listed temperature accuracy of +/- 1°C.
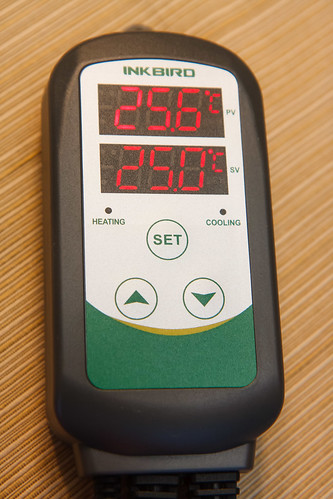
- Two lines of display that shows your setpoint (or target temperature) and the current measured temperature. This is very useful and a setup up from the ITC-1000 which only has one line of LCD display that normally shows the current measured temperature; you have to dig around with button presses to reveal what the setpoint is.
- High and low temperature alarms. Again, an added feature above what comes with the older ITC-1000. This lets you set a (optional) temperature, both high and low, that will result in an audible notification (beeping) if it is crossed.
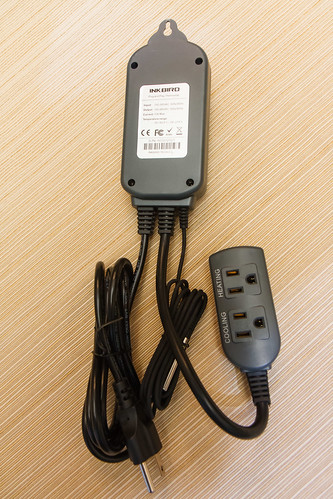
- Separate cord with outlet connections. The receptacles where you plug your heating and cooling sources into are separate from the controller body (like a ‘dongle’ connection). This is handy in that you have some freedom in laying out plugs in tight quarters.
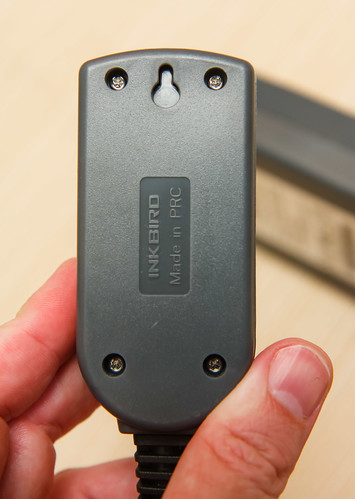
- The body of the unit has a hole for wall mounting.
- The socket box also has a mounting screw hole at the back
Dimensions of the ITC-308:
I know many projects that people take on are tight on space. Here are some dimensions that may be helpful in planning your project. My measurements might be different than what is listed on the manufacturer information, but I’m just passing along what I observe. I measure in metric and convert to the nearest tenth of an inch.
- Controller length = 135 mm (5.3 in.) (excludes wall hanging mount and flexible cord exits)
- Controller width = 68 mm (2.7 in.)
- Controller thickness = 33 mm (1.3 in.)
- Power cord length = 136 cm (53.5 in.) (this is the cord from the outlet to the controller)
- Socket box length = 90 mm (3.5 in.) (this is the separate dual outlet box where you plug in your heat and cold devices) (excludes the flexible cord exit)
- Socket box width = 43 mm (1.7 in.)
- Socket box thickness = 24 mm (0.9 in.)
- Socket box cord length = 25 cm (9.8 in.) (the length of power cord from the controller to the socket box)
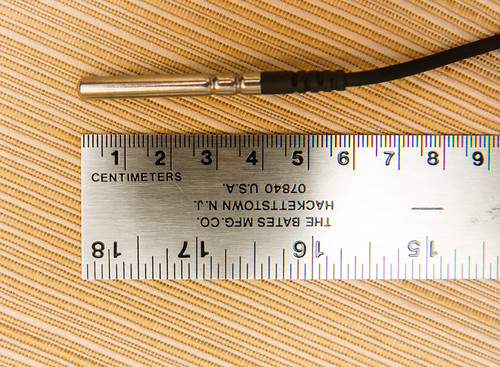
- Temperature probe diameter = 5 mm (0.2 in.)
- Temperature probe length = 58 mm (2.3 in.)
- Temperature probe cord length = 183 cm (72 in.)
- LCD display height = 13 mm (0.5 in.) (for each of two lines)
Setup, Use and Operation:
This temperature controller is very nice. It takes a bit more effort to program compared to the old STC-1000 that I used in the DIY version, but that is because it has more features.
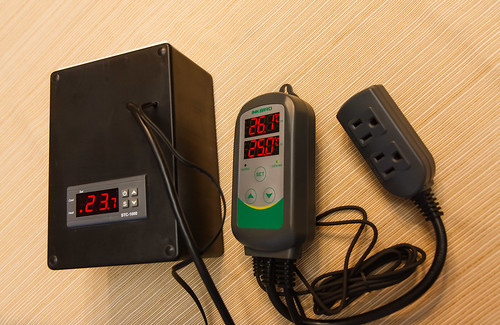
The layout is much better than the DIY version I made; smaller, which is nice since it fits in my equipment box better. I like that where you plug the devices in is separate from the unit; being at the end of a short cord gives you flexibility to fit the whole thing in a small space.
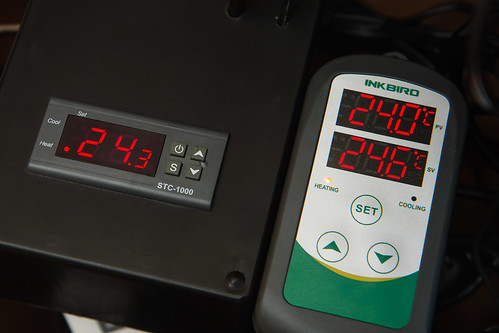
I tested the two (old DIY and the ITC-308) side by side with the probes in the same spot in the aquarium. The indicated temperatures read extremely close every time I checked over the course of a week. They only varied by 0.2°C to 0.3°C and it was consistent with the new ITC-308 being higher.
There isn’t much to say about operation. Once I got everything set for our aquarium, it just worked. I honestly have not messed with it in 5 months. It has been mostly in cooling mode during that time, turning on and off the evaporative cooling fan. Just in the past few weeks it has gotten cold enough to energize the heater. No hiccups – it just works.
The improvements over the STC-1000 are very nice. I like the two line display. It is a big advantage to see the setpoint and the measured temperature all at once. I very much like the alarms for high and low. Temperature controllers are great insurance in avoiding a stuck heater and frying everything; however, they doesn’t alleviate the scenario of a heater that breaks and doesn’t come on. Now, if the heater fails and doesn’t come on in the middle of a cold night, I will get an alarm. I can get up, silence the alarm, put in my backup heater, and probably save some fish!
One feature that I thought would be nice is the ability to set the unit in either Celsius or Fahrenheit. Being an American, I do default to Fahrenheit and planned to use it in this mode. However, I found that when set in Fahrenheit, the unit no longer was programmable in tenths of a degree; it only allowed adjustment to the nearest degree. I do understand that tenths are not equivalent when converting between Celsius or Fahrenheit; however, knocking the resolution down to whole degrees gives up some level of control. I wish they would have compromised and made the Fahrenheit settings to the nearest half degree. At any rate, I have relented and use the device in Celsius.
The probe that came with the unit is unlike what came with the STC-1000. That unit came with a plastic housed probe. The probe with the ITC-308 is metal (stainless steel). It is also a bit larger than the STC-1000’s probe.
On first glance, the ITC-308 is a big jump up in price from the DIY version that I made. However, once I got to looking at the numbers, it’s not a bad deal at all. Here is how the two compare when actually built:
- ITC-308 = $35 USD
- ITC-1000 = $16 USD
- Project box = $10 USD
- Electrical Outlet = $3 USD
- Wall Plate = $1 USD
- Power Cord = $5 USD
- Total Price of DIY Build = 35 USD
I seriously did not jockey with the numbers to get them to match exactly at $35 – very surprising. I’m sure some people can make/find the items for less. However, you can’t deny the savings in time by not having to build and wire. The DIY version has its place, but I’m so glad we now have this ready made version that I can recommend.
Programming the Inkbird ITC-308:
I’m not gonna go through the entire process of programming. I will say that it does help greatly to read the instructions. They aren’t the greatest, but the setup flow diagram is very helpful. Inkbird’s instructions are here, or I have instructions here on my site as well.
The most important part of programming is to remember that when you have finished with the settings you want to make, you have to press and hold the set button for 3 seconds. This exits programming mode and makes all your changes final. If you don’t finish with this step, your changes are not saved.
To enter programming mode, hold down ‘Set’ for three seconds. The two digit code for what you are setting is on the top line; the value you set is on the bottom line. If you are going to change from Celsius to Fahrenheit, do it first (for some reason, it’s last in the menu order). The items to program (in order) are as follows:
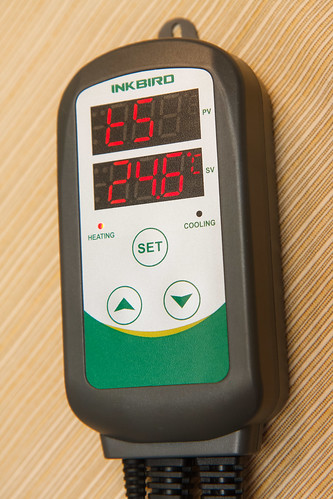
- TS: Temperature set value. This is what temperature you are trying to target. For my aquarium, I set this to 24.6°C (76.3°F). (I don’t know why, on my unit, it has an indecipherable letter and S.) You can set this anywhere from -50°C to 99.9°C.
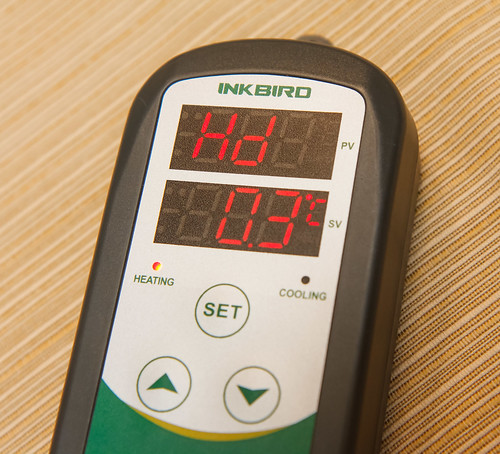
- HD: Heating Differential Value. This is how far the temperature can drift downward before the heater circuit energizes. This can be set from a minimum of 0.3°C to a maximum of 15°C. Because I want the temperature control as tight as possible, I set this at the minimum value of 0.3°C.
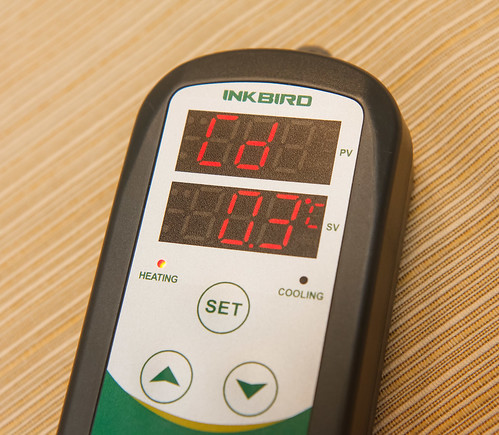
- CD: Cooling Differential Value. Similar to heating differential value, this is how far the temperature can drift upwards before the cooling circuit energizes. This can also be set from a minimum of 0.3°C to a maximum of 15°C. I set this at the minimum value of 0.3°C.
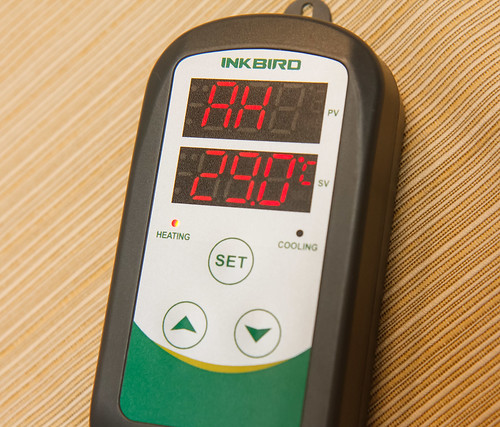
- AH: Alarm High Limit. This is the temperature, when equal to or exceeding, the unit will sound a notifying alarm. It can be set from -50°C to 99.9°C. I set mine at 29.0°C. This gives a bit of margin so that it doesn’t alarm if the tank gets a bit hot during the summer or if I put water in that is too warm during a water change.
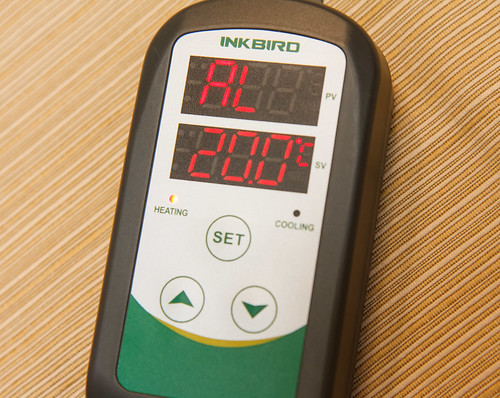
- AL: Alarm Low Limit. Similarly, this is the temperature, when equal to or less than, the unit will sound a notifying alarm. It can also be set from -50°C to 99.9°C. I set mine at 20.0°C.
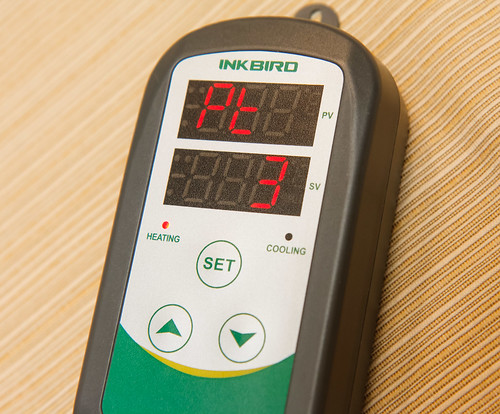
- PT: Compressor Delay. Refrigerant units need a time delay between cycling off and on in order to protect the compressor(s). This setting makes the unit wait for a time period (from 3 to 10 minutes) before the cooling circuit can energize again. Even though I utilize a simple fan for my aquarium cooling, I still decided to set this at 3 minutes. This helps keep the unit from ‘hunting’ (reacting too quickly and overshooting temperature control).
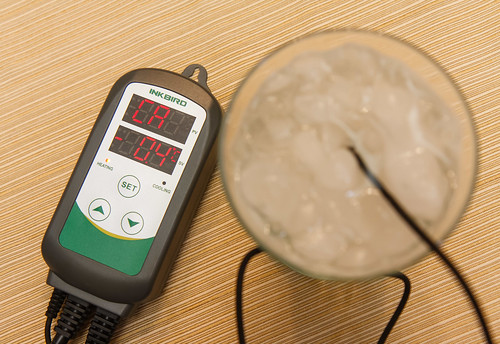
- CA: Temperature Calibration. you use this to make a correction to the unit temperature. See below for my calibration results. This value can be from -15°C to 15°C. (you can see an error in my unit as it doesn’t display ‘CA’ in the top line, similar to TS value. No idea if this is must my unit or widespread)
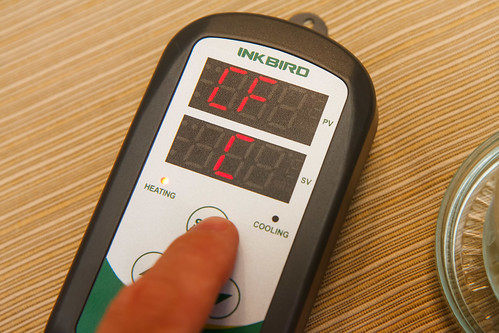
- CF: Display in Fahrenheit or Celsius (Centigrade). As mentioned, set this first if you are changing to Fahrenheit. Because of the aforementioned limitations in resolution for Fahrenheit, I use this unit in Celsius.
How to Calibrate your ITC-308:
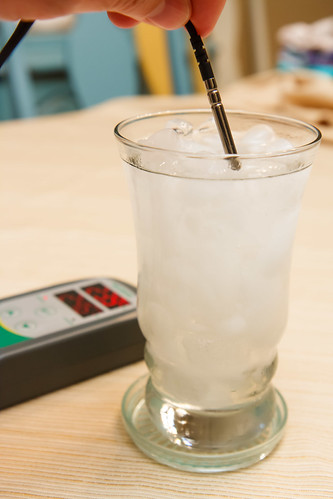
Like I mentioned above, there is a setting in programming that allows you to correct the temperature reading of your ITC-308. The best way I know to do this is to check the unit reading in an ice bath.
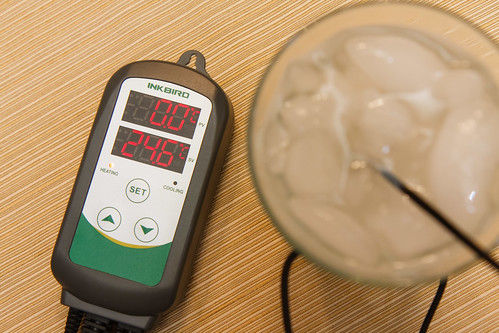
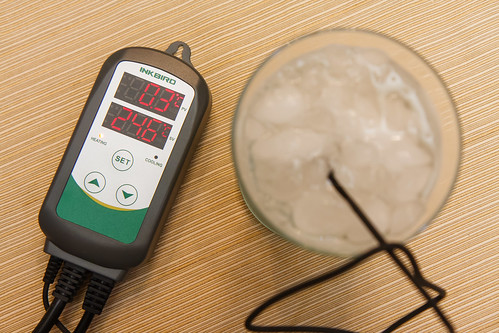
I did the best I could to get a good ice bath, using crushed ice, densely packed into a cup. I placed the temperature probe in the direct center of the ice.
The reading, before calibration, fluctuated around 0.3°C and 0.4°C.
In this case, to get it to correctly read 0°C, I entered -0.4°C in to the CA value (where the minus is needed to bring the displayed temperature down).
After this calibration adjustment, the unit read 0.0°C in the ice water bath.
Final Thoughts on the Inkbird ITC-308 Temperature Controller:
I like it a lot. The DIY temperature controller I made worked very well, but I never felt it was a realistic product to suggest others use because of the work it took to wire and assemble it. Now that there is a product that is ready to go, I think it is a fantastic solution.
As I illustrated earlier, it isn’t much more expensive than the DIY version. I do understand that the cost does seem high, especially for those using this on inexpensive and small aquariums like the Fluval Spec. I also realize it is odd that the controller that I use cost twice as much as the heater I use. Despite the expense, I fully recommend a temperature controller like this one to anyone with an aquarium. The ability to control with such reliability the heating and cooling makes the temperature control as close to perfect as you can imagine. Season after season, it just keeps working; holding the tank temp to no more than a degree in variation.
I only have a few things that I would see as desiring improvement for the ITC-308:
- The resolution being limited to whole degrees when set in Fahrenheit. It basically eliminates the flexibility of dual units; I don’t want to give up the available resolution so it ends up being Celsius only for me.
- I wish the probe was plastic coated like the one that came with the STC-1000. The metal version is a bit sharp and It mars the plastic divider on the Fluval Spec’s filter system. The probe material is a slight compromise for me as a freshwater aquarist. I understand that marine aquarium keepers do not want stainless as it is not impervious to salt water; that would be a more serious shortfall for this probe. (EDIT: See addendum at the end of this article. Inkbird now has a version, the ITC-308S
, with a plastic coated sensor. It works great in a saltwater aquarium.)
- The unit produces a very feint and high pitched whine. I noticed it when setting it up at the table (no competing noise and being very close to the unit). I honestly have not heard it after setting it in place next to the aquarium.
- The two outlets (heating and cooling) are arranged pretty well; however, they are spaced a bit too close. The AC/USB converter I use on the cooling circuit is almost too large for this setup and makes a tight fit for the adjacent heater plug. If you were plugging in large power bricks or timers, you would not have room anyway and would have to resort to a power cord extender
. I do think if they spaced the outlets apart another centimeter that would allow most cords and devices to fit.
Other Inkbird Models:
There are a few other temperature controllers in the Inkbird lineup:
ITC-306T: Heating only and you can have unique heating setpoints for day and night (the times of which you program). It has two outlets to plug heating items into, but they both energize at the same time.
ITC-310T: Similar to the ITC-308 (cooling and heating control) but it also allows control of unique setpoints for up to 6 programmable time periods in a day. (I can’t imagine how much of a pain this thing would be to program)
Update: ITC-308S with Marine Capable Probe:
One complaint I have mentioned in this review is the stainless steel probe, which will be problematic in a marine (salt water) aquarium. Inkbird has now addressed this with a new version, the ITC-308S. It is modified over the version reviewed here as it has a temperature probe that can be disconnected (by way of a phone jack type connector). The temperature probe provided is plastic coated and will not corrode or react in salt water. I’d recommend this version to anyone, both for freshwater and saltwater.





Great write up. I was wondering how the allowed range was set on these controllers. The undecipherable letter is a lower case “t” with the left arm of the cross stroke missing. It’s supposed to be “tS” for “temperature setting”. Or some such.
Ha! Yes, I guess they are limited with the available bars in the display digits.
Does the device reset (therefore needing reprogram) during a power outage?
Nope, it is stored on flash memory of some sort so it remembers every setting after a power outage. Great question though.
Is there anything that can be done to make the probe usable in marine tanks? I’m not a DIY person, but need a saltwater friendly controller. Thanks!
I believe the manufacturer has calibrated this particular unit to work with this metal sensor, so splicing in a plastic one might not work (and that would be DIY). The only option I can think of would be to coat it in a thin layer of epoxy to seal it. That might affect accuracy.
I put my probe into a pvc coke bottle filled with fresh water, it sits in the sump and i don’t ave to worry the probe will corrode. of course the temp of the fresh water will be the same as the salt.
inventive idea – thanks!
The question about the probe being stainless steel caused me to do a little research and I’m wondering if thermometer probe covers (cheap – like 50 for under $4 on Amazon) would work, but only with the assumption that you didn’t put the probe into the aquarium very deeply. Love your site and am going to save up for this itc 308 with your Amazon link, of course, and get one for my new Fluval Spec V setup as soon as possible. Thank you again!!
Interesting idea. I think you would have to check for changes in accuracy and possibly make an adjustment in your desired vs resulting setpoint with any type of add-on sensor cover.
Wow, I had no idea that the temp control in my in tank heater was so bad. I used to see 78 in the morning and up to 82 on hot afternoons. Using a clip on fan and the Inkbird I see only maybe 1 degree change. This was a great investment!
I do have one question for you. I noticed you placed the sensor in the filter compartment. I did the same and it works fine. However I wonder if the heater and the warm water in the next compartment are skewing the temp. Did you or anybody else find an difference moving the temp sensor into the tank?
That’s an interesting thought – that heat transfer through the middle dividing wall (between the pump and filter media sections) could cause some problems. I might try moving mine to the opposite side (away from the dividing wall) and see if it works better.
bought an inkbird itc 308——just want to turn on a fan when my garage gets above 85 degrees-
programmed it [i think] with the set temp–plugged my fan into the ‘cooling’ plug–
it turned on the fan when it went above 86 degrees–but when the temp dropped down to 75 the unit ‘heating’ light came on, and the cooling light went off [nothing plugged in to heat plug] and the fan kept working [my cooling device]-
i obviously have some other parameter set wrong–can anyone give me specific settings for all of the possible settings ?–Thanking You in advance–hh
Great review. Very informative.
I’m about to buy one of these that I’m going to hook up to a Schego Titanium heater (German made unbreakable heater).
Great article.
I have just placed an order today and will check how accurate it is, do we really need have a fan connected to cool down the water? Why not let it cool down naturally and let heater kick off when the temp is low.
The only concern I had before purchasing the unit was the thermometer probe getting rusted in the salt water but I guess I will have to use a thin layer of silicone.
I don’t know about ‘We’ needing a fan. I know for sure that ‘I’ need it and have had great benefit in having the fan as it controls temperature during the warmer months.
No rust at all on the sensor on our unit (over a year in use).
Thank you @Nate
The indecipherable letter and S is a T and an S as in “Tempersature Set”
I just received my inkbird itc308 and am anxious to set it up.Is the purpose of the heater and cooler to set up a fan so that when the water gets too warm,the fan kicks on?
Also,can I plug a power strip that has 2 or 3 heaters plugged into it,into the inkbird unit to monitor multiple fish tanks,or do I need one for each?
Lastly,If I don’t plan on using a fan,,could I just get the 306 model that only uses heat,and use it for 2 tanks?
1. Yes, that is how you use the cooling/heating mode. When the temp goes above the setpoint, the cooling outlet is energized; you can plug a fan into that outlet.
2. From the heating side outlet of the temperature controller, you can plug whatever you want into that, including multiple heaters. Of course, there is only one temperature sensor on the controller. If you have multiple (separate) tanks each will need it’s own controller.
3. Yes, if you know you will never use the ITC-306T if you know you will never use the cooling outlet. It has some specific timer features that you would not use.
ITC-308 is dangerous…I have two that decided to get stuck in the on/heat relay position. This occurred after adding an additional heat lamp to each system, bring the total wattage to 500W apiece, well below that 10A max for the units. A light tap frees the relays, but who wants to stand around all night?
Please contact ITC and let us know how they respond. Thanks for telling of your experience.
Hello Nate,
I’m curious on where you have settled on putting the inkbird probe?
And how high of a flow rate are your pumps running?
I shove the temperature sensor down into the filter section between the filter media and the wall (that divides the filter and main sections).
I have the pump slider adjusted to the highest flow position. I have one hole in the tube (that runs from the pump to the outlet nozzle). I don’t know what exactly that flowrate results in.
Thanks for the write up… got this for my nano reef and your setup instructions have made it so much easier and less frustrating to programme
So glad it helped – you’re very welcome!
I’ve seen some videos showing the unit cutting power when reaching the alarm setting, AL or AH. Ie, say target tempurature is 25 it’s set to turn heater on at 23 and AL is 22. Videos appear to show heater coming on at 23 but if it continues to fall to 22 the alarm sounds but turns off the heater. This last but seems odd. Can you advise if this is still the case. Thanks
Great review Nate. I think an improvement in the ITC would be to have the ability to replace the probe without dismantling the device.
A serious concern I have with mine (not sure if it is peculiar to mine or not) is the extreme slowness with which the device finally registers the temperature. I tested my probe in an ice flask and noted that while there was a fast initial change in the temp recorded, it took quite some time (10-12 minutes ) to stabilise at the the final temp. I currently have mine in free ambient air adjacent to a another calibrated device and the Inkbird after nearly 4 hours, has still not got within 4 degrees Centigrade of reading ambient. I suspect a fault with the thermister probe rather than the device itself, hence my suggestion about being able to swap probes easily.
I am now using inkbird 308 but I worry that as I have to set heater to high temp for it to work that if it failed to cut out and turn off heater it will kill my lovely fish where as before I worried heater would stick in on and do same. I guess I just worry to much. I also have eheim jager heater that says I can’t use with controller. An hi-top heater just didn’t work with 308 but dennerl ( unsure of spelling )works fine. I tried 308 because I was finding it impossible to maintain stable temperature in 36l (6g ?) aquarium. Don’t know if I’ll ever go small again, bigger tanks so much easier
Maybe you could set the heater’s temperature setting just slightly higher than the controller’s set point. That way if the controller fails ‘on’ the aquarium heater won’t go much higher before it turns off.
I am not aware that the Eheim Jager can’t be used with a controller – honestly I have a hard time believing that is true.
Where exactly do you place the probe in the aquarium? How do you get it to stay? It makes me nervous about the possibility of getting the cord wet.
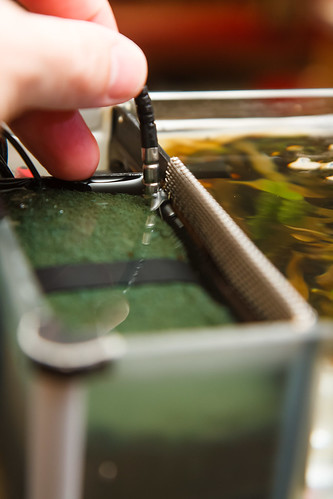
The probe comes with a suction cup to affix to the glass of your aquarium. In my case, using in an All In One (AIO) Spec V aquarium, I forgo the suction cup and simply jam the probe down into the filter section. (See picture above).
The cord is fine being wet. Do put some thought into securing the probe in the aquarium. If it falls outside the tank water into the ambient air, that will lead to a very bad failure where the controller may continuously heat. In that scenario, everything is cooked.
Inkbird have been criticised for sending replacement probes and asking users to splice it in (on the old version with hard wired probe). There’s a reddit thread where they joined & apologised for suggesting this, but they have just asked me to do the DIY fix through amazon messaging!
I’ve reported to amazon CS as this is not something Joe public should be asked to do (leaving aside regs being different around the world).
My temp value has been drifting, and is now at +15°C (the max that it can be calibrated for) so is useless. I’ve got a refund from amazon so will try the ITC-308S with submersible & replaceable probe. If that fails I’m done with Inkbird.
Thanks for the feedback. I don’t see how splicing in a new probe would even work – I understood that the unit had to be calibrated to the sensor and wire resistance which would clearly change with a user modification.
It’s interesting how some people don’t have luck with a product and others do. I’ve used both the ITC-308 and now the ITC-308S (in our new EVO) for many combined years with no problems.
I hope the ITC-308S works for you!
How long after an alarm will the unit reset or does it require something else.
Great question. I believe the alarm sounds until you press the ‘Menu’ button or until the temperature changes to be within target (not certain it will reset in this second scenario).
Is the ITC-308 temperature controller any good for my greenhouse to control the heater
Sure – just check the amperage of your heater vs. the max of the ITC.