

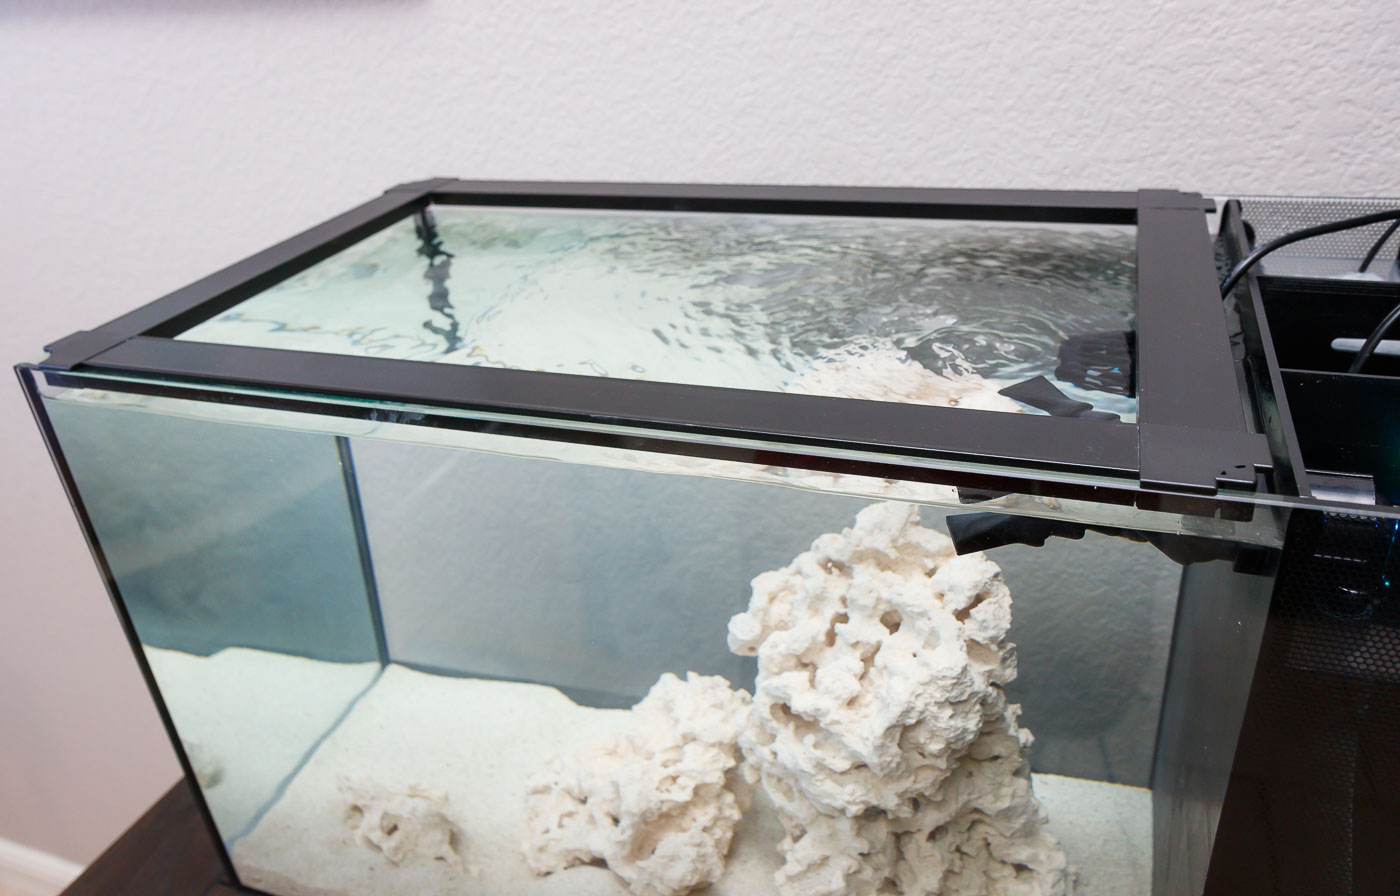
Very early in planning for our Fluval EVO 13.5 build, I knew a replacement lid solution would need to be found. While the stock EVO 13.5 lid is adequate for many setups, it has a few deal-breaking compromises that would not work with the equipment I was planning.
I’ll discuss in this article the general reasons to go with a mesh top (over the stock EVO lid), options for an aftermarket lid (DIY or ready-to-use), and some advantages and disadvantages of using an open-type lid.
Reasons to Ditch the Stock EVO Lid for an ‘Open’ Mesh Top:
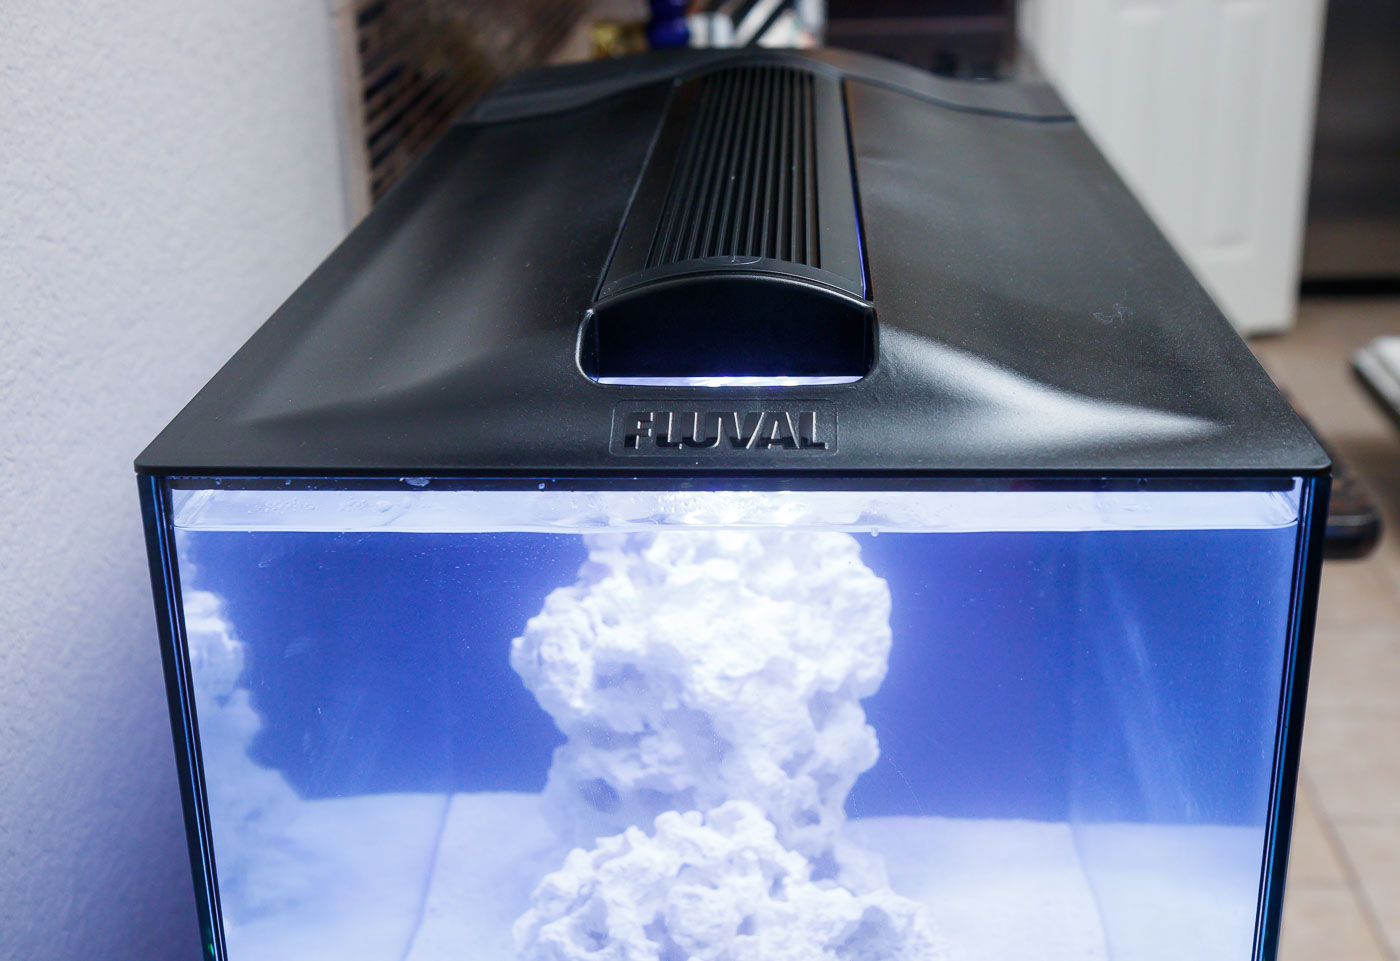
I discussed this in my Spec V Topless article, but the biggest reason for wanting to get rid of the stock EVO top is aesthetics – The stock black plastic lid is a bit ‘heavy’ looking and distracting. Also, I like the connected feeling of being able to see inside the tank from up top. Corals, fish . . . even just the ripples of water movement – all look so beautiful from above. It’s a shame to have that fully blocked by the stock opaque top.
Beyond looks and visibility, one practical reason I wanted a different top is for temperature control. I have used a temperature controller on our freshwater Spec V for years with great results and wanted to use a similar approach with the new EVO.
For the cooling option to work, I need an open (or mesh) top to be able to direct airflow over the water.
[picture of fans on EVO]
Another reason I wanted to ditch the stock light is for my future plans for an aftermarket light. An open style top (with mesh netting) allows light to pass easily and efficiently through and this sets up as a perfect compliment to an aftermarket light.
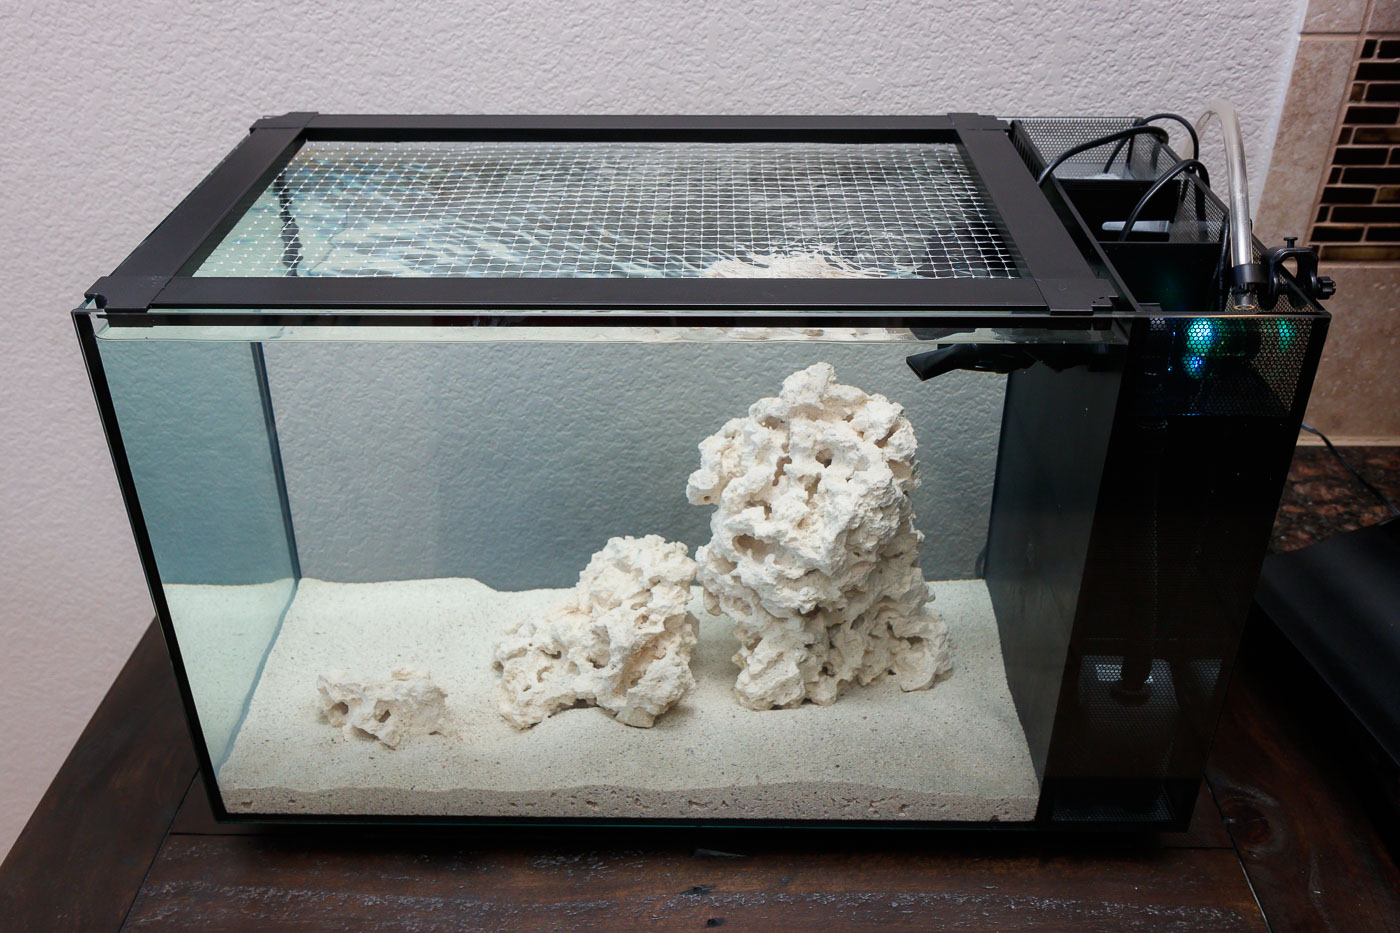
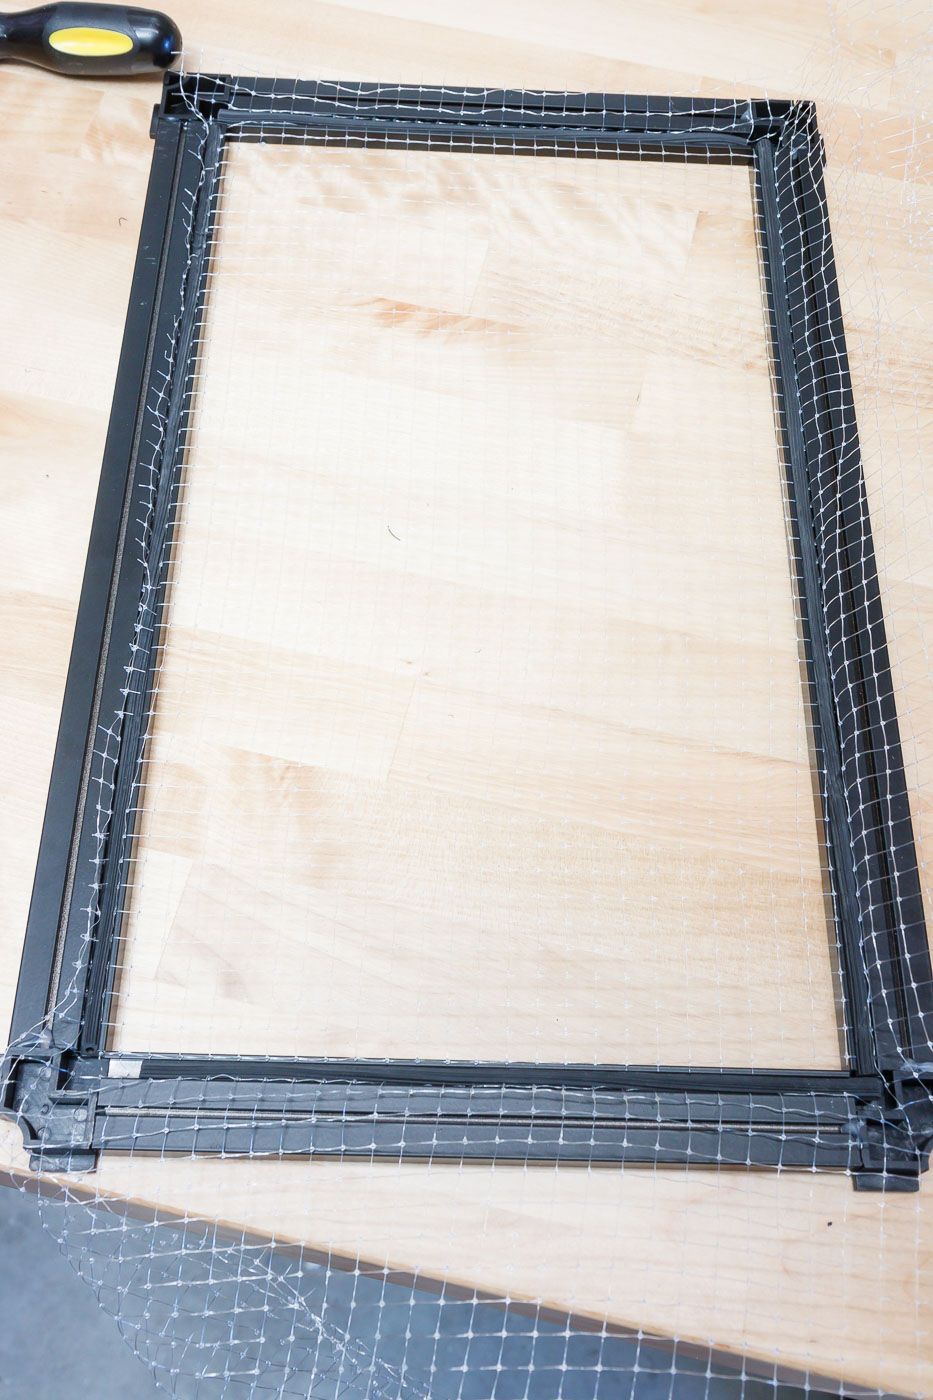
The standard solution for a semi-open top for marine tanks is a mesh and frame system. These tops are constructed of an aluminum frame at the top perimeter, plastic corner pieces, and a plastic mesh material covering the center. The mesh is unobtrusive enough to allow airflow and visibility but keeps fish/critters from escaping.
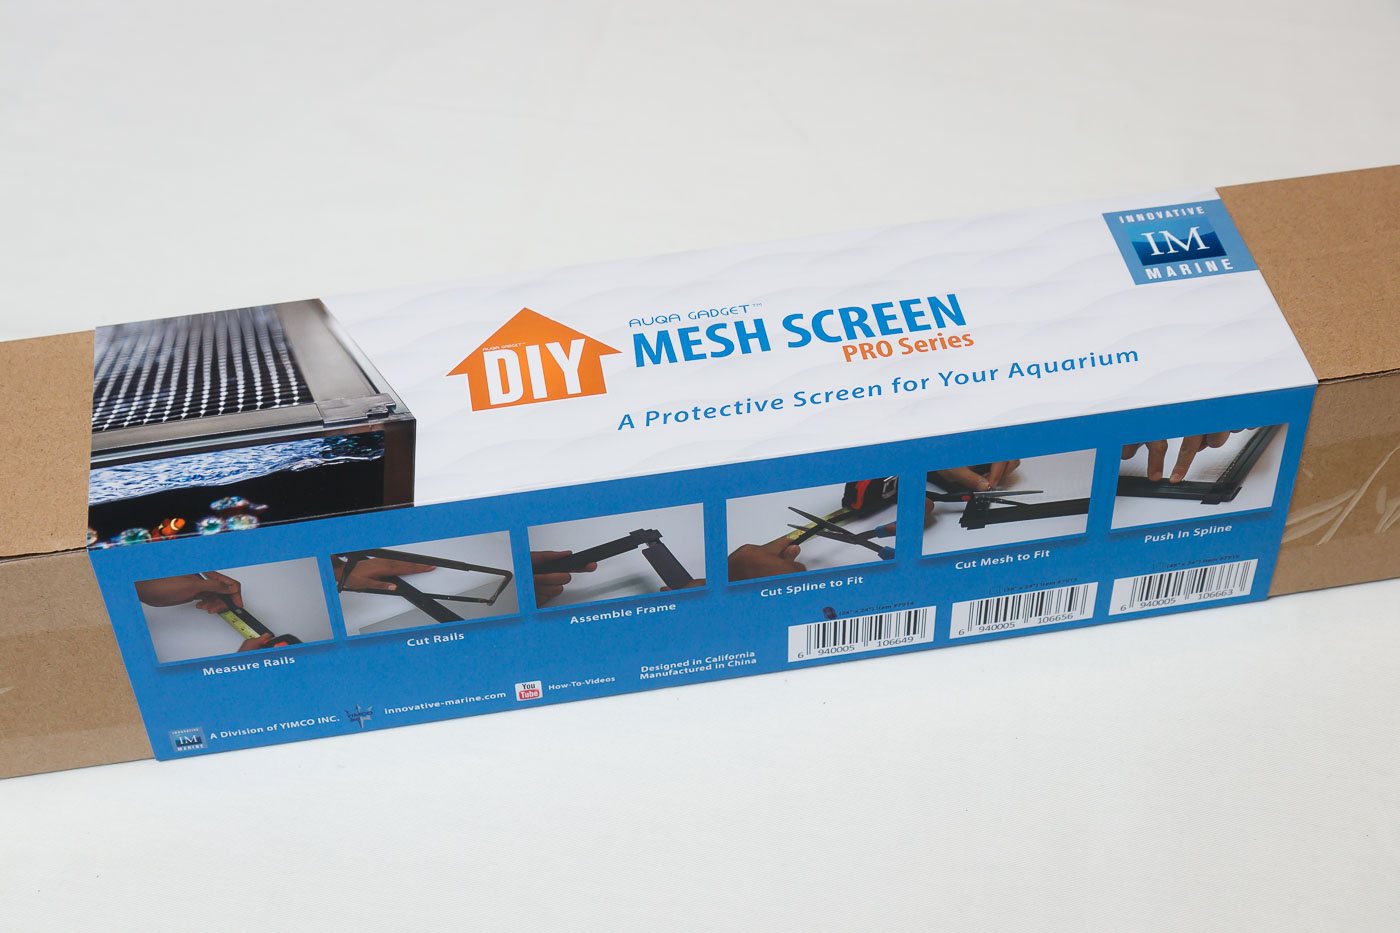
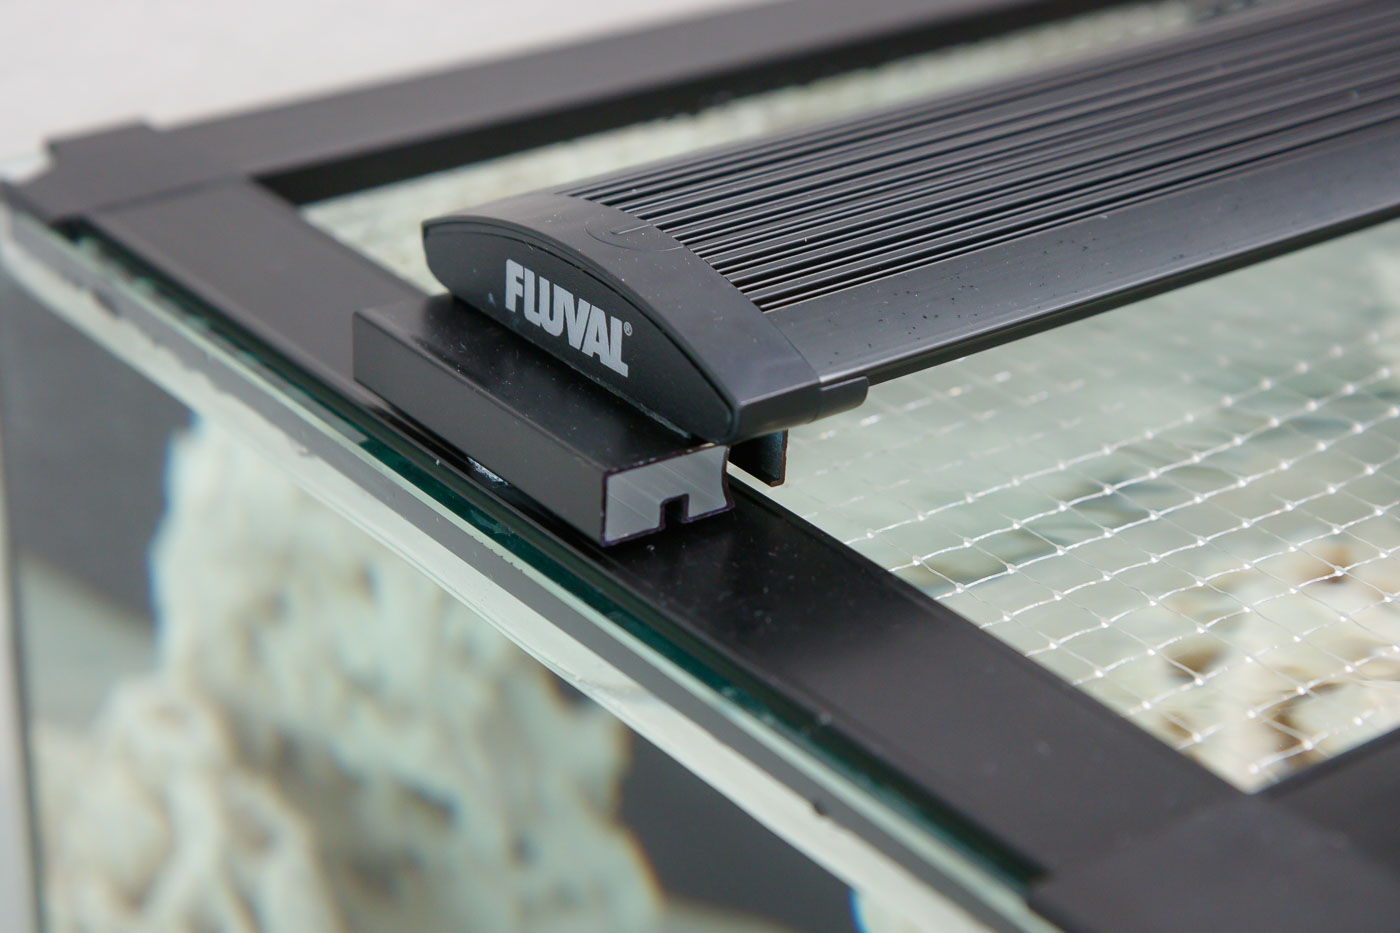
There are several Do-It-Yourself (DIY) options for this style of lid, but I found a semi-DIY kit from Innovative Marine. The one suitable for a smaller nano such as the Fluval EVO 13.5 is Innovative Marine’s DIY SafeScreen™ Aquarium Mesh Lid.
Review and Assembly of the Innovative Marine DIY Mesh Top:
I like that this kit includes (almost) everything you need to make your own mesh aquarium top. The end result works great and is still going strong years later.
The price is decent. The quality is good (enough). The only downside is this is a DIY job that requires some time, tools, a little skill, and some effort.
Here are the following supplies/tools I used for assembly:
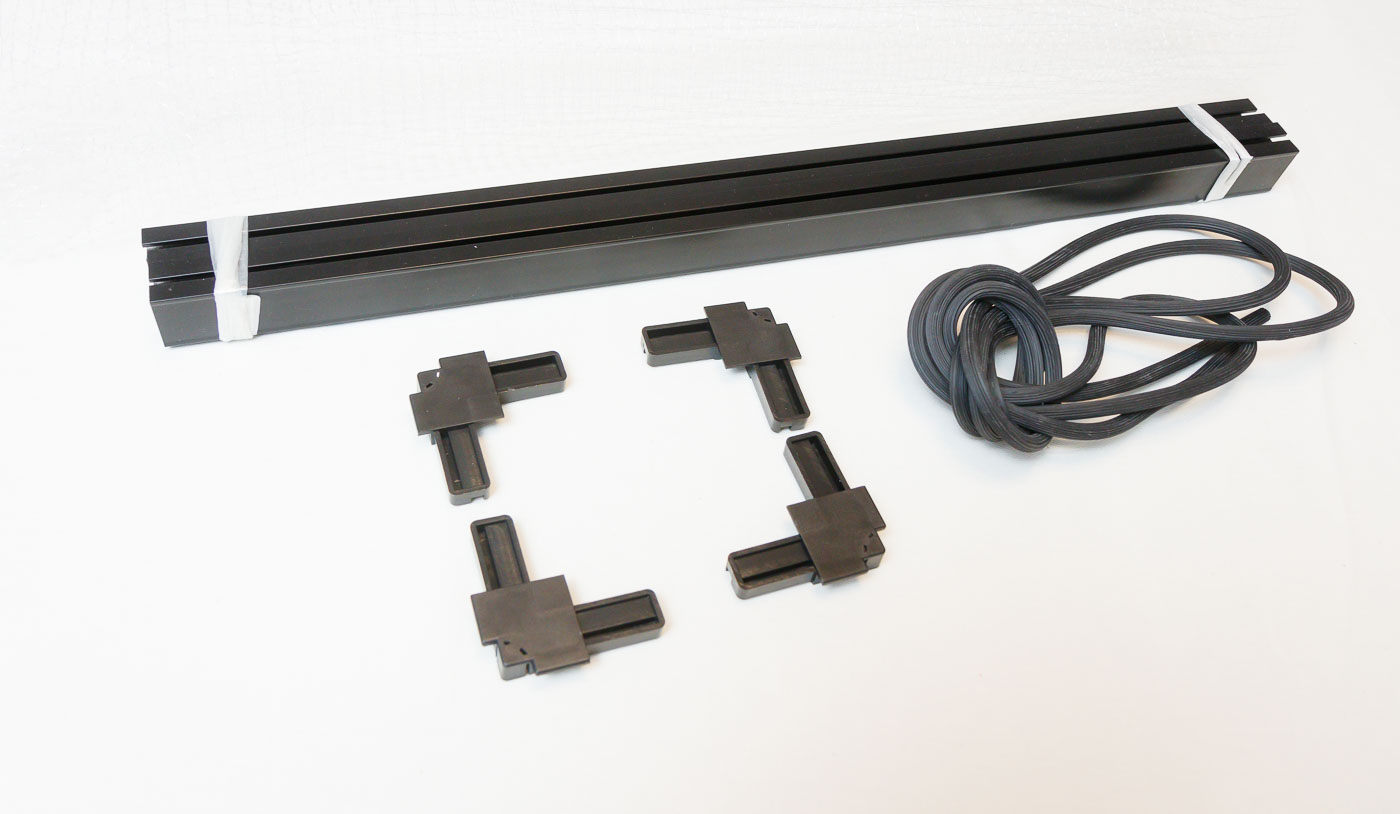
- Innovative Marine DIY Mesh Top Kit: (24″ x 24″) The kit includes (4) corner pieces, the mesh material (translucent – 1/4″ [6mm] openings), a gasket material (to hold the mesh to the frame) and aluminum channel.
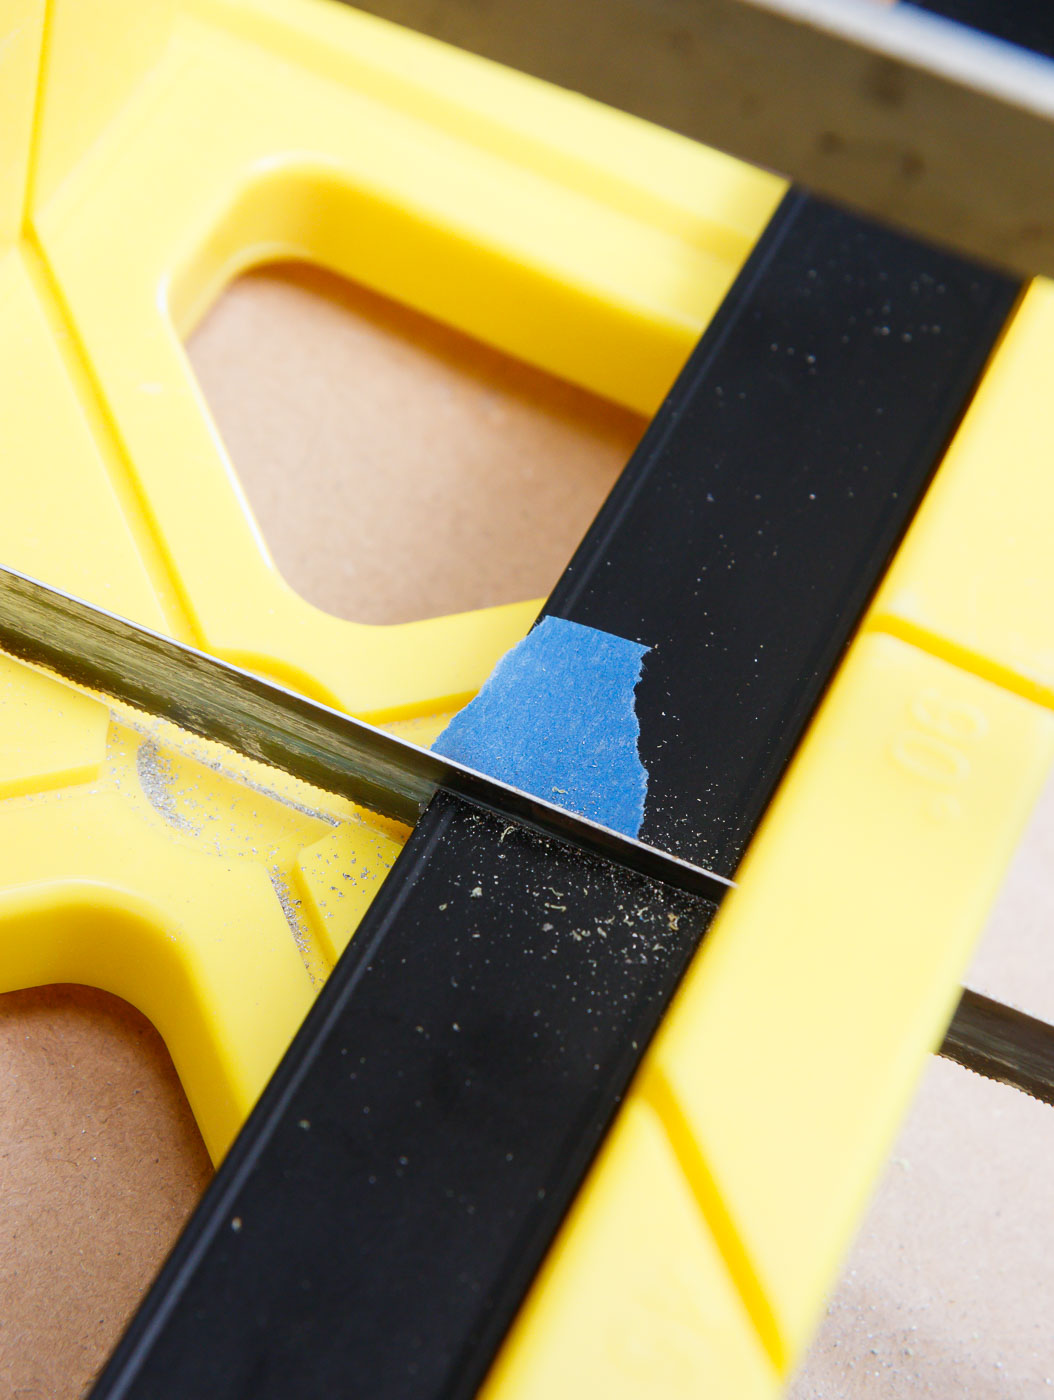
- Hacksaw with a new blade (suitable for cutting metal)
- Mitre Box
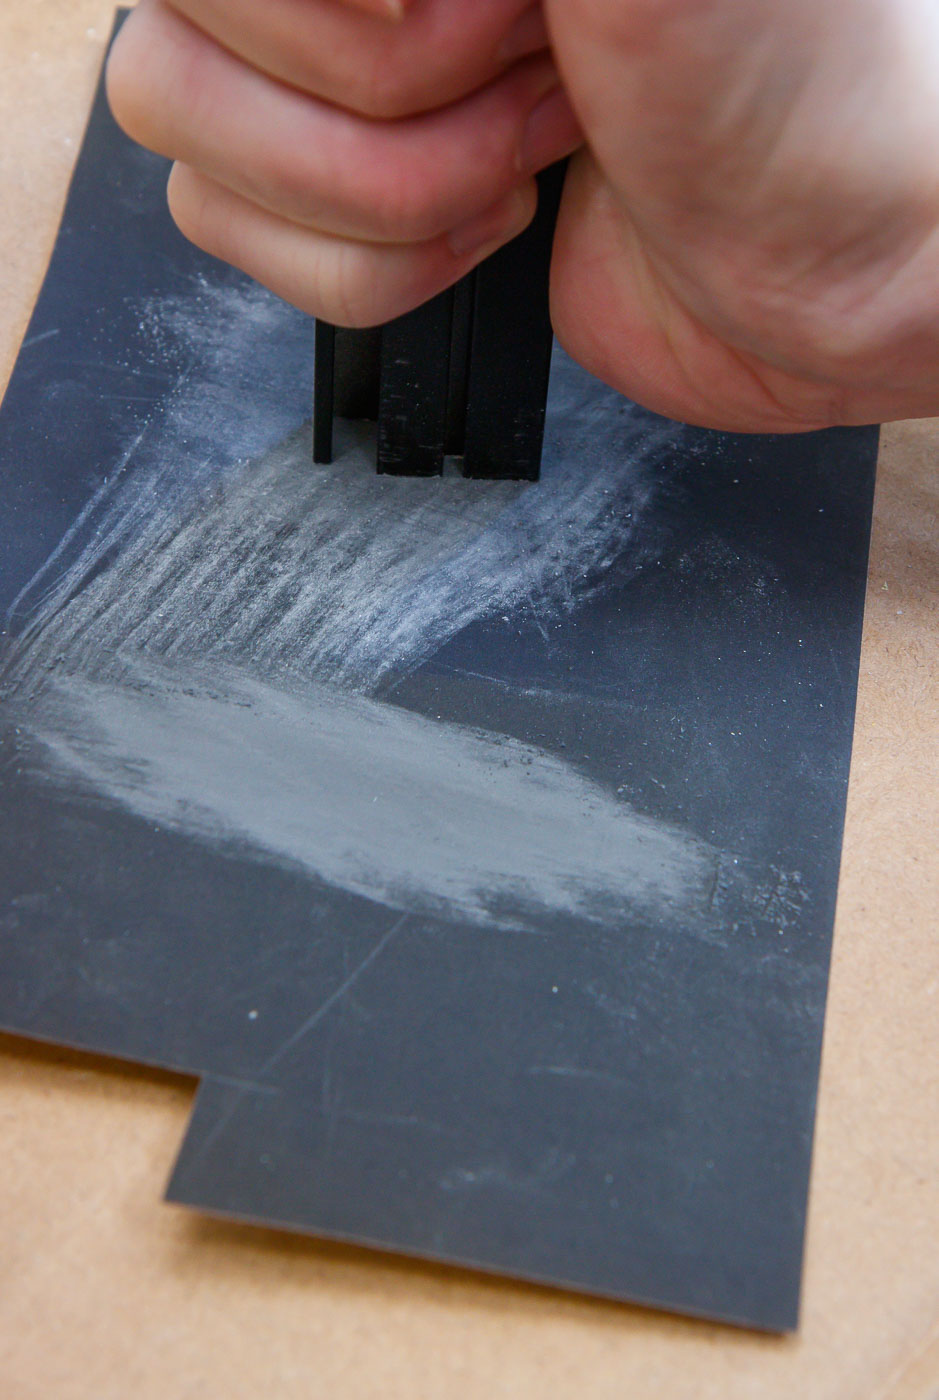
- Sand Paper: 100 grit is a good option
- Hot Glue Gun with Glue Sticks [link] (optional)
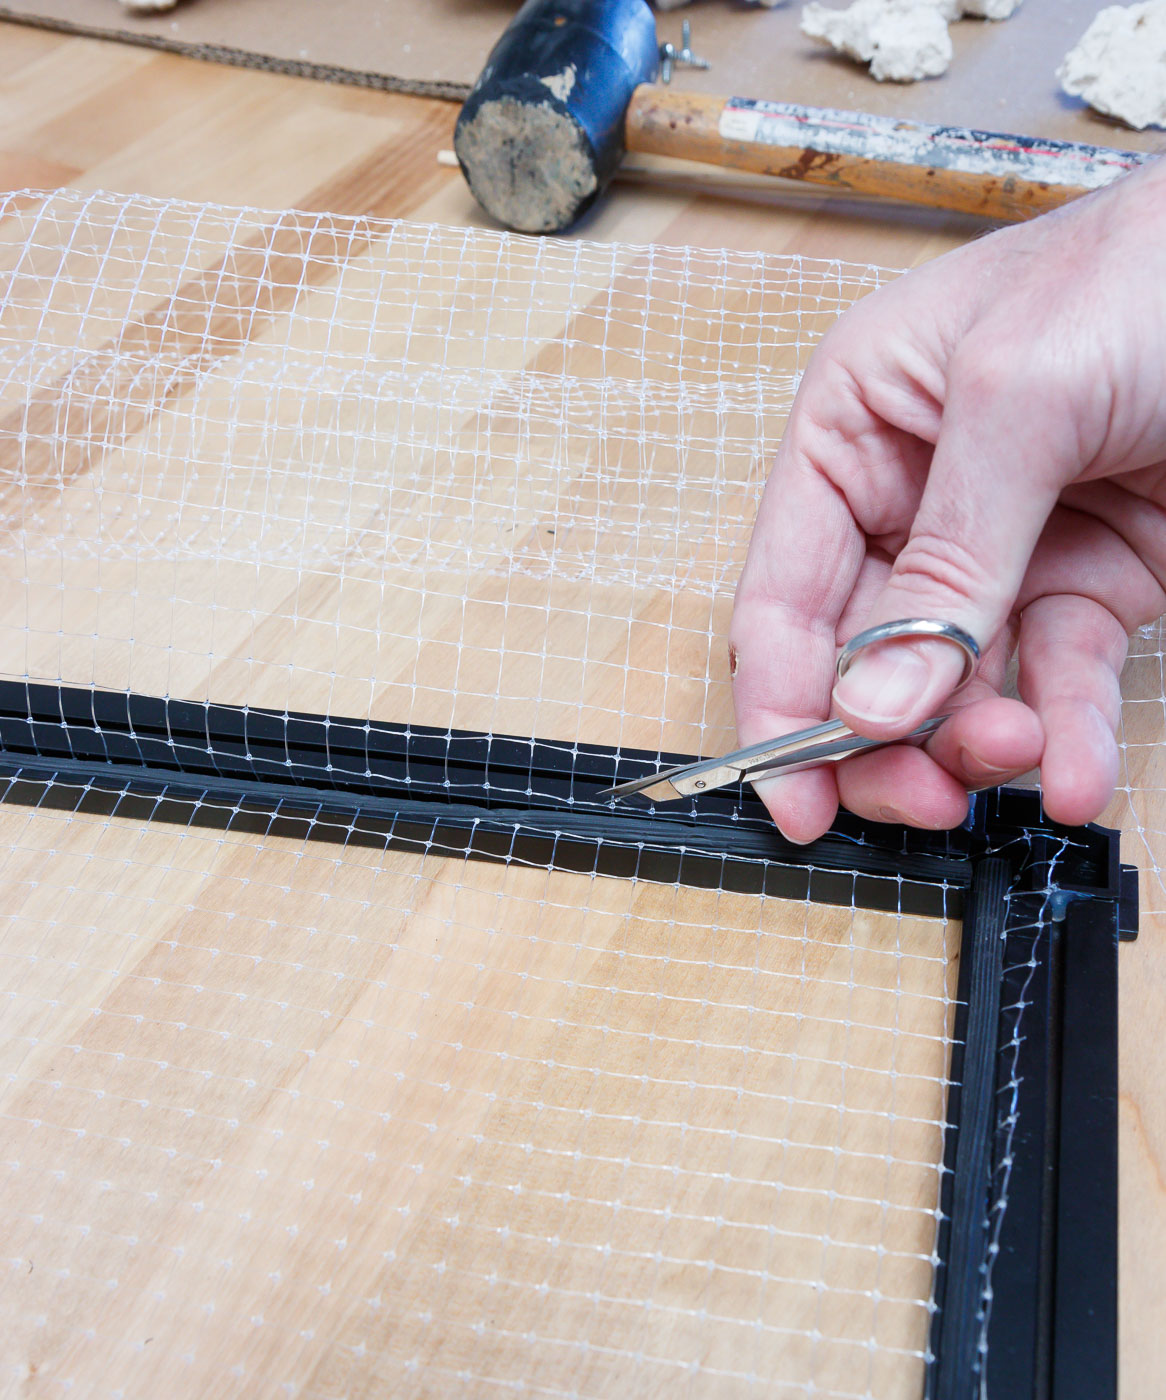
- Scissors
Assembly is fairly straightforward (Innovative Marine’s SafeScreen Instructions Here):
- Cut the Channel Edges to Size: Start by measuring the total span (inside glass to inside glass). For our EVO, this was 465mm (long edge) by 285mm (short edge). I wanted to leave a 10mm gap at the end for a power cord to exit (from a center-mounted wavemaker), so the long edge distance was reduced for this accommodation.
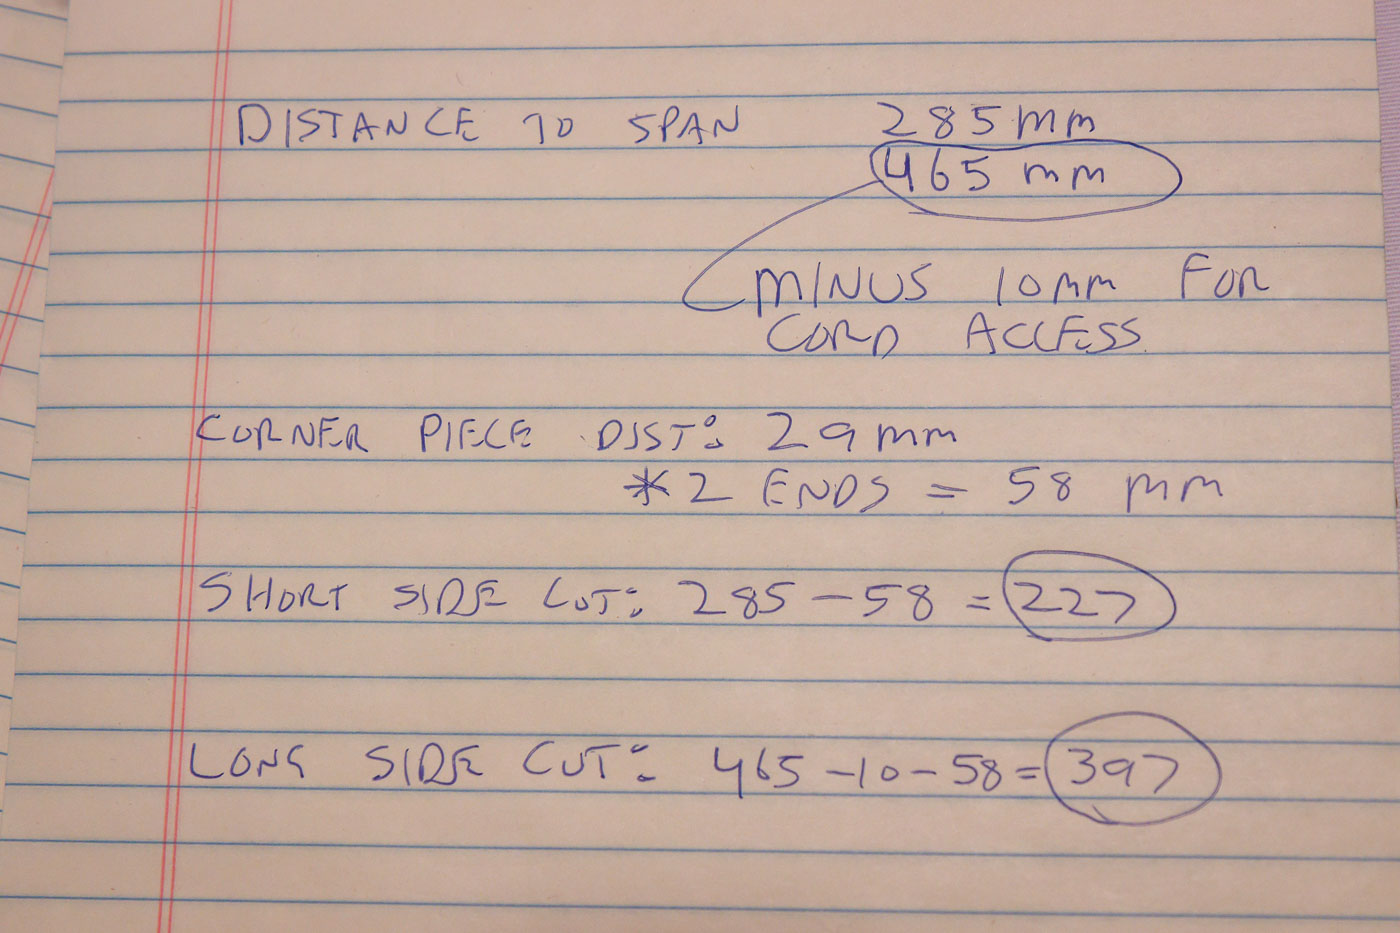
Then, you need to subtract the distance of each corner. I measured this as 29mm per corner piece. Make sure to subtract times two (each edge has corners on opposing ends). The lengths of the channels I cut were 397mm (long – two pieces) and 227mm (short – two pieces).
All of the above dimensions are given as a courtesy to show the process. Please make your own measurements as manufacturing tolerances change over time (and I might have made a mistake – check me carefully).
- Smooth Channel Edges: Inevitably, cutting the aluminum channel will result in some burrs and rough edges. Now is a good time to take care of this. I used a fairly aggressive sandpaper (100 grit), with a light touch, to remove these imperfections.
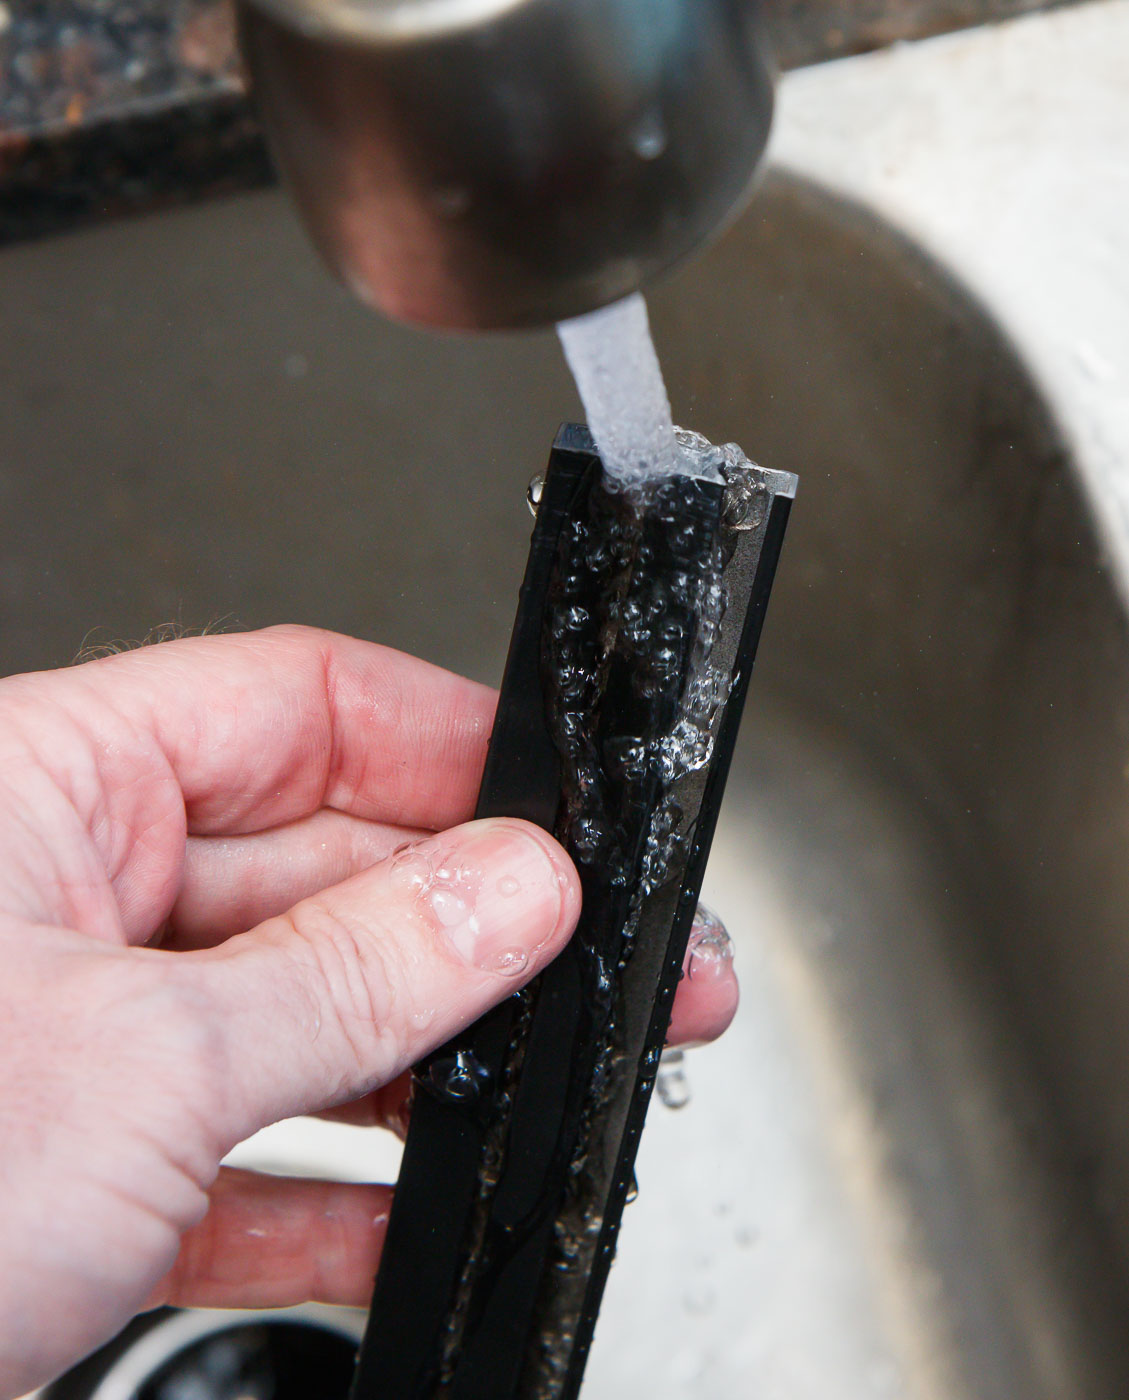
- Wash Down: After the cutting and sanding, rinse all the pieces to remove any metal bits.
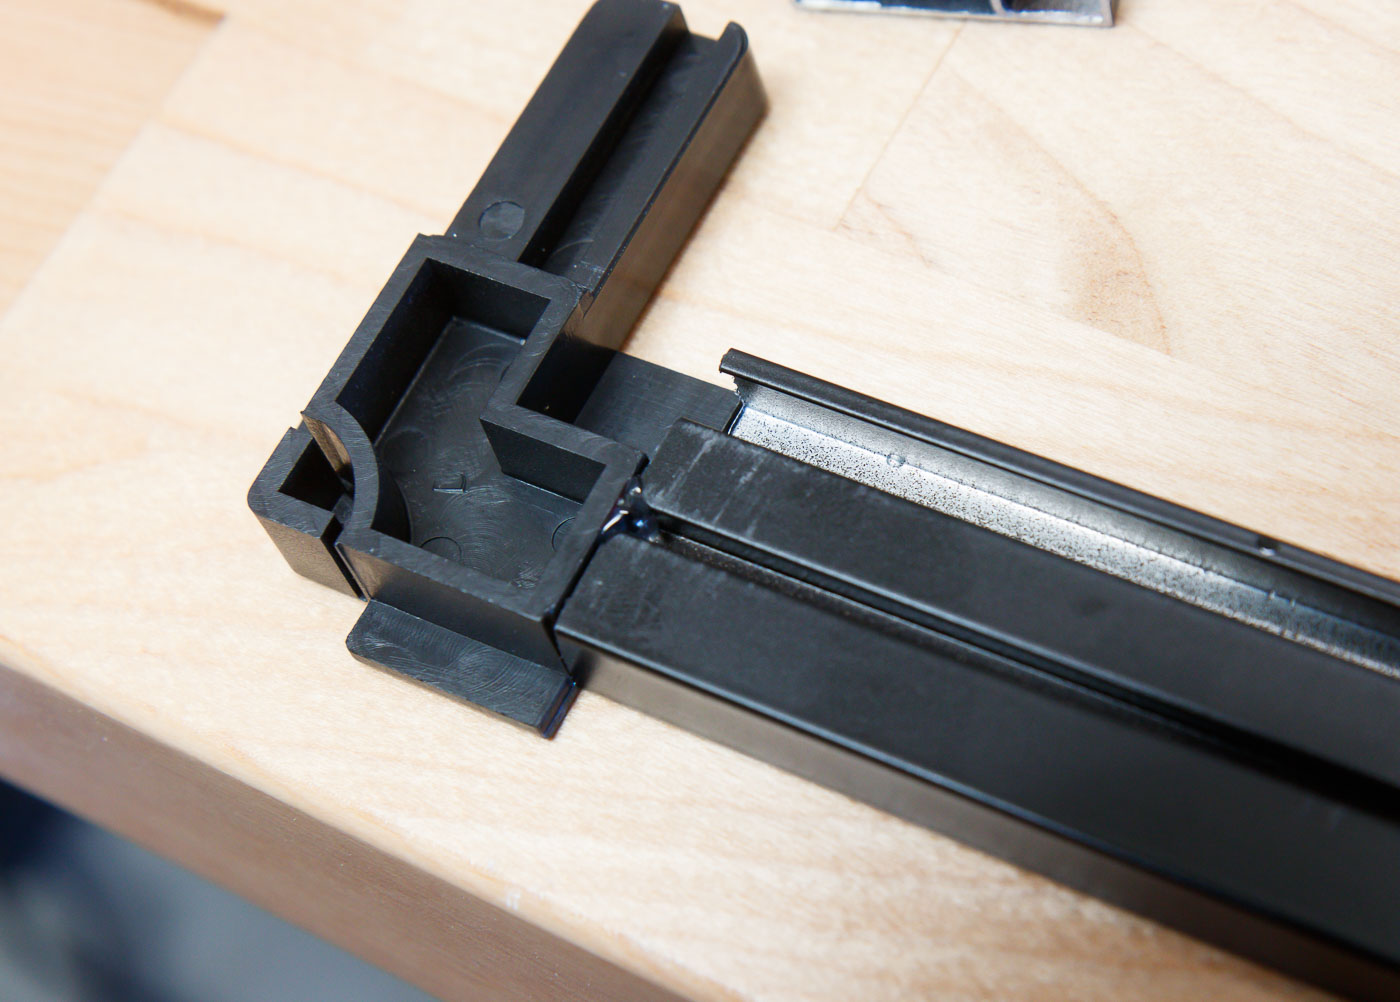
- Assemble the Frame: This simply involves inserting two channel pieces into each corner.

- Test Fit on the Tank: Once the corner pieces and channel are assembled, place them on your tank to check the fit. Hopefully, if you measured carefully, it is all good.
- (Optional) Glue Frame Together: On my kit, these pieces didn’t snap or otherwise interference fit into place, so they remain loose. To help out the structural integrity a bit, and to simplify the remainder of the assembly, I decided to affix each joint with some glue. This step is optional but it made the next step much easier having the entire frame stay assembled.
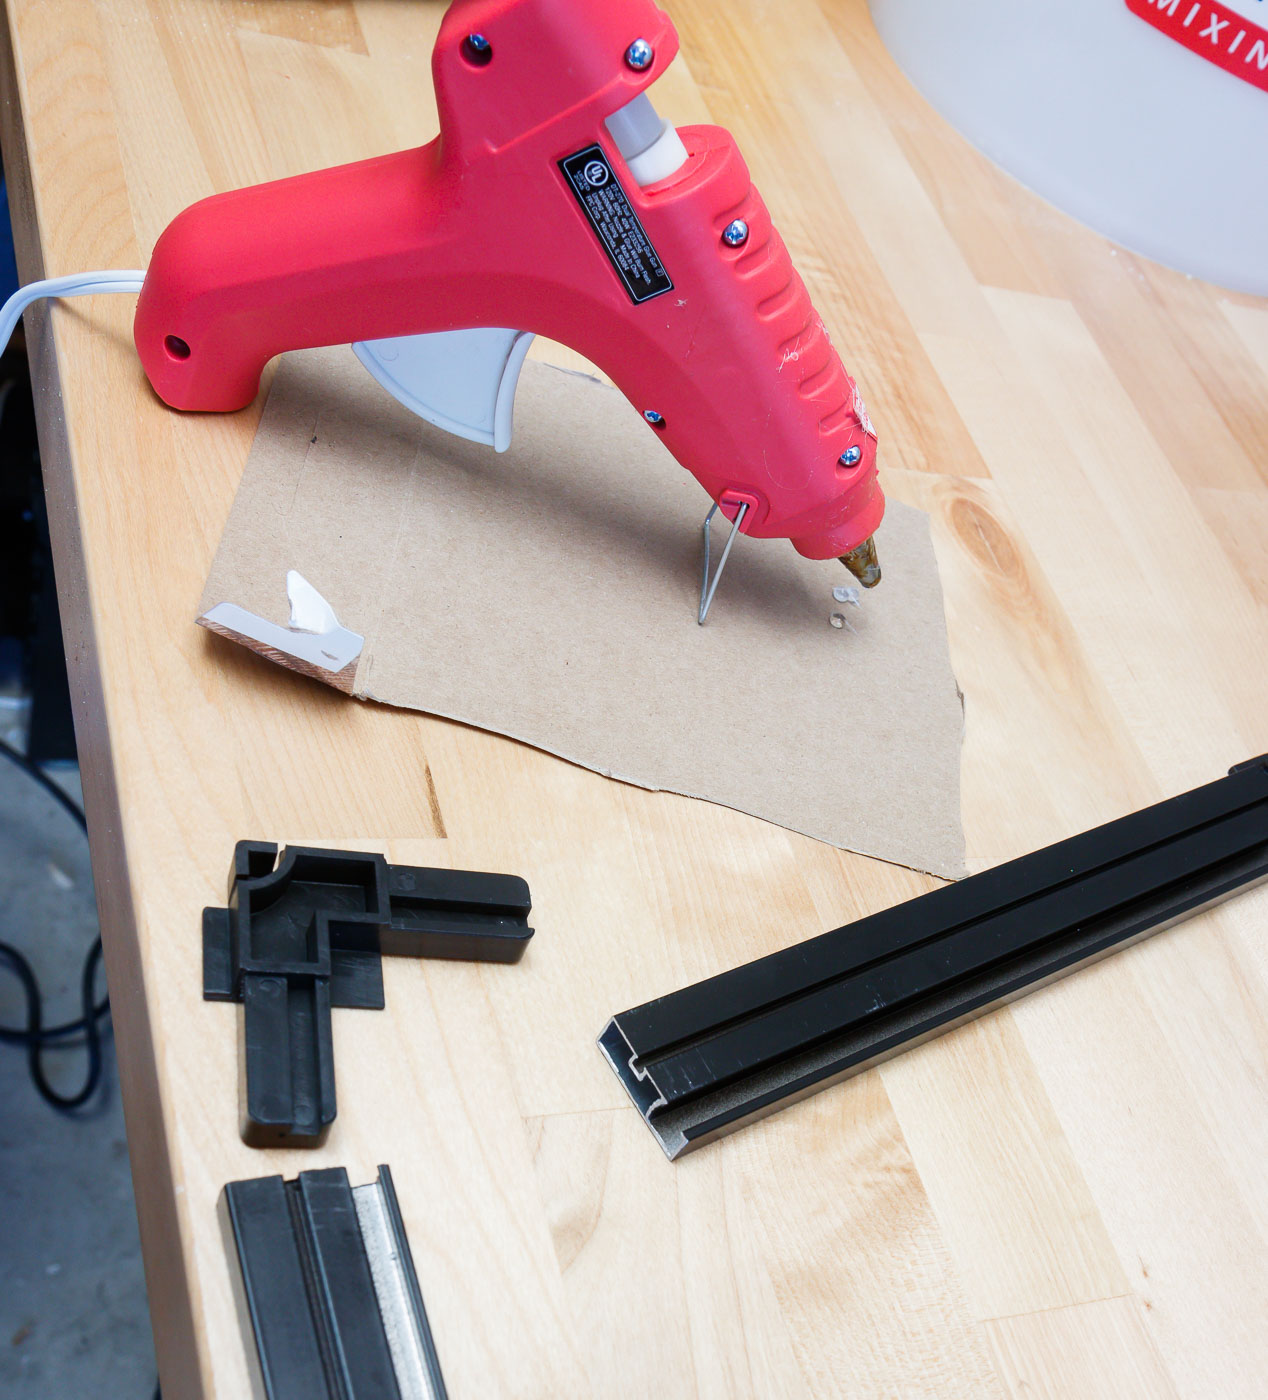
Hot glue worked great. Just put some inside the receiving end and quickly press the channel firmly inside.
- Assemble Gasket and Mesh: This part of the job was the most challenging and I had to employ help from my sweet wife to offer another set of hands.
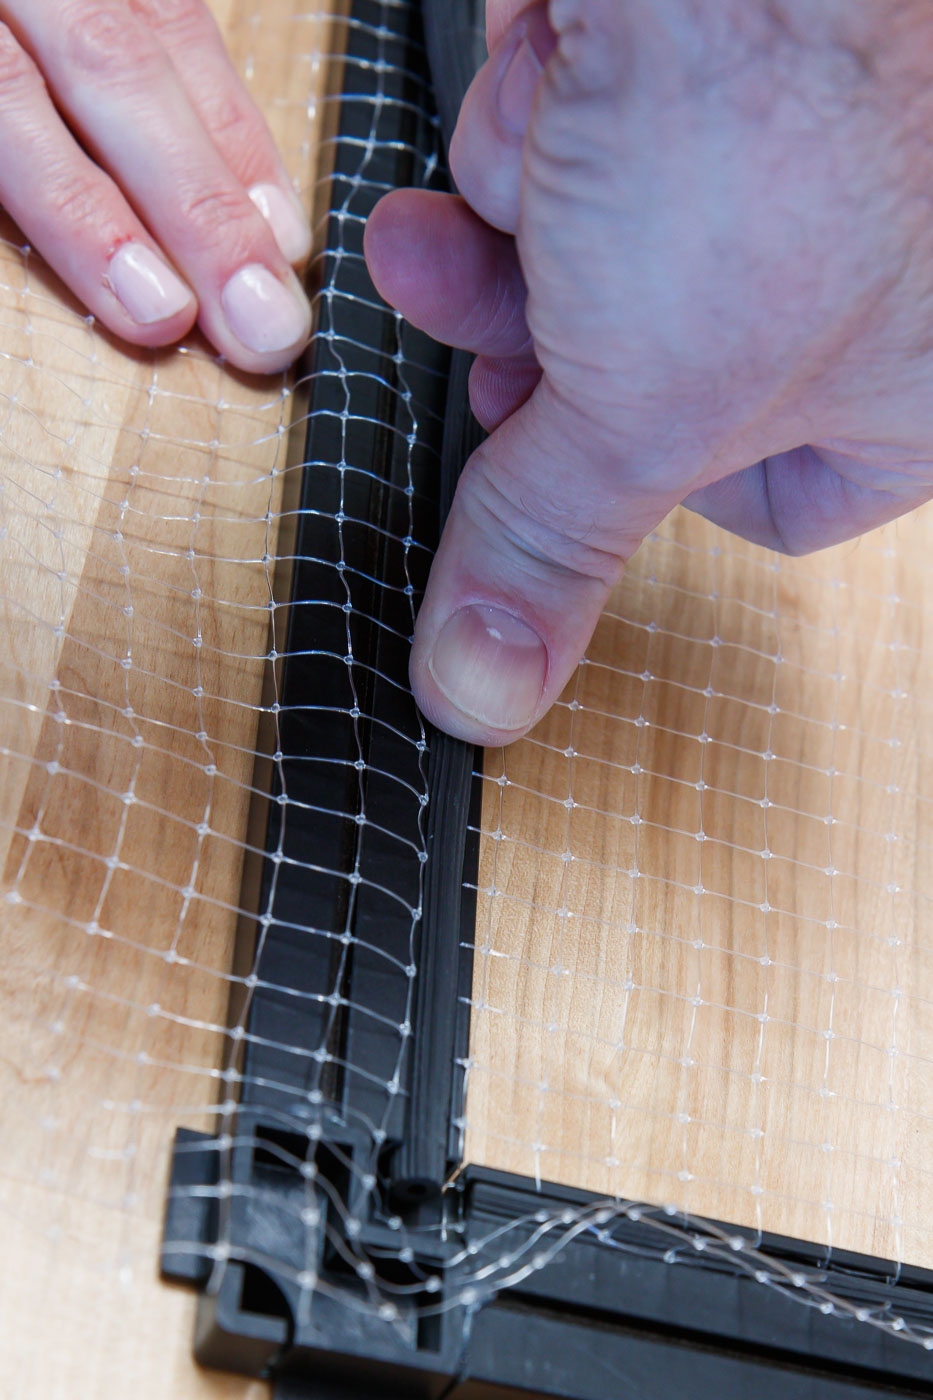
You don’t need to have the mesh sized perfectly (it will be trimmed later) so go a bit bigger on every side. You just need to press the gasket into the frame to hold the mesh in place. Innovative Marine’s instructions tell you to complete opposite sides first, then do the remaining two sides.
The challenge for me was to keep the mesh grid pattern aligned straight as I put the gasket into place.
Innovative Marine may have changed their design since I purchased this kit; the rubber gasket may now be a sub-channel they refer to as ‘Rigid Spline’. The method should be similar but they have some helpful diagrams in the instructions.
- Cut Excess Mesh: Use scissors to trim the excess mesh beyond the gasket.
The resulting aquarium top works great! I love the sleek visuals of being able to see in from above. Having it in use also reveals a few other perks. Feeding dry food is super easy – you can just drop it in through the wide mesh so no need to remove the top.
For maintenance where I need to get into the tank, I simply remove the top and set it aside. Simple.
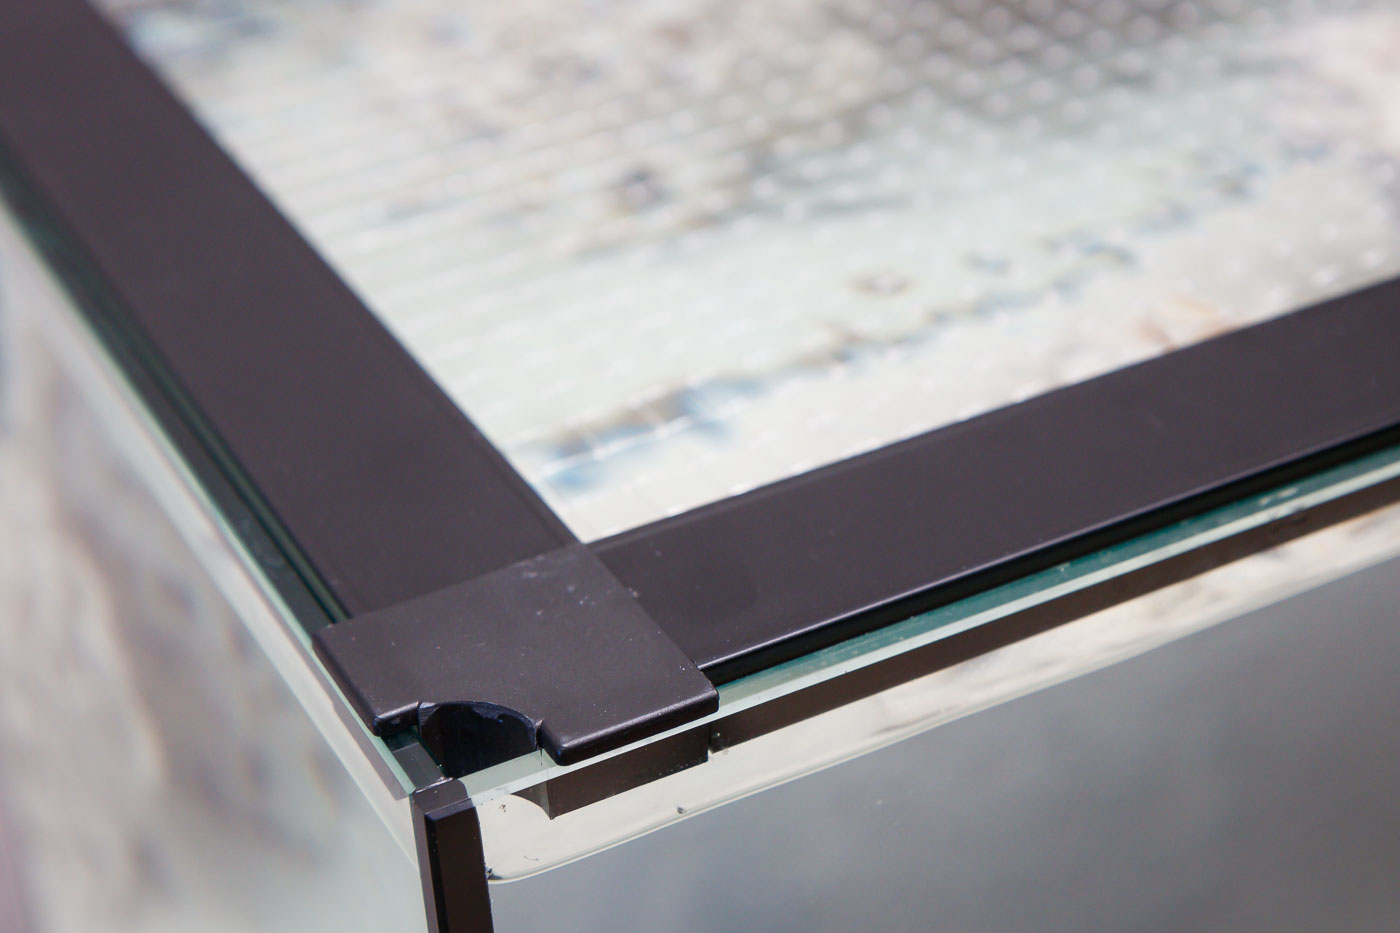
The corners of Innovative Marine’s kit are very nice. They have tabs built in that support at the top of the glass. Other DIY kits I have seen have these clips as separate parts that can get knocked off.
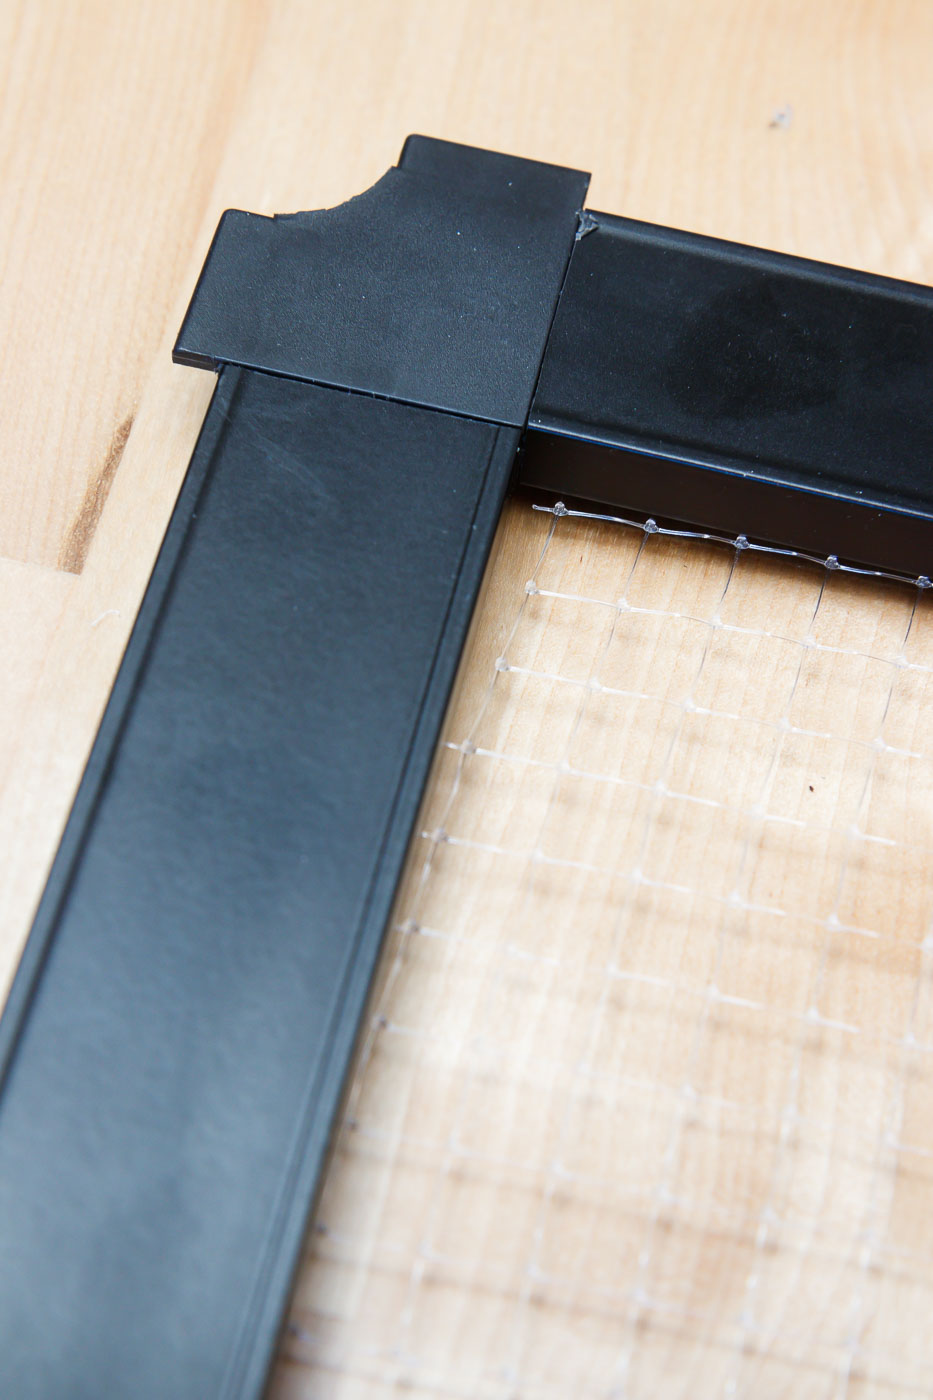
Each corner also has a ‘knock-out’ tab at the corner. You can push these out to remove them permanently if you need access to allow a cord to exit the display section. I ended up removing the two knockouts at the end of the tank as they interfered with the aquarium’s silicone bead.
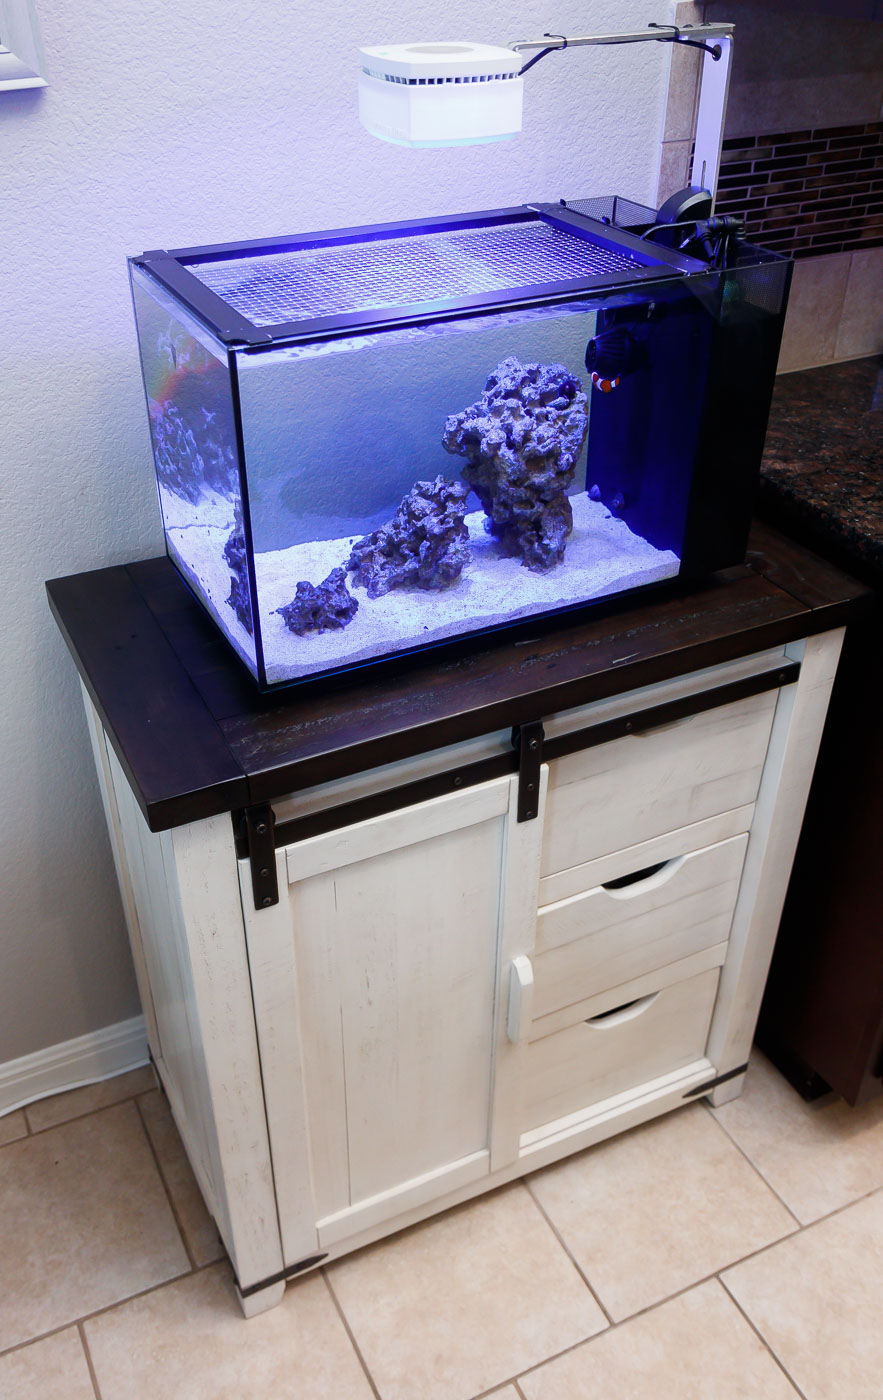
Another nice benefit of going ‘topless’ is reduced tank temperatures. The stock EVO lid holds in heat. Even without active (fan) cooling, your tank will stay cooler with a mesh top.
An opposing disadvantage compared to the stock EVO lid is evaporation. The EVO lid holds in condensation nicely and reduces freshwater loss. An open mesh top offers no such barrier and your evaporative losses will be much higher. This has never been an issue with our setup as I installed an ATO from the start.
It’s such a good mod at a reasonable price (around $40 USD at the time of publishing). The only real disadvantage is the effort to assemble, but that is intertwined with the advantages of DIY, reasonable cost, and custom sizing.
I’d like to add that this kit will work with any nano tank – saltwater or freshwater. However, the mesh openings might be a bit large to stop jumping nano fish and shrimp.
Modifying Mesh Top to Use the Stock EVO Light:
I wasn’t quite ready to purchase an aftermarket light when I got this lid kit, so I modified it to make it work with the stock Fluval EVO light.
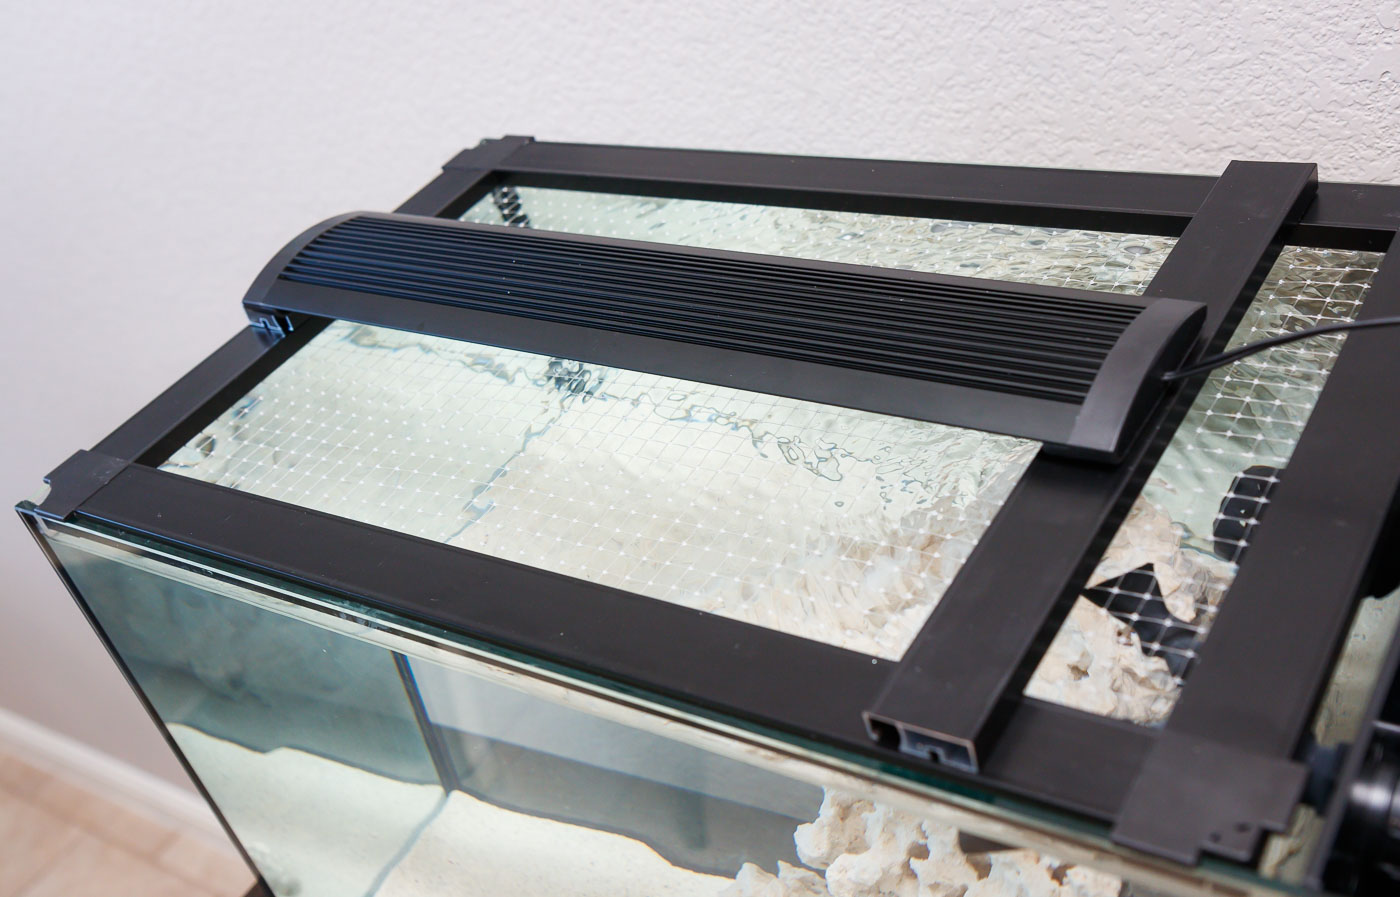
You can see the concept in photos here. I just used some of the excess channel that came with the Innovative Marine DIY kit.
I used some adhesive-backed Velcro dots to affix the cross rails to the lid channels.
It’s not the most elegant solution, but it makes a nice hybrid solution if you want an open-top feel with the stock EVO LED fixture.
Other Aftermarket Lid Options for the EVO 13.5:
You may have gotten to this point in the article and realized . . . you have no desire to deal with a DIY option. You are in luck as some individuals and companies make tops for various nano tanks, including for the Fluval EVO 13.5.
I have not tested or dealt with any of these companies, but the one I would be most likely to go with is from Kraken Reef. They offer several interesting options (like custom cord cut-outs and a feed port) and the finish seems very high-end.
Kraken Reef’s EVO 13.5 lid is currently $90 USD. On first consideration, I thought this was a bit pricy, but taking into consideration the quality, that you don’t have to build/assemble it, and that IM’s product is $40, it’s not that big of a leap.
Final Thoughts:
I don’t have any regrets or issues with Innovative Marine’s SafeScreen DIY kit. It’s been very good and has offered all the advantages of a topless setup without the risk.
One thing I had wondered about when we started our Saltwater Nano was can you run your Marine tank fully topless (I.E. no lid at all)? I’d say you can if you only have corals. If, on the other hand, you have snails and fish, I’d advise you to have a top of some sort.
Saltwater fish, even smaller varieties like in a nano, are ‘athletic’ compared to their freshwater brethren. They can and will eventually jump out of the tank without a barrier. I certainly wish I could go completely sans top, but the risk of losing one of our beloved clownfish would never be worth it.
