

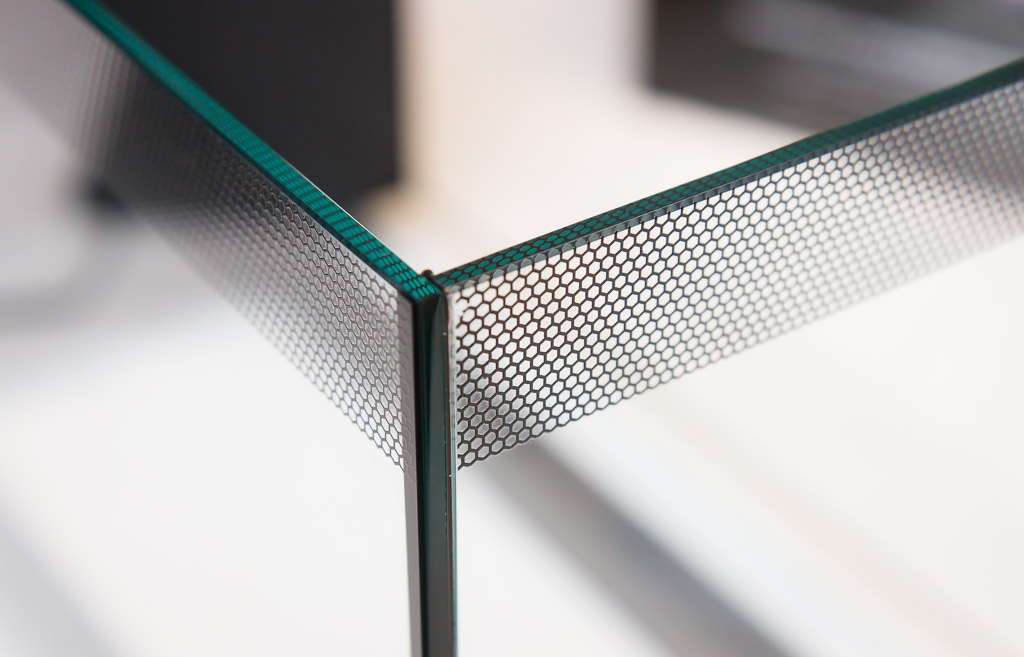
Several Fluval AIO (All In One) aquariums have featured a patterned decal of sorts on the tank exterior. These are usually to obscure equipment or, on newer models, to hide water stains/deposits at the water line.
One such model with this black ‘honeycomb’ pattern is the EVO 13.5 Saltwater Nano. When we started our EVO build, I decided the rim honeycomb pattern had to go. I’ll give some quick direction on removing the honeycomb pattern from a Fluval aquarium and offer some thoughts on when to perform this mod and why you might want to.
What Does the Honeycomb Pattern Do on a Fluval Aquarium?
The pattern is there to obscure . . . stuff. On many Fluval aquariums, the pattern hides all the stuff in the filter and pump sections of their AIO (All in One) tanks.

Later on, Fluval decided to add the pattern to the upper 1″ of the display section of the tank. The purpose of this is to obscure the water line. This is a ‘feature’ I’ve never really wanted and didn’t ask for, but I can see how this area of the tank often stays dirty, and the pattern helps to hide this.
How to Remove Fluval’s Pattern:
First of all, the pattern is simply a black, hard sticker. It is applied to the outside surface of the aquarium glass.
Removal is simple and involves only one tool – a razor blade. To make life easy, hopefully, you have some sort of blade holder.
I’ll assume that you are removing this before you have set up and added water to your tank – this is by far the easiest way (although there is hope if it’s already running – I’ll get into that in a bit).

The technique is simple. First, lay the blade flat on the glass surface somewhere beyond the pattern. Set the angle of the blade at a shallow angle (30-ish degrees) and move slowly toward and into the patterned area.
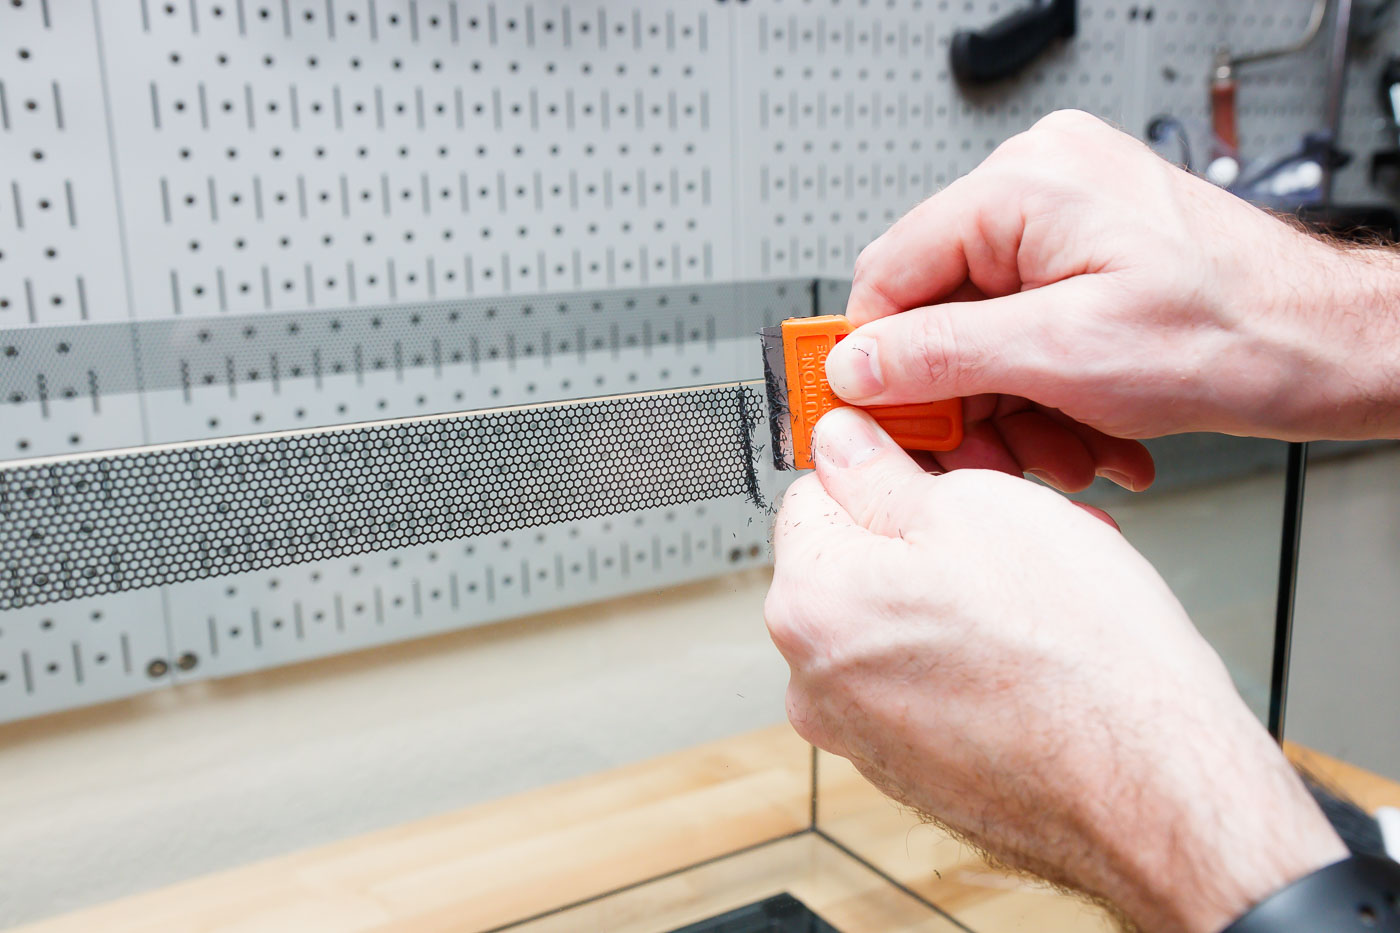
It should come right off. If it doesn’t, try again slowly and with a bit more pressure. Make sure to keep the blade flat on the surface. You can help ensure it stays on the glass by sliding back and forth to make new strokes (i.e., don’t lift).
A few areas to be careful of: First, take care not to contact the silicone with the blade. Take your time and remove very slowly right up to the edge of the glass/silicone junction, but stop before you touch the silicone. It’s not difficult – just take it slow.
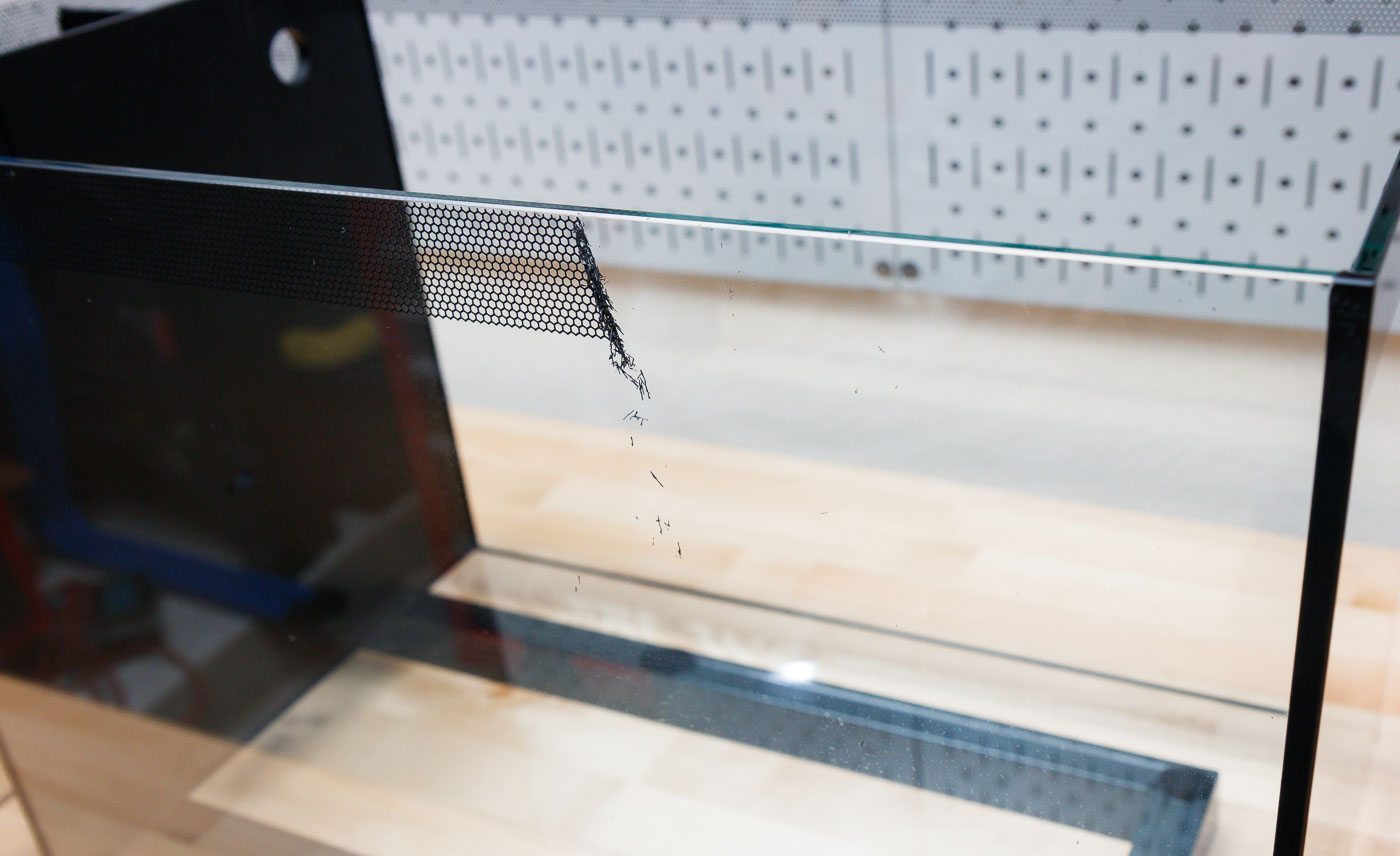
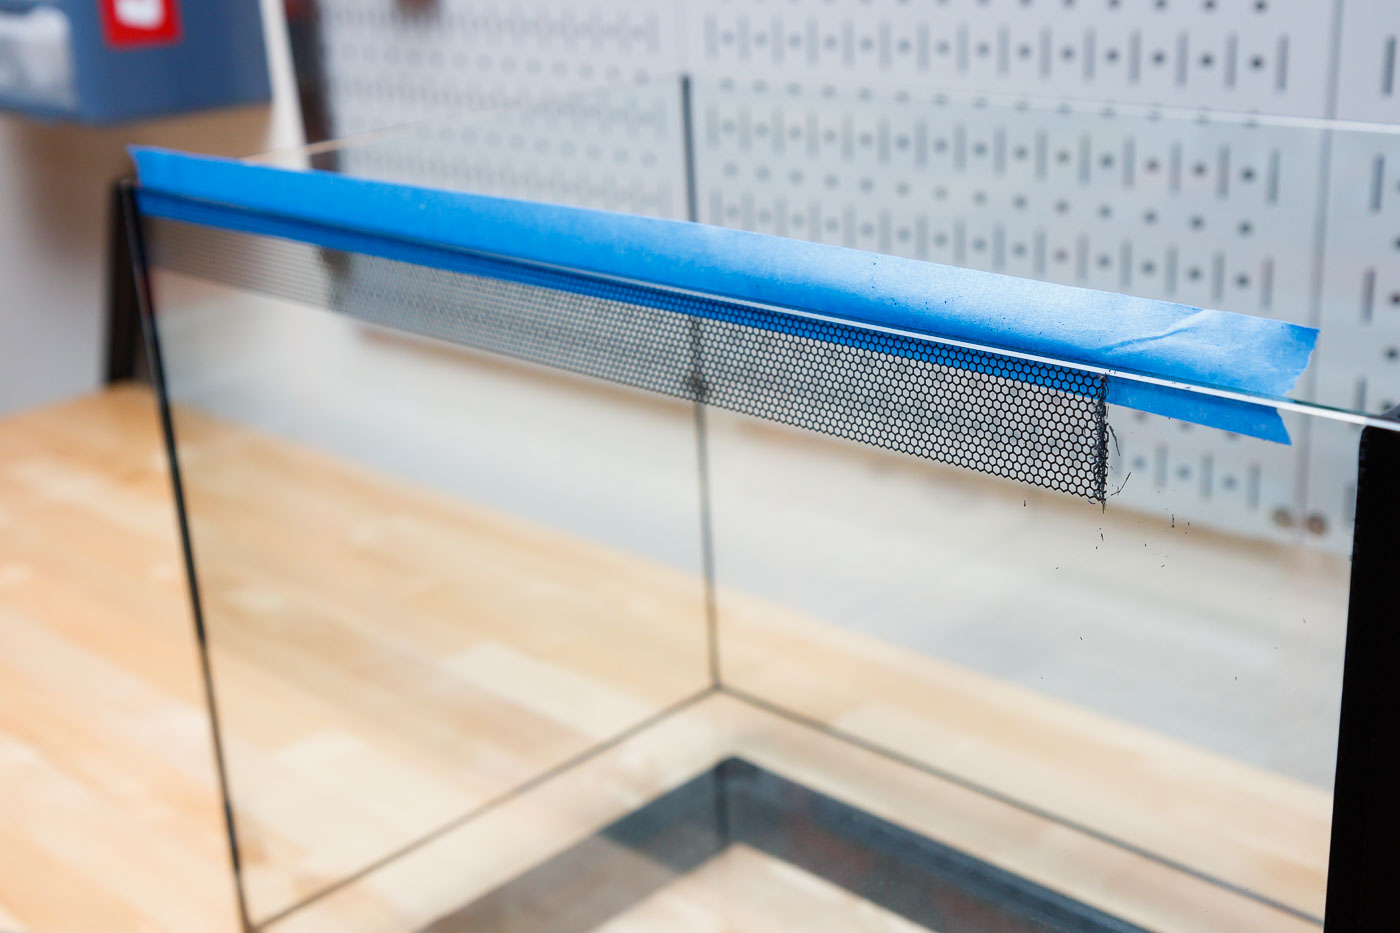
The second area that will take some planning is where to stop your work. On our EVO, I wanted to leave the pattern on the filter section, which meant cutting a hard line to remove the rim pattern but leaving the pump/filter section pattern.
I honestly just took it slow and freehanded this. If you’d like, you can mark or mask the part to remain with some blue painter’s tape and cut right up to that line.
After that, clean up all the removed bits of decal from your tank – project done!
What if the Tank is Already in Service (i.e. wet):
This one is a bit tough. I’ll say it’s much easier to remove this decal (and clean up the ensuing mess) before setup and filling. If your tank is new and you are on the fence . . . just do it.
However, If you already have your tank up and full of critters and then decide to remove the pattern, there is still hope.
I haven’t tested this, but I’d suggest the following:
- Remove the aquarium’s lid.
- Remove some water from the tank (optional – might not be necessary depending on your water level).
- Take tape (like the aforementioned blue painter’s tape) and apply it to the inside edge of the tank glass on all sides, with some of the tape sticking up over the top.
- Affix some additional paper or plastic to the tape (above the top of the rim).
This level of tape and plastic can serve as a barrier to catch/bounce the bits of decal out of the tank.
I have considered it might be enough protection just to use the stock aquarium lid; however, I feel like you would surely get bits between the lid and glass that would end up in the tank.
If a piece or two of the removed decal does find its way into the tank, don’t panic. It shouldn’t be toxic (at least not short term). Just find a way to siphon it out when you are wrapping up the job.
Final Thoughts on Removing the Pattern from a Fluval Aquarium:
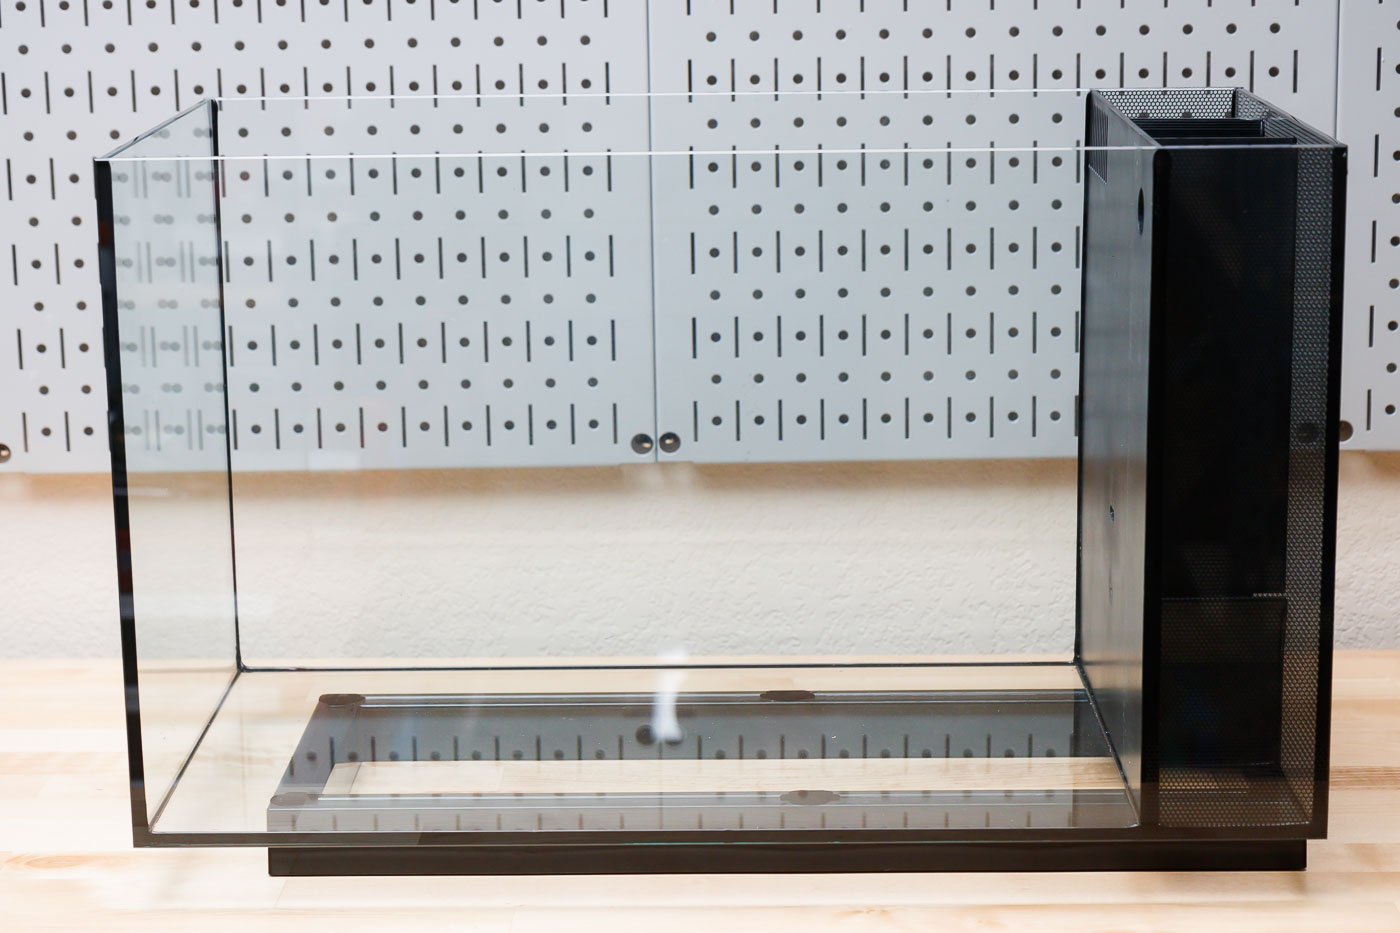
I think Fluval’s patterned bit are generally a good feature for most people. It works very well for the back sections.
I’m glad that this pattern is easily removable. I think our EVO looks much more sleek without it obscuring the rim, and I don’t regret removing it. I’ve never had any issues with keeping the water line clean – it just takes a quick swipe every once and again during your routine maintenance.
