

One of the adventures in starting our saltwater nano aquarium was figuring out tank maintenance. I have experience with our freshwater planted Spec V, but it seemed I had a lot to learn regarding nano reef maintenance. As it turns out, there are enough similarities that getting into a rhythm didn’t take long.
I’m going to describe maintenance tasks we perform on our EVO 13.5 – this will breakdown both frequency and techniques used. As with anything, I’m sharing what works for us and our tank but everyone (and every tank) is different. Know that as you setup and establish your tank, you will inevitably find methods that work better for you.

I’ll group tasks by frequency: daily maintenance, weekly water change maintenance, filter media maintenance, and other extended frequency maintenance tasks.
Daily Maintenance Tasks for a Saltwater Nano:
The word that sums up daily tank maintenance is . . . Observe. Take time to watch your tank and critters and check in on the equipment function.
This is not a set checklist like preparing for landing, but on any given day, I tackle some or all of the following:
- Critters: Watch your inhabitants (fish, snails, corals). Check that your fish are acting and moving normally. Verify corals are open and are looking ‘happy’. See if any snails are flipped over, or making a break for it.
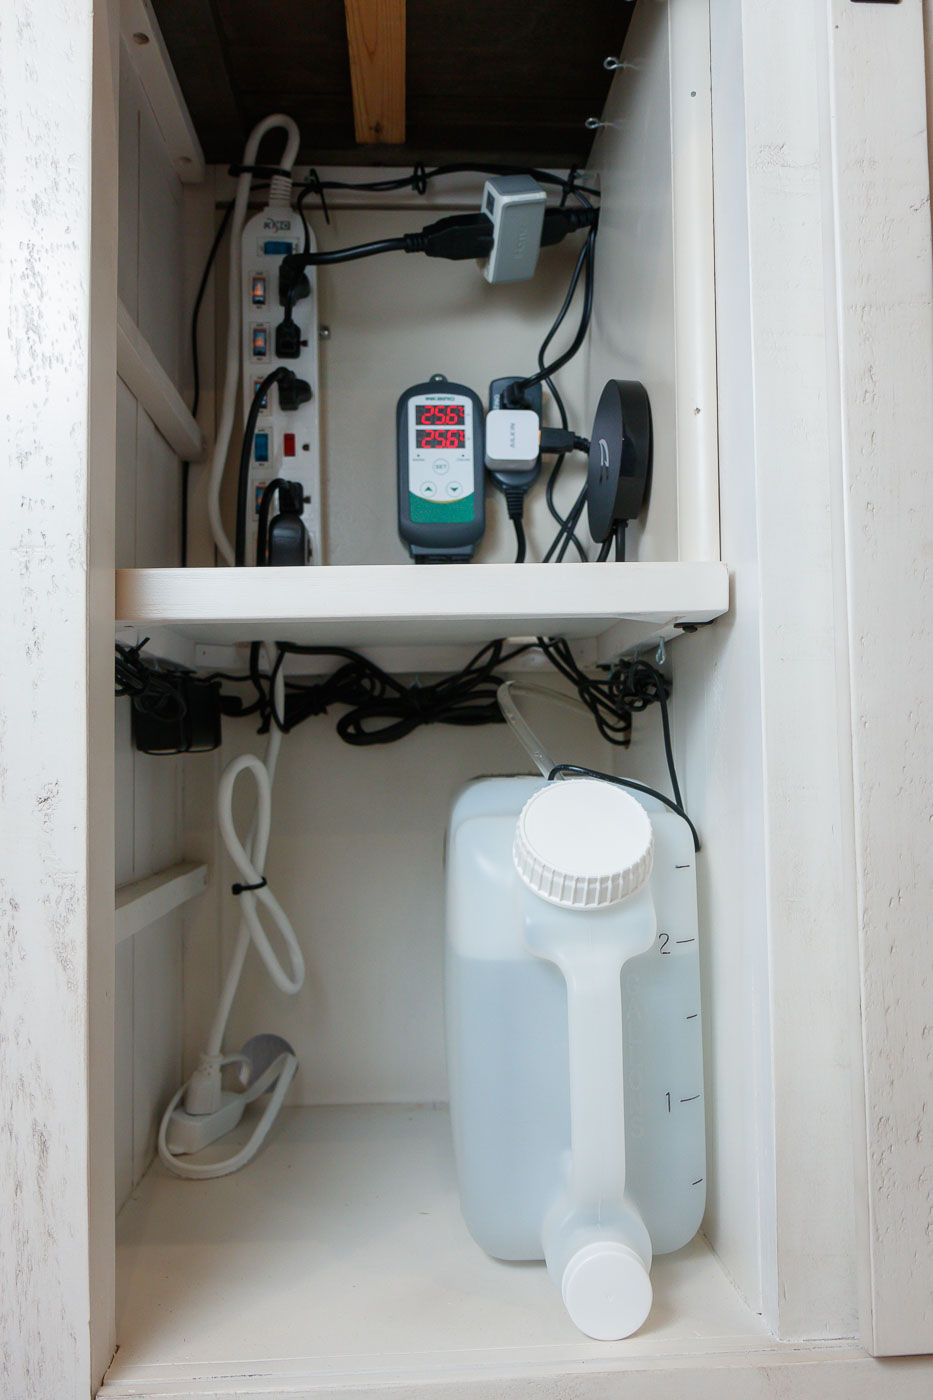
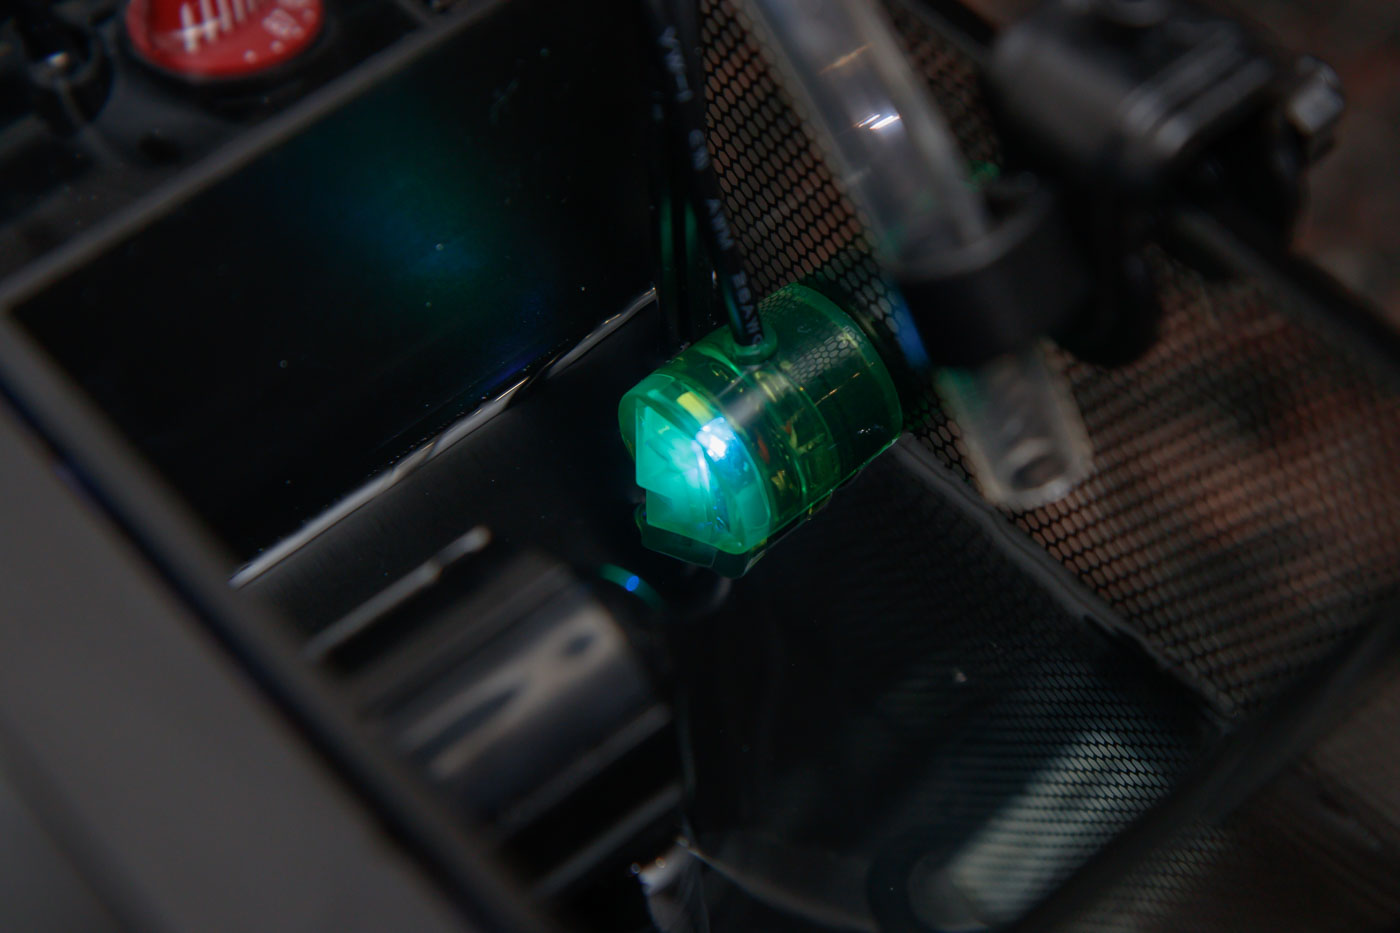
- Equipment: I take a quick glance at all the equipment to see that it is all working. For our tank, I check that the ATO light is on (indicating it is running normally) and that the ATO reservoir has RODI water in it. I glance at the temperature controller to see that the tank is holding temp as intended. I look to see that the return pump and wavemaker are pushing water in the normal pattern.
- Feed: On most days, I prepare food for fish and/or corals. I have a previous post in this series on feeding the fish.
Occasional Nano Reef Maintenance Tasks:
These are the maintenance tasks that get performed occasionally and between water change days:
- Clean the Glass: I don’t get much growth on the glass, but every 3-5 days, I take a few minutes and run our Innovative Marine MicroMag glass cleaner to get the glass sparkly clean. It’s amazing how much clearer the view is after the glass is cleared from even a thin layer of algae.
- Blast the Rockwork / Stir Sand: I use a bulb pipette (turkey baster would also work) occasionally to blast detritus and gunk out of the rockwork. This is not an issue for a new tank but will become more prevalent as your marine aquarium matures. I just squeeze the bulb and try to get as deep into all the crevices as possible. The ensuing storm of junk will get into the water column and lots of it will get circulated and caught in the filter floss. I do this every 3-10 days. Nothing says you have to do all the rockwork at the same time – I sometimes break it up over multiple days or multiple times in a day.
Separate from blasting the rockwork, I occasionally stir up the sand using the same bulb pipette. Same concept – it makes a temporary mess of the water column, but much of the junk gets caught in the filter floss.
- Fill the ATO: If you have an ATO, glance in to check the water level and fill up with RODI if it’s getting low. Our 2.5 gallon [9.5 Liter] reservoir last several weeks in the winter and about 10 days in the summer between fills.
Weekly Maintenance – Water Change Day:
I’ve come to embrace water change day for our saltwater nano. I’ve gotten the whole process into a tidy sequence that doesn’t take too long (it’s faster than maintenance on our planted tank) and I feel this work has been the cornerstone of our tank’s success thus far.
I’ll say again, there are infinite ways to manage the workflow for maintenance tasks – I’m sharing the nitty gritty details of my water change process, but give yourself the freedom to come up with your own method. If you are in a hurry, a water change can be as simple as scooping water out with Tupperware container and pouring in newly mixed saltwater to replace. Done!
Here is a list of supplies that I use and setup to perform a water change:
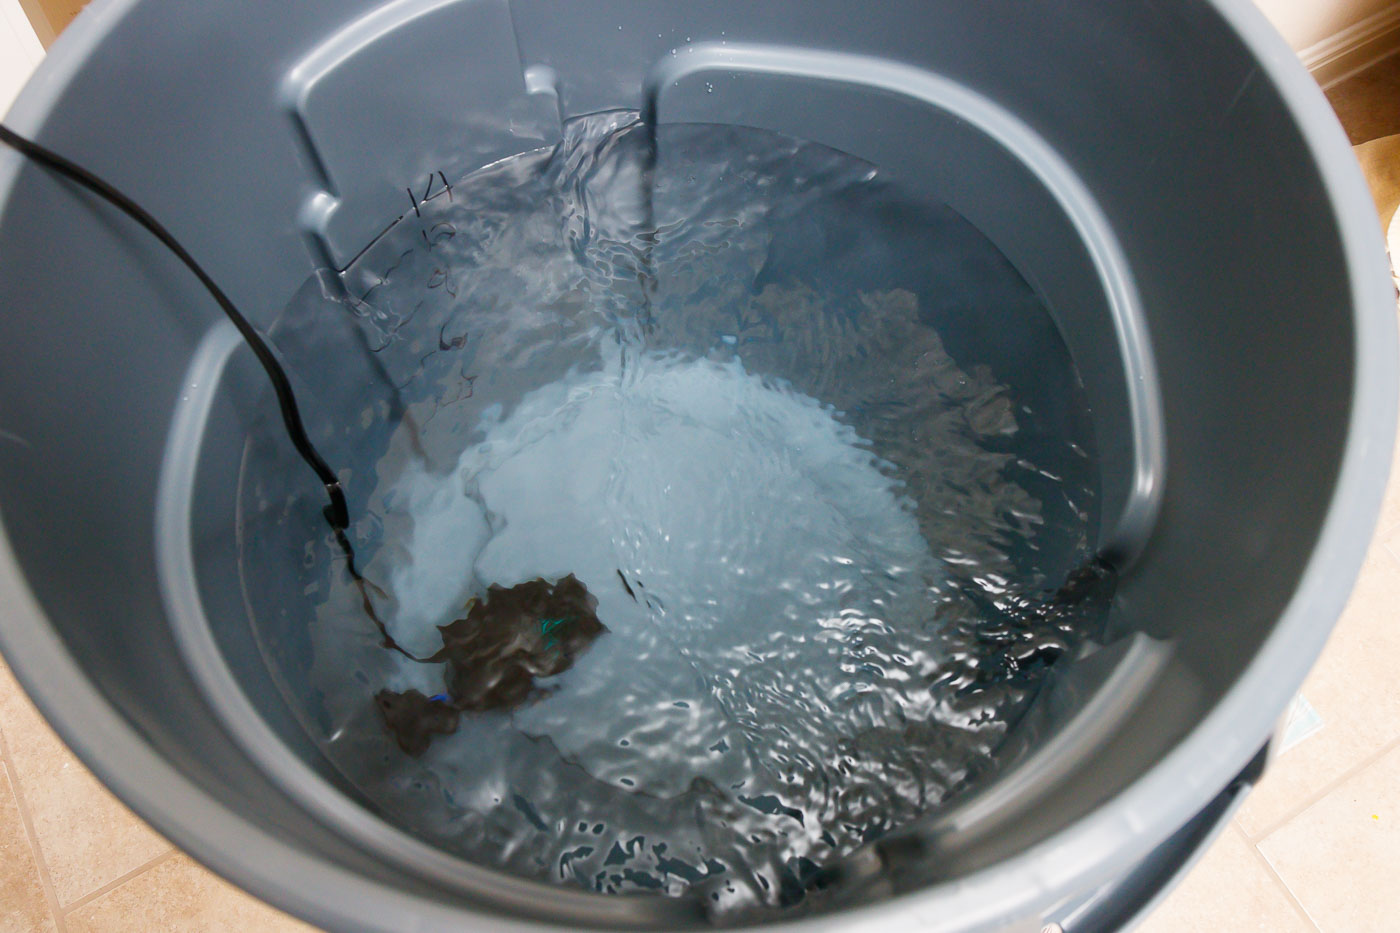
- Water: Mixed and ready to go (temperature matched to tank temp) in a rolling brute trashcan (how to mix saltwater article) or in a 5 gallon bucket.
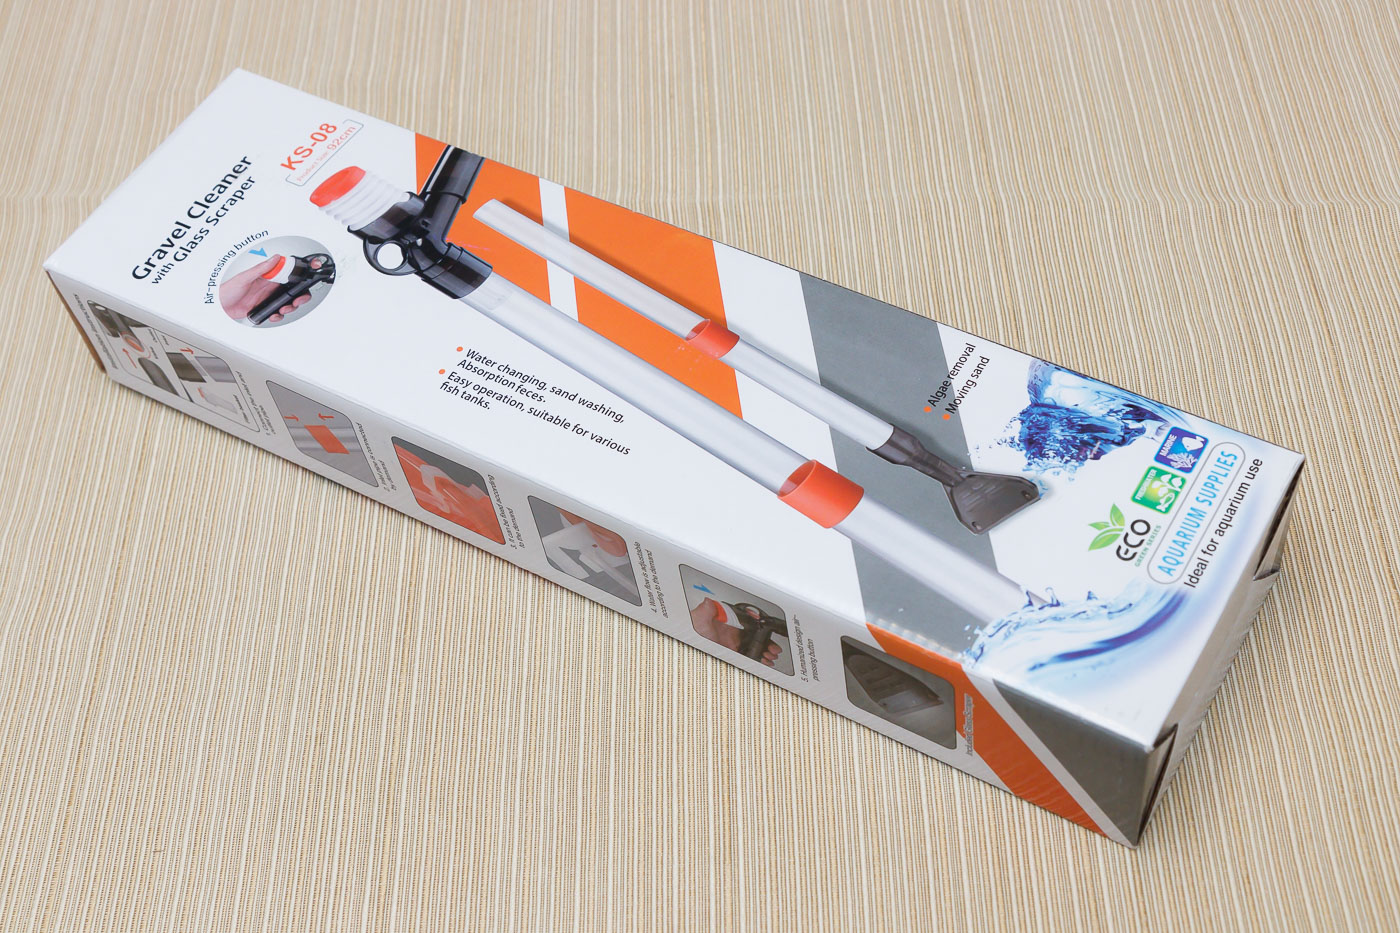
- Aquarium Gravel Siphon: I found this super simple water change siphon and it works great for our nano reef. It has a bulb to prime the siphon and a gravel vac appropriate for reef sand. It’s the right depth for a nano to boot.
- 5 Gallon Bucket: This is the ‘dirty’ bucket to receive the removed saltwater. The bucket I found has volume marks on the side – very handy for mixing and for tracking how much is removed.
- Cleaning tools: Nothing too fancy – I have a toothbrush and another scrub brush for cleaning rockwork. I always have an old credit card ready to move sand around or clean the glass at the sand line.
- Towels: It can get splashy.
- Transfer Pump: I’ve found it beneficial to use a pump to get new saltwater back into the tank – easier and more controlled than trying to pour in from a bucket. My transfer pump is made from the following parts:
Submersible Pump: This pump is a bottom suction pump that can operate down to 1/4″ [6 mm] of water depth. It has plenty of flow to transfer water quickly.
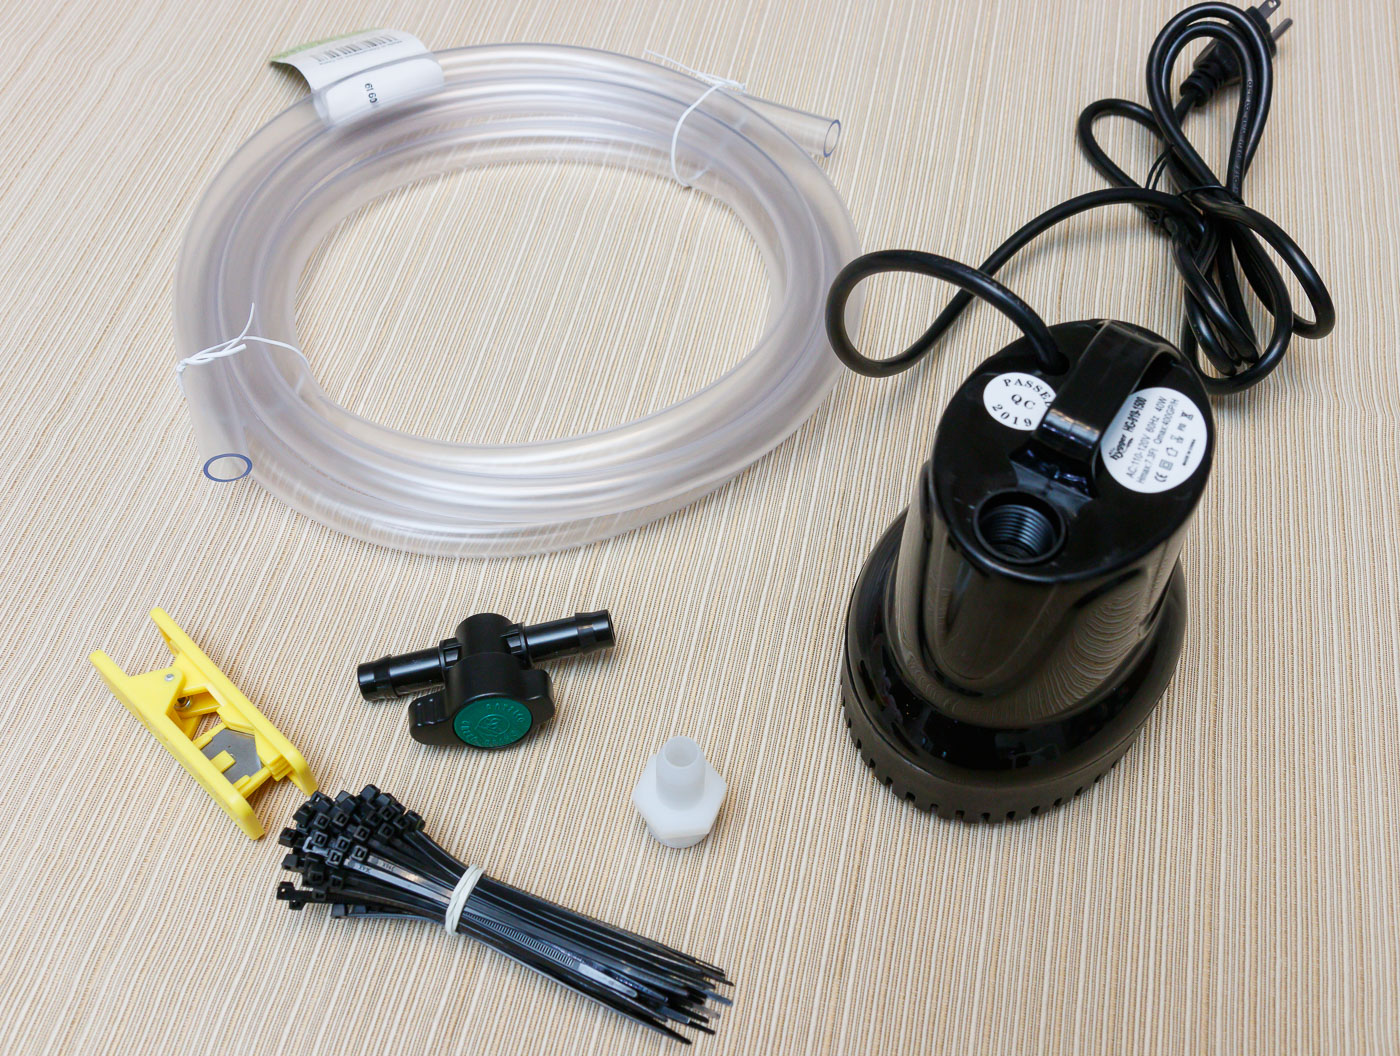
1/2″ MIP (NTP) to 1/2″ Barb Fitting: This fitting adapts down to a more reasonable tubing size for the application.
1/2″ ID (5/8″ OD) Vinyl Tubing: Fits the outlet of the adaptor.
Stainless Hose Clamps or Zip Ties: You might get by without these, but with them on, I never have to worry about an inadvertent fountain if a tubing end disconnects from a fitting.
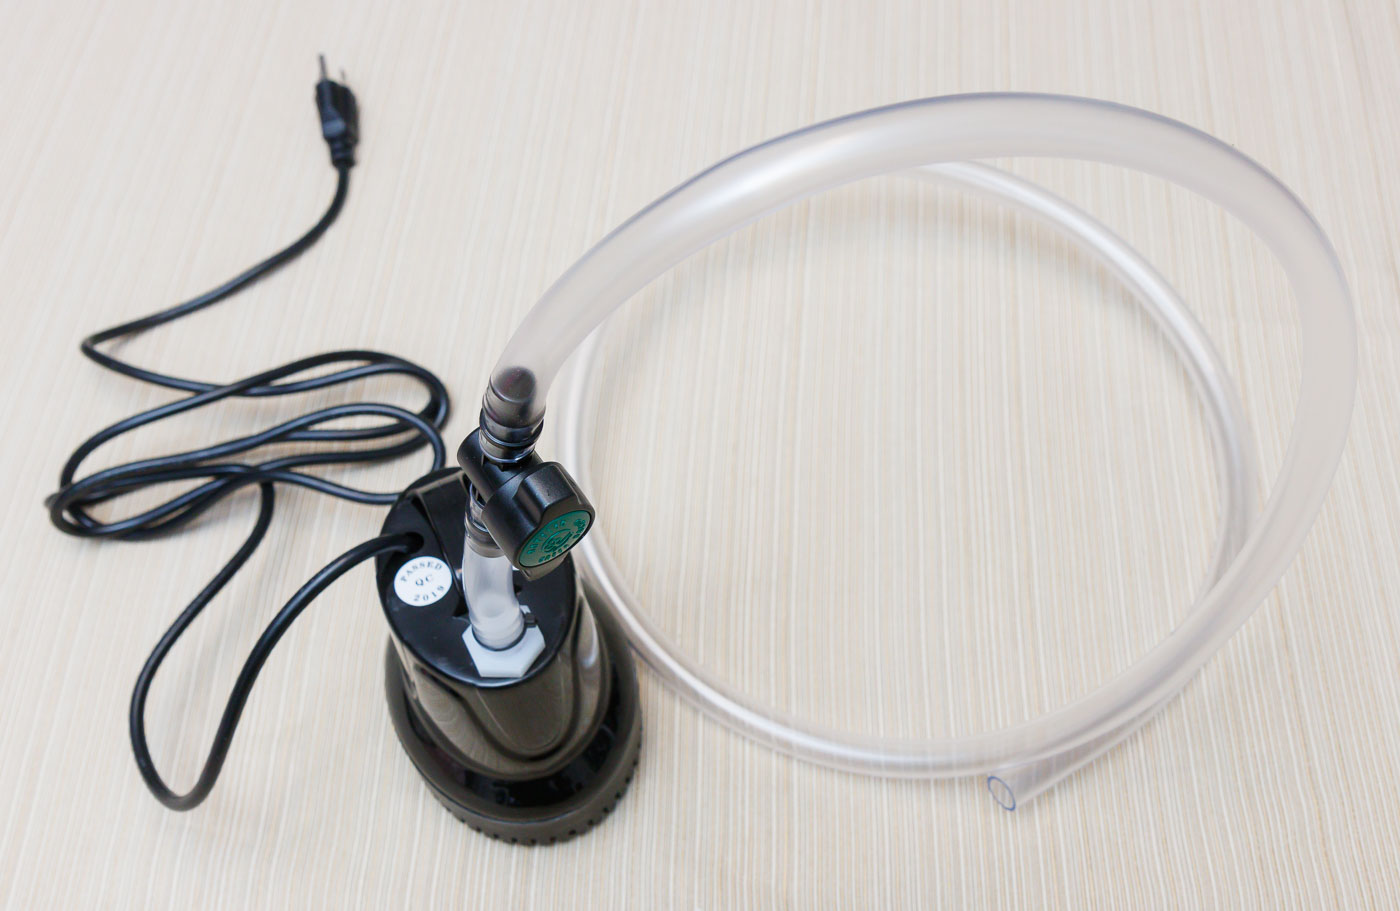
Valve: This is optional – I installed inline in the outlet tubing to give me the ability to throttle flow back if I needed a more gentle or slower fill. I usually leave this valve wide open.
With all the stuff out and ready, a water change goes like this:
- Turn off tank accessories: For our system, I kill power (using the individual switches on our power strip) to the return pump, wavemaker, and ATO.
- Remove the Aquarium Lid.
- Check the Temperature: Verify that the temperature of your newly mixed saltwater is close to display tank. It doesn’t need to be exact, but in the ballpark is a best practice. If I’m doing a 15% (ish) water change, I try to get the temperatures to match within a few degrees.
- Check the Salinity: You will be tempted to skip this step. Don’t. However sure you are that the salinity of your new water is correct, go ahead and verify. Wierd stuff happens and you don’t want to make a mistake. I get the salinity of the new water to match the display tank to the nearest 0.001 SG.
- Remove Water: Prime the siphon and start moving water from the display tank to the ‘dirty’ bucket. While I do this, I may or may not siphon junk out of the sand depending on how dirty it is or how long it’s been.
Siphoning the sand is easy, but there is a trick to keep as much of the sand in the tank and not in your bucket – pinch the hose to slow and throttle the water flow. As the gravel siphon fills with sand, you can pinch off the hose for a time and gravity will send the sand back down to the tank. It’s a fun balancing act.
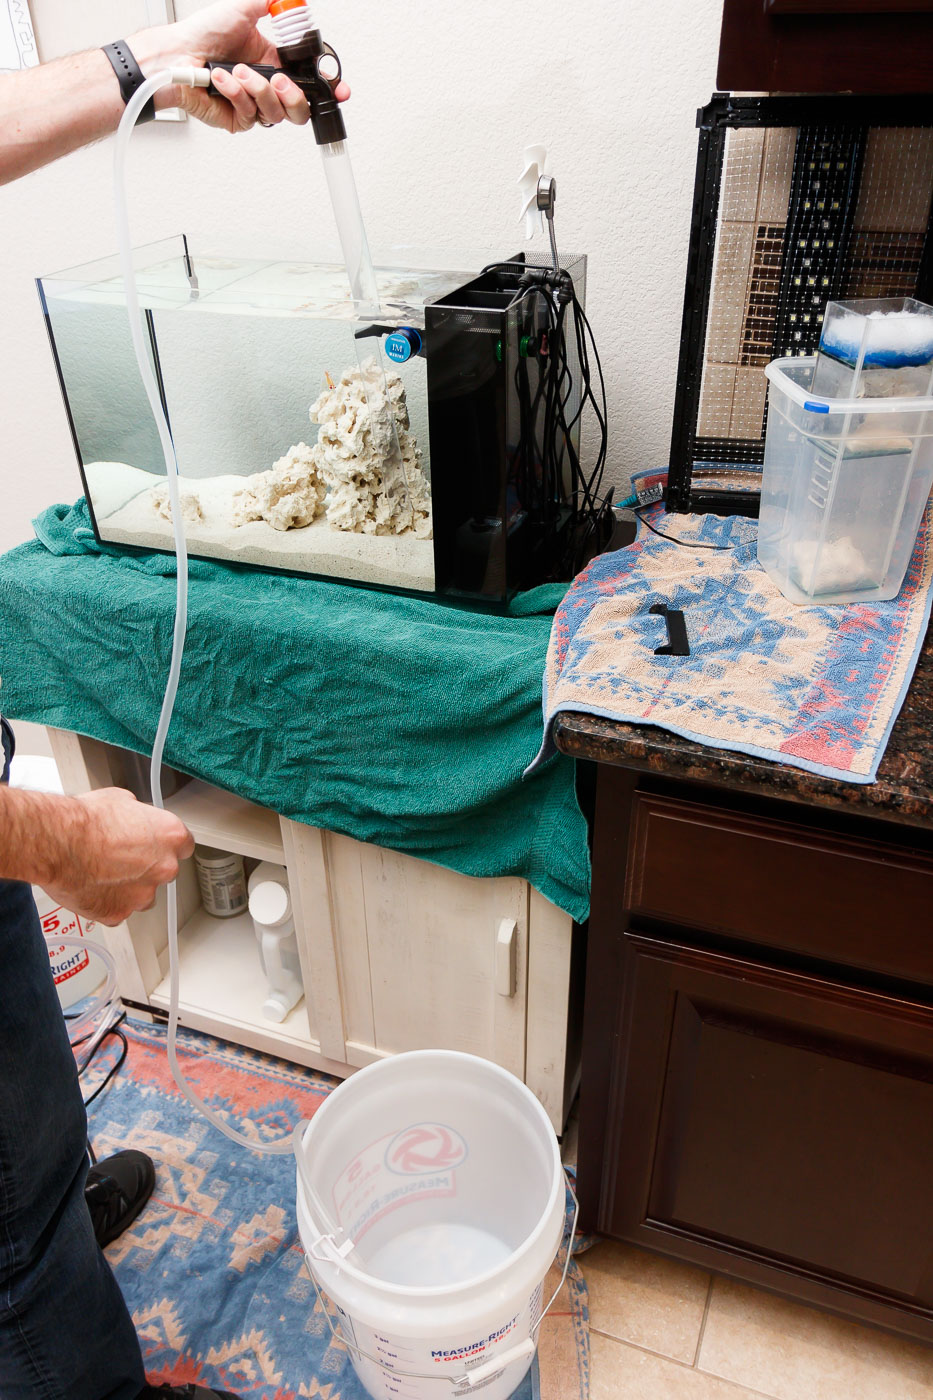
You will get some sand in your discharge bucket, and that’s no big deal.
Keep track of the amount of water you have pulled out. I mark a spot on the ‘dirty’ bucket with a piece of blue tape about where I typically want to stop. For our tank, this was usually around 1.6 gallons [6.25 Liters] for a 15% water change (of our 11 gallon capacity tank).
- Scrub rocks, back wall, etc.: This is optional, but if you have need to clean algae off of anything, low tide is a good time to do it. Even better is to perform this mid-way through removal of water. After you have the water column all messed up with algae bits, you can capture and remove some of that when you siphon out the last half of the water you plan to remove.
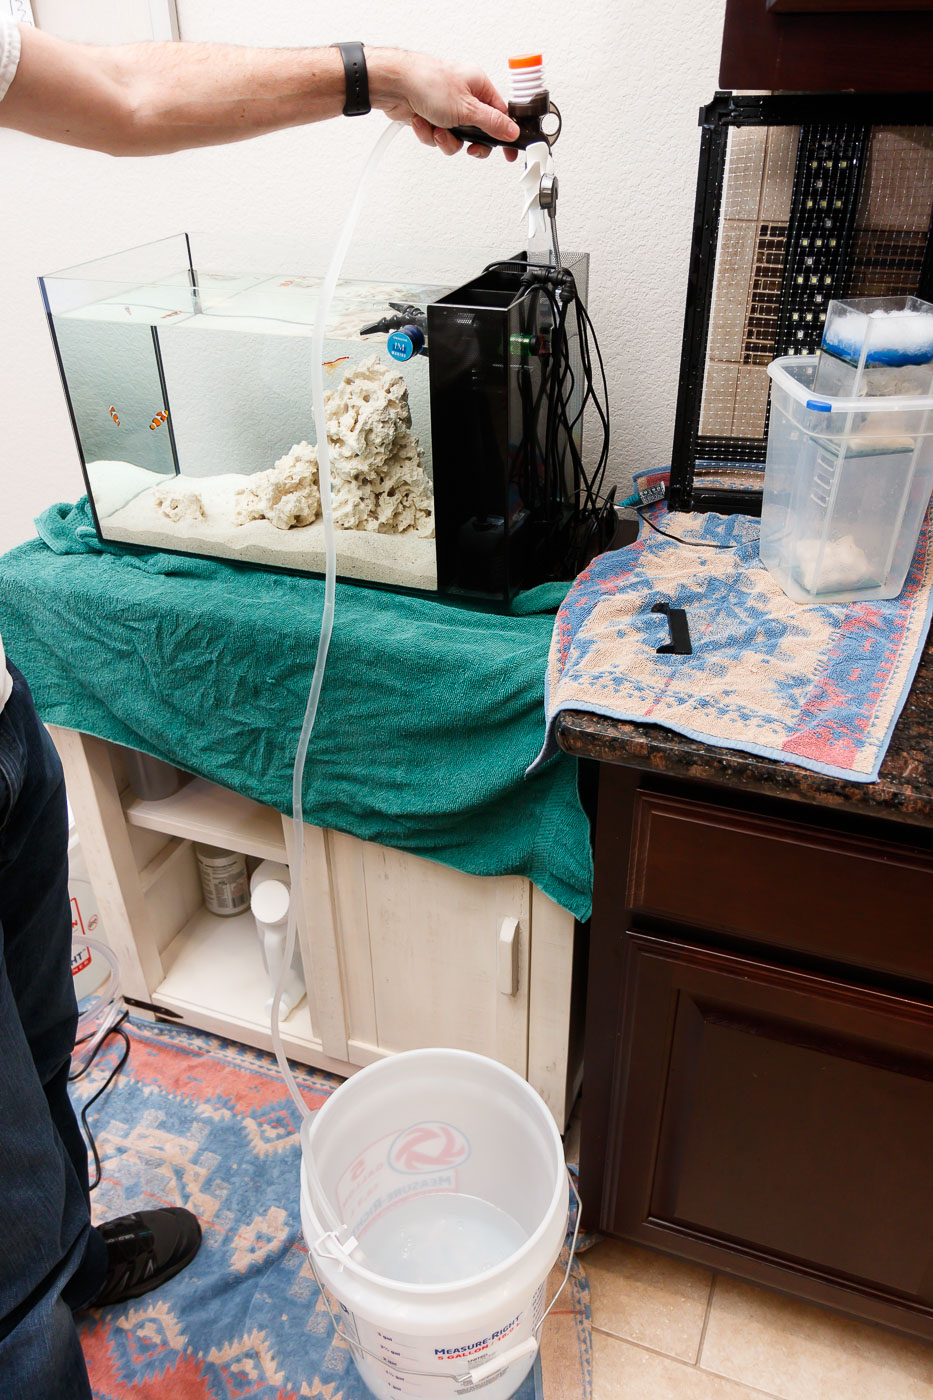
- Replace Water: I use our transfer pump to move water back into the tank to the appropriate operating level. I use a spare outlet in the stand and jockey the on/off switch to that outlet with one hand and hold the tube in the other. You can also use a clamp to hold the tube in place.
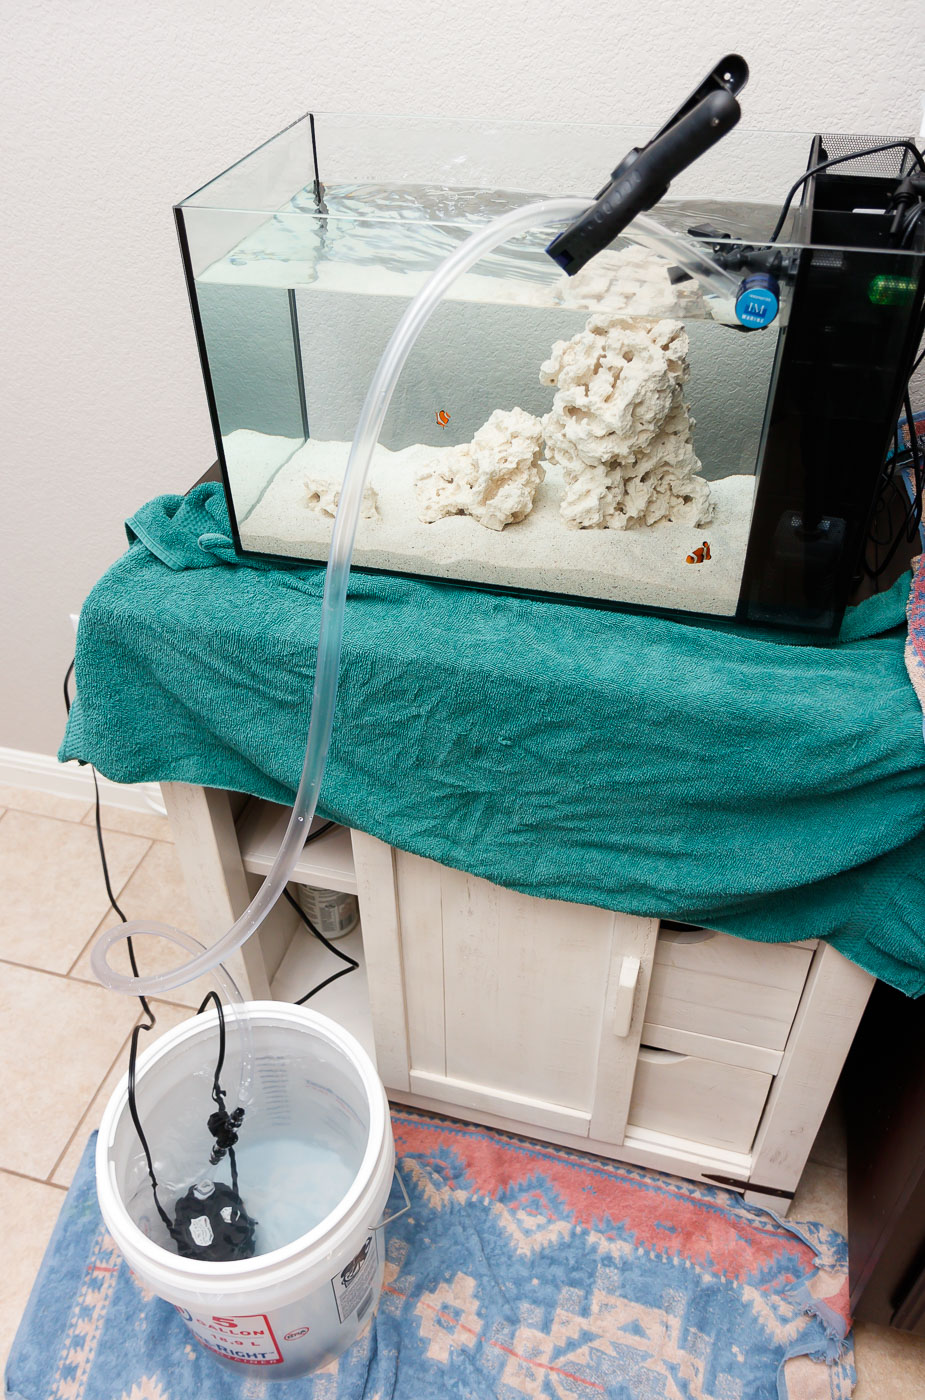
When I get close to full, I turn on the aquarium’s return pump to see how the level is reacting. I observe how water is flowing over the chamber one filter pad – if that pad is not submerged, I add more water. If that chamber is flooded and water is escaping over the side of the InTank Chamber One Media Basket, I remove a little water from the display section by scooping it out with a small Tupperware container.
- Check the ATO Sensor Location: Small changes in the tank’s filter can sometimes affect the water levels in the back chamber. If you are running an ATO, it’s good to double check that the sensor and/or float is located at the resulting water line.
- Discard the Old Saltwater: I wish there was something creative to do with the old tank water, but the only option I’ve found is to pour it down the kitchen sink.
- Clean up/Finish Up. . . Put Away: Easy Peasy! Put the aquarium lid back on. Restore power to all the equipment. Stuff doesn’t store too well with saltwater on it, so I rinse all the water change equipment off in the sink (using tap water) and place it in the ‘dirty’ bucket for storage.
Filter Media Maintenance in Your Saltwater Nano:
There are almost infinite options in a saltwater tank for filter media – I have discussed some aspects of selecting filter media in a marine nano already. Part of having that media work effectively is replacement in a timely fashion.
I’ll share what filter media replacement looks like in our nano:
- Filter Floss: Since we don’t run a skimmer in our nano, replacement of the filter floss is the primary means of nutrient export. You can tell the filter floss needs to be replaced in two ways. First, the color will turn from white to dark. Second, it will get clogged. The water flow through the chambers of our AIO tank will stall as the filter floss is obstructed with gunk.
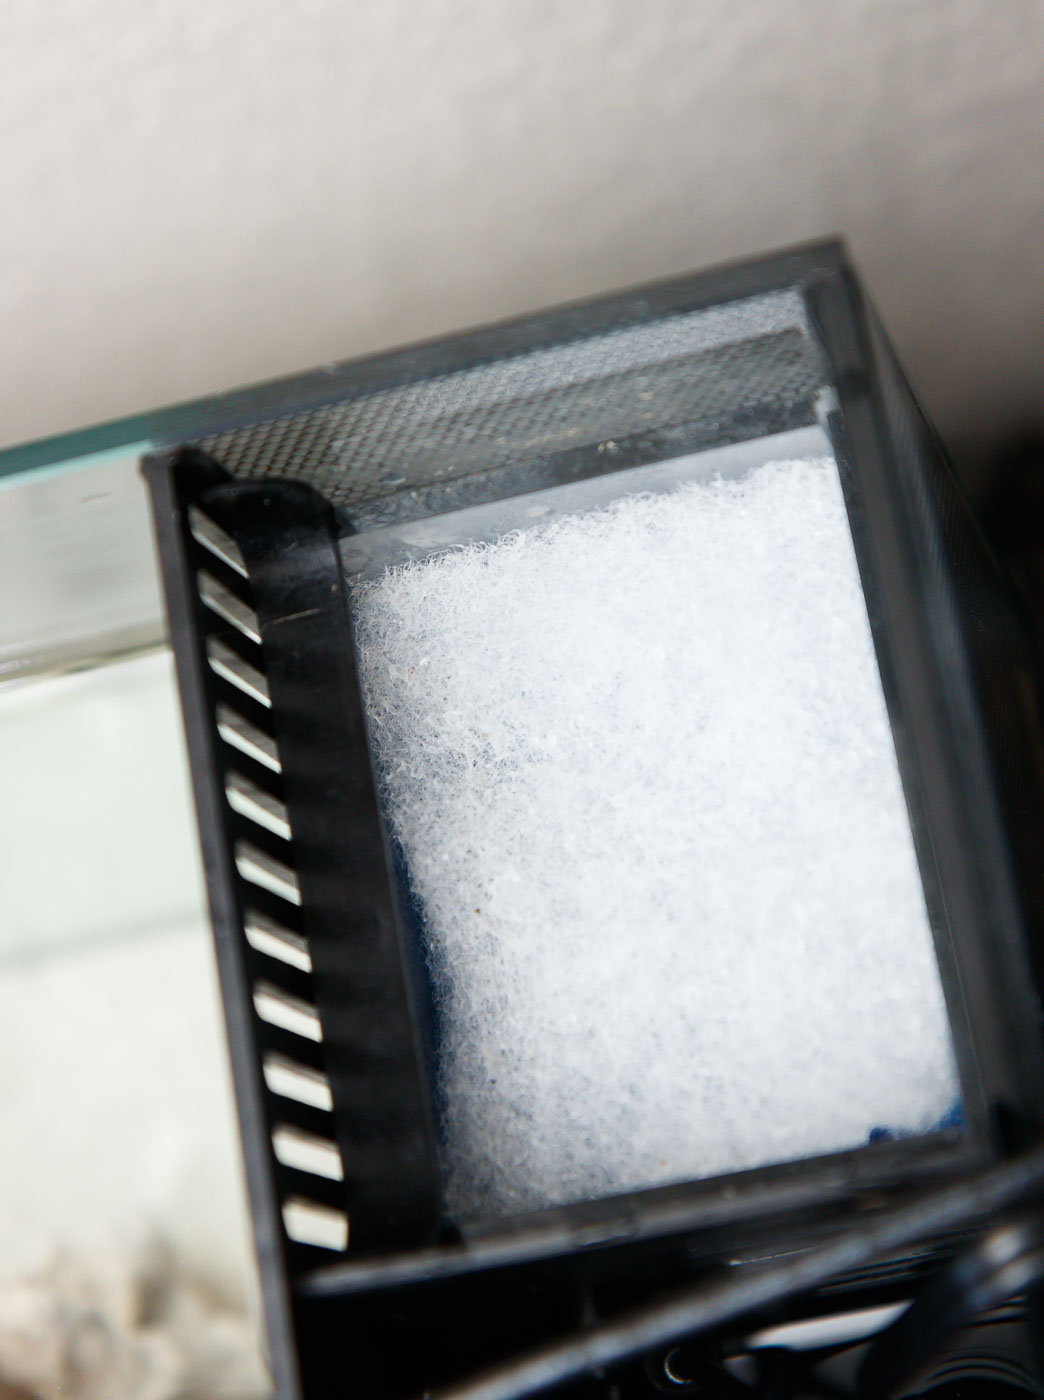
I keep pre-cut pieces of InTank’s Blue & White Poly Filter Floss in our stand, ready to swap out. For our bio-load, 5 days is the best interval to change out the filter floss. If it stretches to the 7-10 day range, no biggie.
- Carbon: Once a month, I toss the activated carbon and replace with a fresh (1) tablespoon of ROX 0.8 Activated Carbon (contained in a new disposable media bag). This quantity is based on manufacturer instructions; the frequency is by consensus of other reefers.
- Seachem Purigen: Every 2 months, I swap the 100ml Seachem Purigen bag out for a clean one. I then clean/regenerate the bag of Purigen I removed and store it in a ziplock bag with some RODI water, ready to swap in next time.
- Seachem Phosguard: I only use this media when phosphate levels test high. I use the prescribed quantity (two teaspoons for our system volume) in a disposable bag. I don’t replace until a phosphate test reveals that the reduced phosphate levels begin to rise again.
You probably understand the concept behind filter media maintenance intervals – it can depend on observed conditions, manufacturer instructions, water parameters, and the nutrient load.
Extended Frequency Maintenance Items for an AIO Tank:
Here are a few other longer interval maintenance tasks to perform:
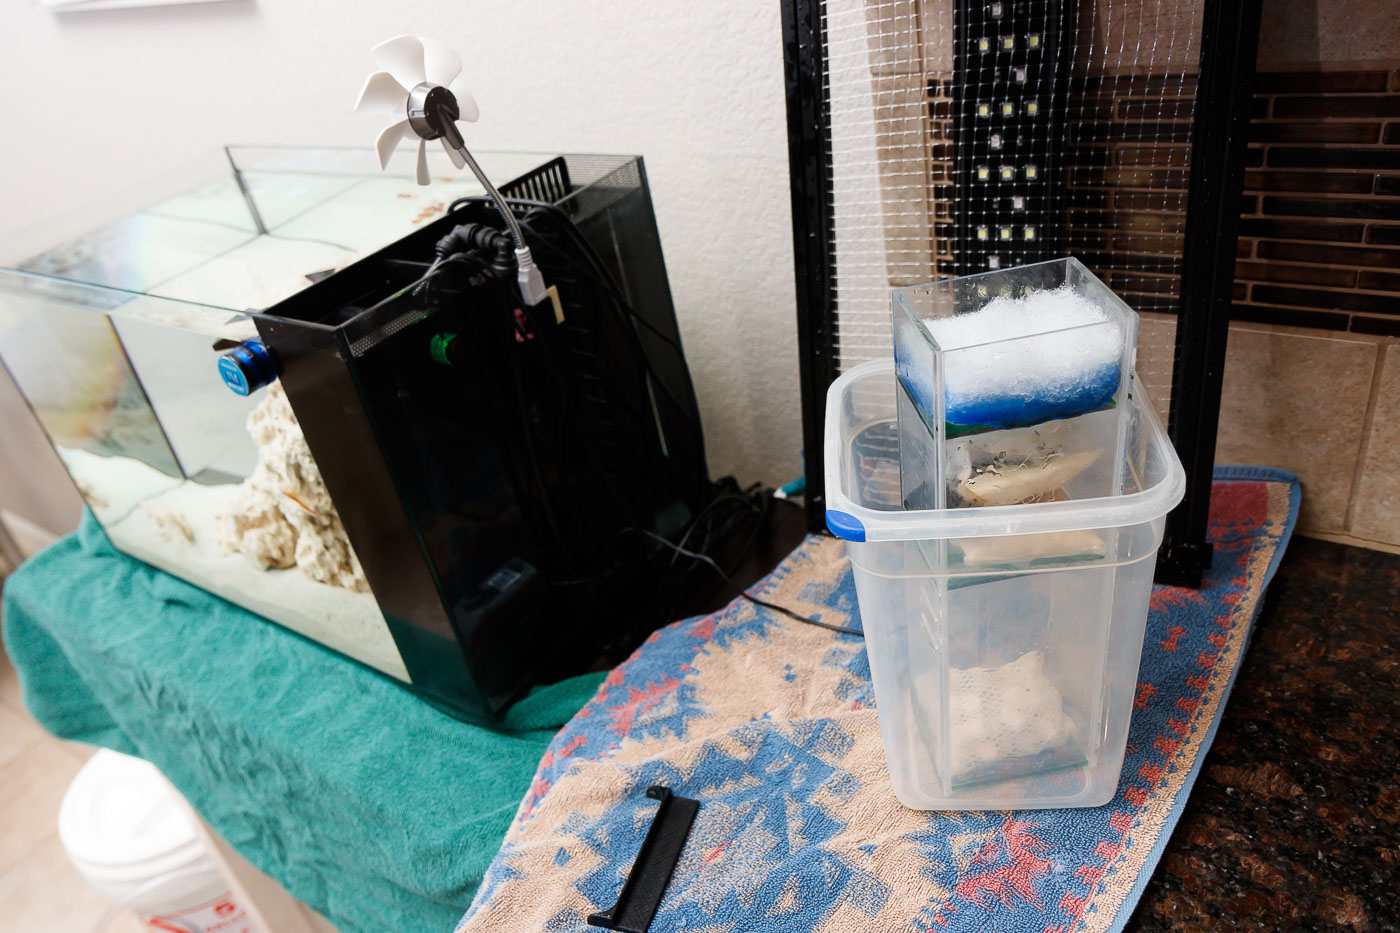
- Clean the filter/pump chambers (or your sump): In an AIO tank like the Fluval EVO 13.5, you do occasionally need to clean out the filter and pump sections. I do this by removing the filter media caddy, scrubbing the walls with a piece of pot scrubber, and siphoning out the water from the back chambers.
- Clean the Pumps: After a year of use, I noticed that flow from from the return pump of our AIO nano was noticeably reduced. This brought to light the need to occasionally clean the return and circulation pumps.
The easy method is to take the return pump out, remove the cover(s) and the impeller, and scrub the pieces and internal clean with a brush.
The slightly harder method is to perform the easy clean, then run the pump in a separate container of 1:1 vinegar and tap water for 10 minutes or so. After the vinegar rinse and run, rinse the pump with tap water and then rinse with some RODI.
For wavemaker and circulation pumps, I clean occasionally with a brush. If it get’s clogged with coralline algae, a separate vinegar bath and clean is in order.
For our tank, I usually look to clean the return pump every 3-6 months.
- Clean the Hood / Lid: I abandoned the stock EVO lid right away, but the mesh Innovative Marine DIY top we use needs an occasional cleaning. Any hood or lid will accumulate salt creep over time. You can rinse/wipe with RODI water or occasionally wipe with diluted vinegar and follow up with a RODI water wipe down. I rinse off our hood every two to three weeks.
- Clean the Aquarium Exterior Glass: I only use RODI water and a microfiber cloth to clean the outside of the tank’s glass. This is on an as-needed basis, which is every few weeks on our tank. I have always avoided using cleaners of any kind on our tank’s glass – I think the risk of contamination and catastrophe is too great.
- Clean the Mixing Bucket: All saltwater mixes leave residue over time. The Tropic Marin Pro Reef salt that we are using now is fairly clean, but the Brute mixing can still occasionally has growth inside. For a time when we can use up all the mixed saltwater, I will empty the container, rinse with tapwater, and wipe down with a clean cloth. I finish up with a good RODI water rinse.
- Maintain RODI Water Station: This deserves a separate article, but you should track the usage and life of media used in your RODI water station.
- Clean ATO Sensor: Every two weeks or so, I maintain the Auto Top Off sensor. The sensor in our AutoAqua Smart ATO Lite is optical only – I wipe down with RODI water and a microfiber towel outside the tank. If you have a mechanical float type sensor, you will need to clean off any salt creep or other deposits that can impede movement.
Final Thoughts on Maintaining a Saltwater Nano:
I touched on this at the beginning, but the main idea of successful nano reef maintenance is observation. Take note of the condition for inside the tank as well as the equipment. Make it a habit to put eyes on all the critters, the rocks, the filter media, and the equipment.
By simply making the rounds visually of your tank and inhabitants, you will notice things that are headed downhill and that will need attention in the near future.
A final thought relates to an article I wrote a while back (Aquarium Maintenance – Sometimes Good Enough is Best) – Life sometimes get’s in the way of our reef hobby. Sometimes motivation or energy wanes and you don’t want to face all of the maitenance.
This is understandable – don’t give up! Prioritize and try to tackle the biggest (most important) items first. If the tank is neglected, but you can’t face all the maintenance that is piling up, just do one thing. Swap out the filter floss, or perform a quick water change. Something is better than nothing, and the little interim tasks can keep a tank crash at bay while you plan further maintenance in the near future.
Finally, decay, breakage, wear/tear is part of life and part of this hobby. Embrace the challenges and learn to love the process of managing your tank.
