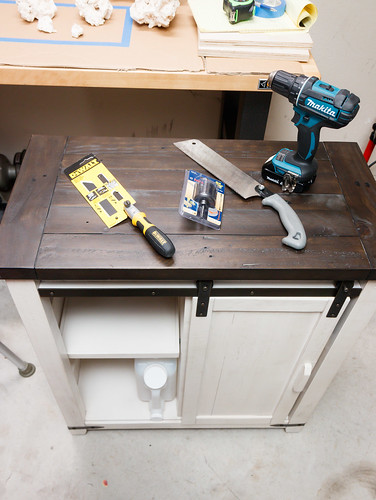
I discussed in “Project EVO Marine Part 2: Aquarium Stand and Placement” that one of the great benefits of nano AIO (All-In-One) aquariums is that you can use regular furniture pieces as your tank stand. However, one drawback to using regular furniture for an aquarium is that it might need some modifications to fully meet your needs, especially if you are setting up a saltwater aquarium.
I found a few things about the furniture that needed to be modified; you may find these to be common for your DIY aquarium stand:
- Places to Mount Components: Our nano reef will have a number of controllers (temperature, ATO [Automatic Top Off] system, lights [future]). It’s alot tidier to keep the controllers mounted to a vertical surface instead of hanging loose or taking up space on a shelf. Furniture might not have a suitable surface to mount controllers or, as in our case, the wood was too thin to support the weight.
- Pathways for Power and Hoses: Aquarium stands need to have a way to get power into the stand, and a pathway through and out of the stand (and to the aquarium) for various power lines and hoses. More than likely furiture will not come with these pathways in place – some holes or openings will need to be cut.
- Strengthen the Structure: Some furniture might be a bit weak along the centerline to support the weight of an aquarium. Now is a great time to add a bit of wood to support the weight down to the floor.
I made modifications under each of these categories to our EVO 13.5 stand. I’ll show what I did to our stand and hopefully, this will give ideas of what you might want to do for your situation.
Component Mounting Surfaces:
I purchased some 1/2″ laminate wood at the hardware store to add to our furniture piece so that I’d have something substantial to mount equipment components.
I decided that all of said control pieces would be on the upper shelf. First, I cut two pieces with one on the back wall and the other on the (right) side wall. Then, I affixed both of these to the thin furniture backing with stainless pan head screws.
Further along in the process I ended up removing these and spray painting to (roughly) match the interior paint of the piece. I also painted and installed a piece of quarter-round to cover the exposed leading edge of the right hand piece.
Cutting Holes in Your Aquarium Stand for Wiring and Hoses:
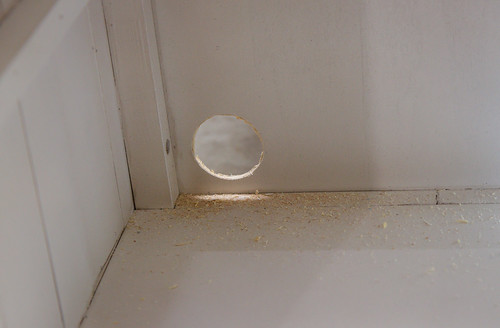
I used a 1-3/4″ hole saw mounted into an impact driver (it could also be driven with a plain drill) to cut holes in our stand.
Before cutting, put some thought into where you need pathways. I ended up cutting 6 holes:
- One at the back (lower left) for power cord entry.
- One at the back (upper right) for all the wire/tube exits up to the end of the tank.
- Two in the shelf floor that separates upper from lower.
- Two in the dividing piece to get cords/tubes up and through the stand.
Other than carefully thinking through where you want the holes, there really isn’t much to it. A few tips:
Cut Holes from “Pretty” side to “Ugly” side: Any hole saw bit will tend to tear the wood where it exits. Therefore, cut the hole from the side you would like to look more attractive and live with some splintering on the opposite side.
Cover hole exit with Duct Tape: To help reduce splintering when the saw exits the wood, cover the back side with a layer or two of duct tape. It won’t work miracles, but it might reduce splintering a bit.
Structural Bolstering of Aquarium Stand:
Luckily, the furniture we chose for our Fluval EVO 13.5 was fairly stout and I didn’t have many concerns as far as structural integrity. It has a center support board that separates drawers on the right side from the shelves on the left. This is good as it gives some support at the center and transfers weight down to the legs.
If your furniture piece does not have this, consider if you need to add some wood to support the center. Simply wedging a 2×4 at the center may be all it takes.
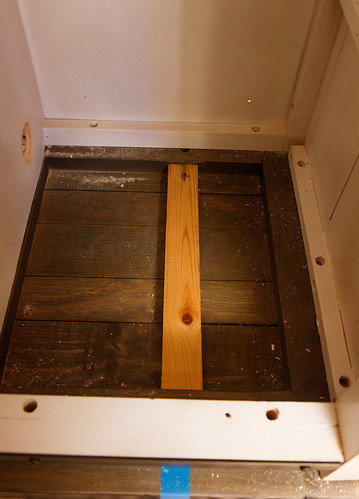
I did find one area to add just a bit of support. Our stand has separate wood pieces that form the top. It was supported at the center, but I added two additional 1×2 pieces midway between these spans. I attached these with wood screws driven in at an angle.
Aquarium Stand Odds n’ Ends:
I have been extremely excited about having an ATO system for our nano marine tank. It is going to be super helpful not having to constantly baby the tank’s evaporative losses.
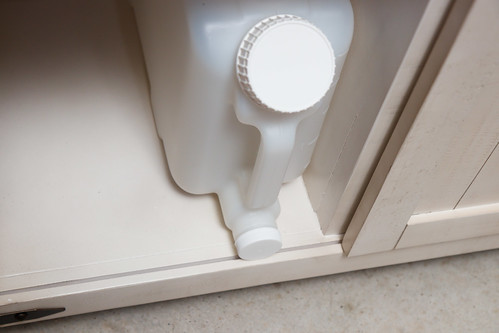
Part of getting the ATO system into place was selecting a good fresh water reservoir to place in the stand. I found the perfect shape and volume in this 2-1/2 Gallon Container. It even has separate openings: one for the pump tube exit and other larger screw cap to refill (with RODI water). I like how it sits upright and does not take up too much shelf real estate.
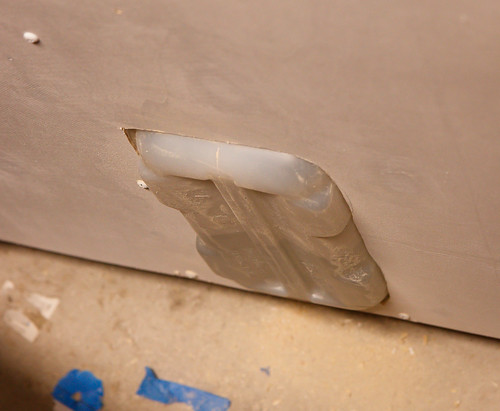
I thought I measured carefully, but when I got my prized makeup container in place, I realized it was about 1/2″ too long and the door now would not slide close.
After much pondering, I decided to cut out the back of the stand so that the makeup water container could fit (with about an inch or so hanging out the back).
Perfect! Well. . . it works and nobody will ever notice back there.
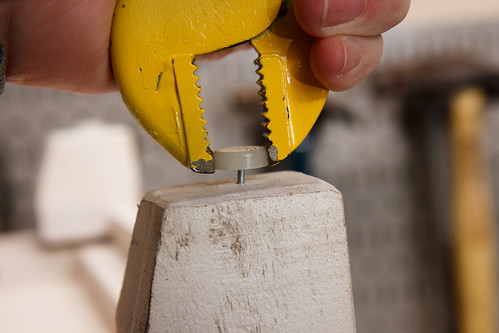
Last thing was that the furniture had plastic feet at the bottom of each leg. I didn’t trust this plastic bit to hold up under the weight over time and I didn’t like the possibility of the whole stand and aquarium sliding on this slick nub. So, I decided to pull those out.
My effort with the stand gets us that much closer to getting this tank put together. I’d suggest not rushing this part of the build. Take time to plan out not only what equipment is going in now, but also what you might want to install in the future. It’s much easier to deal with these modifications now rather than later with a full aquarium sitting on the stand.
After the install, I plan on another post to detail how to arrange components and wires in your aquarium stand.


