One thing that came up over and over in my research of saltwater aquariums was the need to use RODI water (Reverse Osmosis, Deionized) as the base for mixing saltwater. It seemed compromising on this (by using tap water instead) was out of the question if I wanted a successful nano reef.
Honestly, the biggest reason to use RODI over tap water is control and consistency. With a good RODI system, you start every saltwater mix with a clean slate. No chlorine, phosphates, silicates, or any other unknowns your local water supplier may be putting into your water.
Speaking of control, not only do I not trust the water from the tap, I don’t even trust RODI water (or mixed salt water) from a fish store. They are great guys and gals; super helpful. I just wanted to control the process myself, not to mention be self-reliant to produce RODI and saltwater on my own when I need it.
I’m going to run through the basic purchase list of items to get our RODI system installed and running and also give steps to installation.
RODI for a Nano Aquarium – System Select and Parts Needed:
I discussed this a bit in Part I, but as a quick refresher, I found a great vendor, Liquigen, on Amazon that sells reasonably priced and complete RODI systems. I ended up getting a 5 stage RODI unit from them that in addition to producing RODI water, it also can make re-mineralized drinking water.
The five stages of filtration on this unit are: (1) Sediment, (2) UDF Carbon, (3) Coconut Carbon, (4) Reverse Osmosis, and (5) Dionization. To make drinking water, stage (5) switches (by way of manual valves) from Dionization to a remineralization stage.
I considered the portable 4 stage RODI unit – it is much cheaper and, even though it has one less filtration stage, it should do just fine to produce RODI water for a nano aquarium.
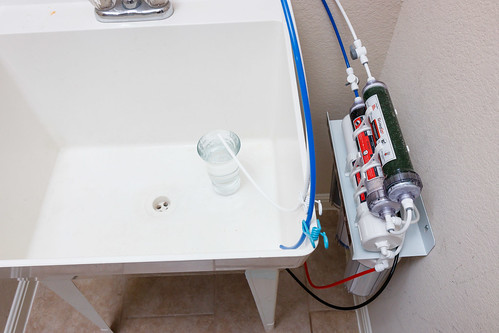
The Liquigen RODI unit came with an adaptor to hook the unit’s supply tube to a garden hose spigot. This would have worked had I installed in the garage (where we have a spigot next to the water softener), but I decided to install the unit in our laundry room next to a utility sink.
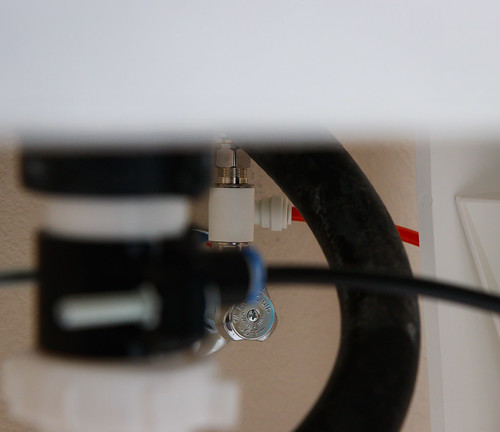
Connecting the unit to the sink requires two accessories: an Angle-Stop adapter valve (to provide an an on/off valve at your sink cold water connection) and a clamp saddle to 1/4″ push connector
to connect the reject water tube to the sink’s drain.
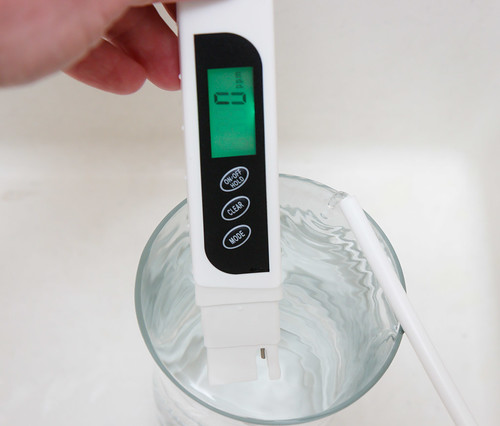
The last related accessory I got is a TDS (Total Dissolved Solids) meter. One defining characteristic of RODI water is it has a TDS of 0 PPM. I wanted to get the meter to verify the quality of RODI water being produced from our system.
Steps to Installing Our RODI System:
To mount and get our RODI system up and producing water, I did the following:
- Complete Assembly of RODI Unit: Liquigen typically ships their RODI units with a few fittings not installed. These fittings, located on the ends, would have a high probability of getting broken off if shipped installed. The instructions are very good. Wrap teflon tape (provided) around the threads before screwing into place. Then, install the tubing into the fittings.
The push-connect fittings (for 1/4″ OD tubing) typically used on all RODI systems of this size are super easy to use. Making a connection is as simple as pushing the tubing into the quick connect fitting as far as it will go. To remove, you press the collar back (away from the connected tubing) and pull the tubing out.
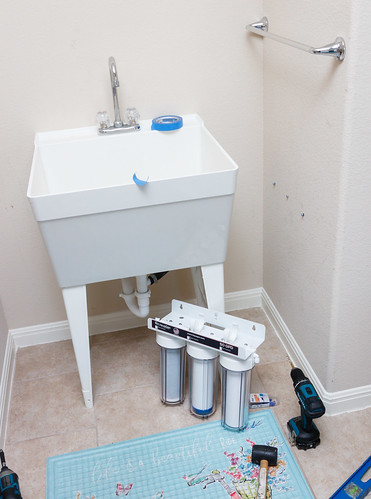
- Mount to Wall: The utility sink in our laundry room has a nice nook – I found that the RODI unit could fit to a side wall and still have enough room to access it for maintenance.
The back of the unit has (2) key -holes for mounting to a wall with screws. The way our studs lined up, I had to also use the center hole for support.
For planning purposes, know that this unit is 15.7″ [40 cm] wide by 19.7″ [50 cm] tall and 5.9″ [15 cm] deep. Full of water, it weighs around 24.5 lbs [11.1 kg].
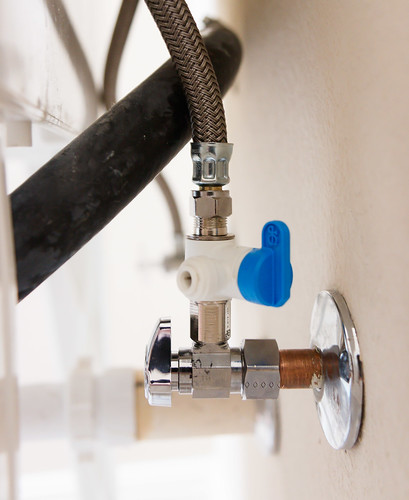
- Install the Cold Water Valve: Installing the valve to supply water to the RODI unit was not bad at all, thanks to the John Guest angle stop valve that I got.
I first needed to shut off the cold water stop valve behind (or under) the sink. Open the cold water faucet to release any pressure. Then, use a wrench (I just used an adjustable wrench) to remove the braided hose from the stop valve.
The John Guest valve then installs in place of the braided hose connection that I just removed.
Finally, re-install the braided hose back to the top of the newly installed angle stop valve. Make sure that the new valve outlet (the blue valve handle, that opens/closes flow through the tee) is in the closed position (closed is with the blue handle perpendicular to the ‘tee’ water flow).
Then, open the stop valve at the wall and check to verify there are no leaks.
- Install the Drain Saddle: The drain saddle is a fitting that allows a push-connect fitting to drain into the drain under your sink.
Installing it is easy. First, I looked for a space on the existing sink drain pipe where the clamp would fit. On our sink, the best place was up high, prior to the p-trap fittings. Know that the clamp needs to be installed prior to the p-trap; installing after the water seal in the p-trap would probably lead to sewer gas smells leaking out of the new hole.
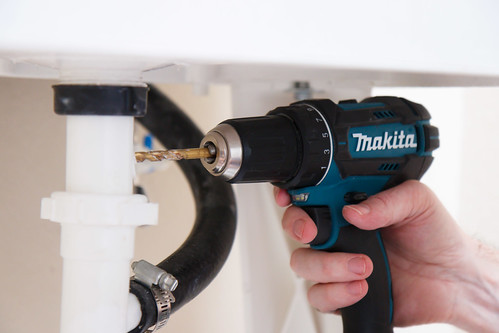
Once a location was found, I used a 1/4″ drill bit and drilled a hole through one side of the pipe. I drilled the hole on the side where I anticipated the RODI waste water connection would be routed to.
After the hole was drilled, I installed the adhesive gasket around the hole.
Lastly, I installed the two halves of the saddle clamp. To ensure the hole you drilled aligns with the push fitting in the saddle, insert the drill bit you used previously while you tighten things up.
- Cut and Install Tubing: For the Liquigen unit that I got, tubing colors are as follows: Red is inlet (water flowing into the RODI unit to be filtered), Black is reject water, Blue is drinking (remineralized) water, and White is RODI water.
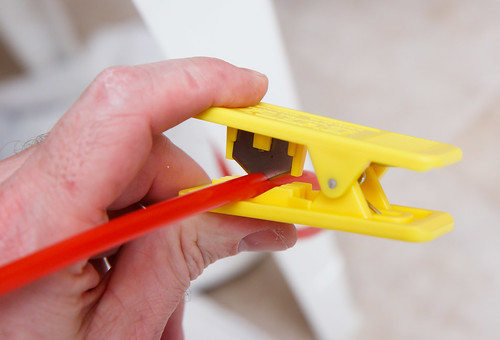
I routed the inlet tube to the new supply valve, marked the length, and cut. Liquigen was super cool to send a cut tool that clips the tubing at a right angle, which is important to make a leak free connection.
I did the same for the reject tubing (routed to the saddle clamp connection).
- Check Connections: I think it’s common for a new RODI unit to leak a bit – I have heard of complaints on a few Amazon reviews. It doesn’t have to be a big deal – It just involves a few quick checks and maybe a slight modification (with teflon tape
, in our case – more on that in the test phase).
Check each tubing connection by pressing the tubing fully into it’s fitting.
Liquigen provides a handy circular wrench that is used to tighten the filter housings. The housings have a black o-ring at the junction between the housing (clear part) and the receiver. You don’t need to tighten this super tight – but put enough umph on them to get that o-ring compressed a bit.
- Make Some RODI Water (Test for Leaks): Now comes the exciting part – making your first batch of RODI water. For the dual use (RODI and Drinking) system we ordered, you have to arrange the outlet valves to make RODI water (open the valve on the white [RODI] tube and close the valve on the blue [remineralized] valve].
Best practice (especially for a brand new system) is to flush out the filters upstream of the RO membrane for a few minutes before you start making water. You do this by turning the flush valve parallel (as shown below).
Clamp the outlet tubing to discharge into a container (always important – it will get messy if it’s discharging onto the floor). Then, turn the supply valve on. You should hear water flowing down the Black [reject] tube and gurgling down the drain. Let this flush for 15 minutes for your first run (normally, 5 minutes is adequate). While it is flushing, check for drips / leaks.
Once the filters are flushed, switch the flushing valve back to perpendicular (to force water through the last two stages). This should slow the gurgling a bit and you should now see water dripping out of the discharge tube.
Once you are making RODI water and all stages are pressurized, check again for leaks. In our case, I had the slowest possible drip coming from the second stage filter housing. I grabbed the wrench and tightened the housing again, but it continued to drip. At this point, I resorted to unscrewing the housing fully, wrapping 3-4 rounds of teflon tape around the housing threads, and tightening again. That did the trick – no leaks and job complete.
Final Thoughts on RODI System Setup:
It’s important to test the resulting RODI water to verify it measures 0 TDS. I’d toss the first few gallons of RODI that is produced as the brand new filter media might need to be flushed. After this initial run, check the RODI water and hopefully you will be rewarded with a 0 TDS reading.
This system is rated for 50 Gallons [189 Liters] per day output. Liquigen (as well as other RODI system manufacturers) warn that in actual use it produces RODI water at a slower rate (based on loading of the filters as they age, incoming water pressure, etc.). Mine actually produces 2 gallons [7.5 Liters] per hour, which is 48 gallons [182 Liters] per day. I really don’t have need for a faster production rate than that. You always will have to wait; it doesn’t add up to much time for the small quantities of water you make for a nano reef.
Liquigen, at my request, included the unit as pre-piped with a pressure shut-off valve and check valve. This combination allows you to shut off the system flow with a float valve (installed in your RODI bucket or bin). I ended up not getting the float valve. I’m not sure I trust a float valve to work 100% of the time – if it fails, the unit will continue to produce RODI water until you intervene.
Since I don’t yet trust a float valve, and I’m forgetful, I’m going to always fill a container sitting in the utility sink. That way, if I (when I) forget to shut it off, it will harmlessly overflow down the drain.
Alternatives to Installing an RODI System:
Lots of people reading this may be thinking, this is too much. Maybe it is the cost, which is a significant chunk of my budget for this build. Maybe it is the complexity of plumbing, or you don’t have the space.
If the issue is plumbing or space, some people use the RODI unit as portable – store the unit someplace convenient, get it out and connect to a faucet and drain to the sink.
Lots of people who don’t desire to get an RODI system for their reef aquarium look to use tap water to mix their saltwater. I can’t recommend this approach as it seems to offer a low chance for success over time. Instead, purchase RODI (or mixed saltwater) from your local fish store. If a LFS is not convenient or available, purchase distilled water.
It sure feels good to get this system setup and working well. I like the install near the utility sink – very convenient and out of the way. I like that I can now produce pure water that will be a consistent base to make my own salt water. More to come . . . Part IV will cover Auascaping for our Nano Reef.


