Cycling a new aquarium is somewhat exciting. Kind-of like watching paint dry or organizing your junk drawer. I kid, but it is an important process to setup a good foundation for your saltwater tank and to make it safe for critters.
I’m going to discuss what is means for an aquarium to be ‘cycled’, how you start the cycling process, how to verify that the tank is cycled, and I will go over some basic marine water parameters and their target values.
What is a ‘Cycled’ Aquarium, and How to Start the Cycling Process:
I have another page here where I discuss the process of fishless cycling an aquarium. The process is the same for saltwater aquariums, but I think the stakes are a bit higher with a reef tank since the critters you are adding are possibly more expensive than freshwater critters (at least in our case).
I would define a cycled aquarium as follows:
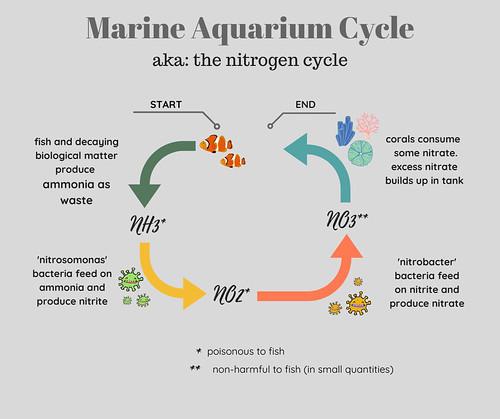
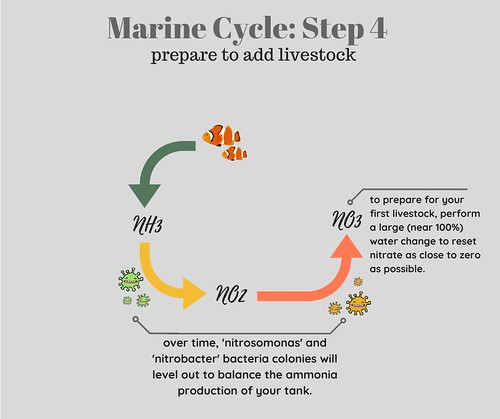
A cycled aquarium is one which has established bacterial colonies to convert Ammonia to Nitrite (both of which are harmful to fish and invertebrates), and Nitrite to Nitrate.
Simple enough. This picture illustrates the process:
Step One: ‘Seeding’ your Reef Tank with Beneficial Bacteria:
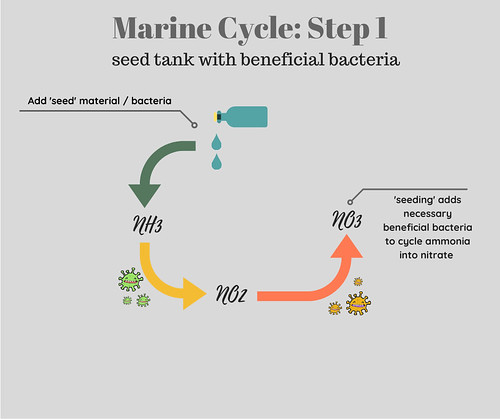
So how do you start this process of establishing the beneficial bacteria that your tank needs? Step one is to ‘Seed’ your tank with beneficial bacteria. There are a few ways to do this. The easiest and most surefire way is to get some material from an established tank, like a scrap of old filter media.
If you have a Local Fish Store (LFS) with marine tanks, drop by and tell them what you are doing and ask for a piece of their old filter material (filter floss). They should have no problem cutting off a small piece from one of their tanks, putting it in a bag, and sending you on your way. A few pieces of live rock would also give your tank the beneficial bacteria it needs. (I discuss the decision of live vs. dry rock in a previous article).
As an alternative to getting material from an established marine tank, you can purchase a beneficial bacteria additive product – this is the direction I decided to go. I did a ton of research on a number of beneficial bacteria additives for reef aquariums. Most have hit-or-miss reviews where some report success and others report no effect.
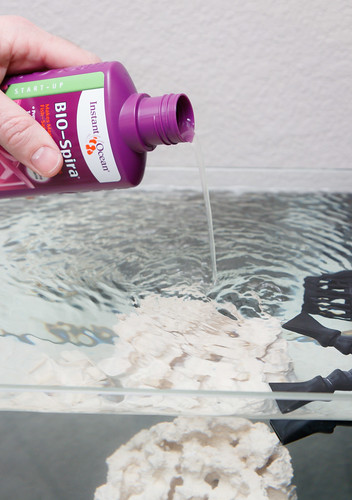
One product that kept coming up as giving users success with cycling their new tanks is Instant Ocean Bio-Spira. I will probably do a full review at some point, but it’s a fairly simple product. Just follow the instructions and dump it in. It worked just as advertised and truly seemed to be an ‘instant cycle’ additive that gave our tank the necessary beneficial bacteria to fully process the waste of our upcoming livestock.
Step Two: Verify the Cycle:
One challenge of the entire biological cycle in an aquarium is that it is an invisible process. You can only ‘see’ what is happening by understanding the process and by testing.
The indication that a new tank is cycled is when you add ammonia and the aquarium begins to produce Nitrite. Nitrite is the end result of both major biological colonies feeding on Ammonia to produce Nitrite, then feeding on Nitrite to produce Nitrate.
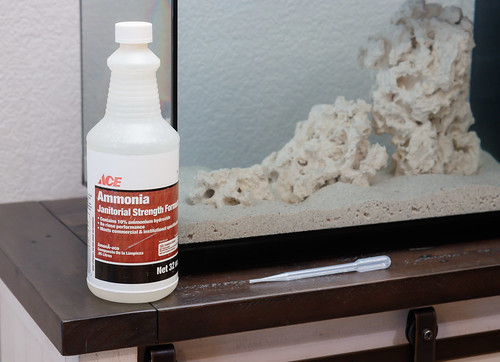
So, once you have seeded your tank, start by adding ammonia. This will artificially simulate what fish will be doing (producing ammonia as waste). I’d suggest dosing around 2 ppm (parts per million). To dose ammonia, use this calculator that I created. There are two sources of pure ammonia that I can recommend. First (and preferred) is Austin’s Clear Ammonia. Second is Dr. Tim’s Ammonia
.
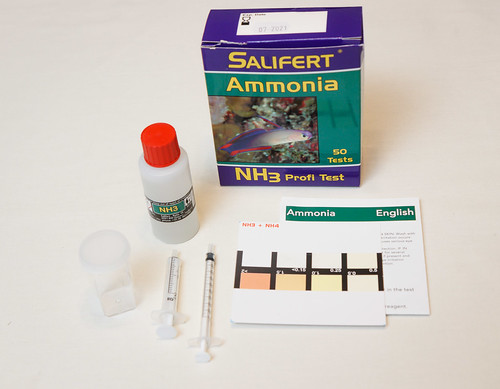
Once you dose ammonia, use an ammonia test kit to verify the concentration that you are starting with. For saltwater, I can recommend Salifert’s Ammonia Test Kit. Give it a few days and test again – you are looking to see the ammonia concentration drop. Once your test indicates the ammonia concentration in your aquarium has dropped, go ahead and test for Nitrate. Again, I can recommend Salifert’s Nitrate Test Kit
. If ammonia drops and nitrate rises, then that signals your tank is cycled!
You might wonder about testing for Nitrite. In my opinion, this is not necessary when you are seeding a tank with bacteria. With all the required colonies of bacteria added at one time, Nitrite will most likely be undetectable – the bacteria will be present to immediately consume nitrite and produce nitrate (the end product of the cycle).
If you want additional assurance that the tank is cycled, perform the 24 hour test. Dose ammonia to 2 ppm. Wait 24 hours, then test ammonia. If ammonia has dropped to 0 ppm, you are most likely cycled. To be certain, you would also need to test and verify that Nitrite is zero, but again – I consider the Nitrite test optional if you have added seeding material (or a bacteria additive).
Step Three: Feed the Cycle (to maintain):
Without food, we all starve, and the beneficial bacteria you seed is the same. You may choose to delay adding livestock to your reef. In this scenario, you need to feed your tank ammonia artificially to keep the beneficial bacteria colonies viable in the interim.
It does’t tank much for a nano aquarium – I’d suggest dosing around 0.5 ppm (or less) every day or two. If your time without livestock is extended, occasionally test nitrate. If nitrate rises above around 50 ppm, I’d suggest performing a massive water change (as close to 100% as possible).
This feeding phase is unnecessary if you are immediately ready to add fish – skip straight to Step Four below.
Step Four: Prepare to Add Livestock (Fishies!):
With your tank cycled, there is one thing that will most likely need addressing, and that is high nitrates. I alluded to this in the previous section – cycling by adding ammonia can result in elevated nitrate levels. Nitrate is not toxic to fish in small quantities, but it is best if Nitrates are below 10 ppm. It’s best to do a massive water change to get the nitrates as close to zero as possible right before you add your fish.
When I say massive, I mean as close to 100% water change as you can perform. This may make you nervous, but fear not – the beneficial bacteria live on surfaces and will stay colonized in your tank even with a huge water change.
I wouldn’t recommend doing this large water change the same day you add your critters – the day before would be best.
Final Thoughts for Fishless Cycling Your Saltwater Nano:
Some summarizing tips for cycling your tank:
- Save time and hassle – seed your tank with beneficial bacteria to jumpstart your fishless cycle. You can use material from another established tank or a bacteria additive such as Instant Ocean Bio-Spira.
- If you seeded your tank with bacteria, you don’t need to test for Nitrite – it will be consumed by the established bacteria before it can accumulate in detectable quantities.
- If you need to wait for some time before you add livestock, ‘feed’ your established bacteria with very small quantities of ammonia.
- The day before you add livestock, perform a large water change (as close to 100% as possible) to reduce accumulated nitrate as low as possible.
Basic Reef Aquarium Water Parameters:
Before adding fish, let’s go over the very basic water parameters and conditions that you need to be aware of to make a safe home for marine fish and inverts. These basics are: salinity, temperature, ammonia, nitrite, and nitrate. I’ve already touched on some of these in the discussion on cycling above, but this will be a good reference.
Salinity – What is the Target for Saltiness?
Salinity is, in the simplest terms, the concentration of salt in your aquariums water. I have touched on this in my “How to Mix Saltwater” article. Salinity of natural salt water is 1.026 SG (Specific Gravity). It is fine to make 1.026 as your target; however, I’d suggest aiming for 1.025 SG to give some leeway upwards if the salinity of your tank drifts up unexpectedly.
Salinity is not a parameter that should swing much one way or the other. For fish, inverts, and corals to be happy and healthy, salinity needs to be maintained very stable with hardly any measurable drift. Use a good refractometer to check your aquarium’s salinity.
Temperature:
Temperature recommendations for reef aquariums range from 75°F to 80°F [23.9°C to 26.7°C). I set my temperature controller to 78°F [25.6°C]. The important thing with temperature isn’t necessarily where you decide to make your target temp, but that you hold it consistently.
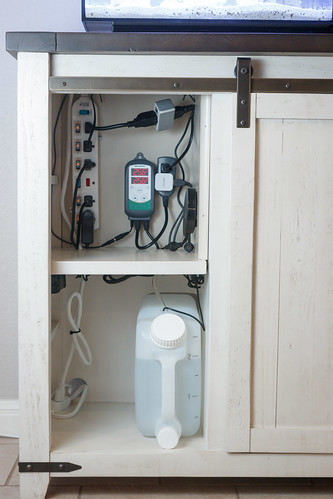
A temperature controller is recommended because the bi-metal thermostats in most aquarium heaters are not reliable and have a large ‘dead-band’ (allowable temperature swing between ‘on’ and ‘off’). I’m using a budget solution that I mention in Part I that involves a simple ITC temperature controller and USB powered fans. I highly recommend it as a very good and reasonably priced solution to control both cooling and heating.
Ammonia and Nitrite:
For a cycled aquarium, Ammonia and Nitrite should always be 0 PPM. Any reading other than zero indicates something has gone very wrong and has killed off some or all of your beneficial bacteria colony.
I’d recommend having an Ammonia test kit on hand for the cycling process and just in case. Honestly, I don’t see that Ammonia is a test that I will perform regularly (It seems futile to test as it always reads zero).
I don’t own a Nitrite test kit. The ammonia test is generally all you need in a tank emergency to see if something has gone wrong.
Nitrate:
Nitrates are the tail end of the cycle process so they can accumulate in your tank. Nitrates should be maintained at 0-10 PPM. If they rise above that, you need to perform a water change in a quantity large enough to drop it down into range.
Nitrates tend to be in issue in young tanks, which often have an ‘ugly phase’ of algae and diatom blooms. The die-off from these phases can cause nitrates to accumulate at a high rate.
Final Thoughts for Beginner Reef Water Parameters:
The goal for a new reef tank is to try and establish stability in your parameters. The aforementioned temperature controller solution can help in that respect. Careful mixing of salt water along with regular, small water changes, will establish stability of other parameters. I will cover water changes in a future article for saltwater aquarium maintenance.
There are other marine water parameters to track (PH, alkalinity, calcium, magnesium). I will discuss these in a future article. For now, take care of the basics and don’t worry about correcting for these other parameters.
Next up in our series will be an exciting milestone – Part 10: Adding Fish to Your Saltwater Nano.


