People who read my instructional on putting together a paintball CO2 system are left hanging – it’s all assembled – what now? This follow up will help in the process of getting that needle valve adjusted to how much CO2 your planted aquarium needs.
Pressurized CO2 – A Review of the Tools:
First, let’s get a quick review of what components I recommend to manage your CO2. You hopefully have a regulator that has a good needle valve that allows you to turn and make adjustments for the quantity of CO2 injected into your tank.
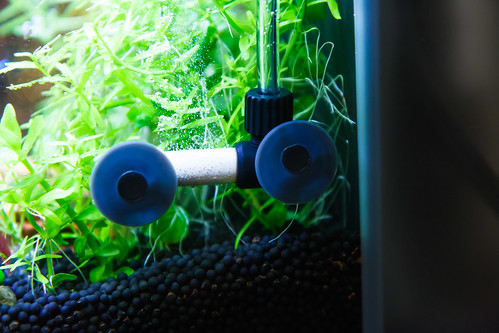
You should also have a bubble counter mounted inline between your regulator and the diffuser or reactor. This will give you a visual as comparison tool as you make adjustments.
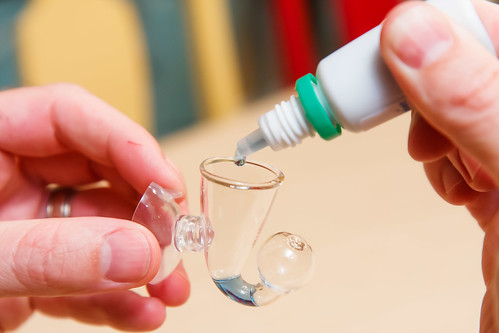
For a beginner, I would recommend using a drop checker; specifically, one that comes with pre-mixed solution. As I will discuss, you may outgrow this method of modulating CO2, but it’s a nice crutch for starting out.
Getting Started – Small Adjustments:
First of all, let’s address a few concepts of pressurized CO2 and equipment that are sometimes misunderstood:
The Bubble Counter – It Means Nothing:
I shouldn’t say it means nothing, but what I can say is that every system (regulator, hose, diffuser / atomizer, drop checker, etc.) has a unique relationship between bubble rate and the resulting CO2 in Parts Per Million (PPM) saturated in the aquarium water.
Check this video out (specifically at 7:45, although the whole thing is very good). It shows two bubble counters in series with vastly different bubble rates. Clearly the same quantity of CO2 is moving through them both.
Further, if the pressure delivered changes (for whatever reason – a change in the regulator or more back pressure through a dirty diffuser as examples), the PPM of delivered CO2 will change even if the bubble rate through the counter is the same.
Having said that, the entire purpose of a bubble counter is to give you a visual so that you can quantify changes (or verify consistency).
Any web forum discussion usually starts with someone suggesting what bubble rate you should start with, or what you should adjust to, or what they use; all useless in the sense that bubble rates never correlate across different aquarium setups.
Any Change Takes Time to Make an Impact:
Changing the needle valve on your CO2 regulator is like turning a ship. You make your adjustment and watch the giant vessel change course over a long period of time. It isn’t going to turn on a dime.
Further compounding a delay is the use of a drop checker. The color change of the drop checker lags behind what is happening in the water. It can take a few hours for a needle valve adjustment to settle in; it might take a few more hours for the solution in the drop checker to complete it’s transition.
Where to Start:
Once you get your equipment in place, decide on your timing for turning on your lights and CO2; set your equipment on a schedule with timers or otherwise establish your routine to consistently get things turned on/off every day.
Again, since the bubble count means nothing, I can’t really suggest where to start for your CO2 flowrate. I will say for myself, working with a small nano aquarium, and taking into account it was newly (and therefore lightly) planted, I started with around 30 bubbles per minute. It might be prudent for you, with a setup unique from mine, to start even lower.
My routine for the first few days was to try and get the fluid in the drop checker out of the blue and into the green during the lights on phase. All you need to do is be observant and watch the color of the fluid in the drop checker over the course of your day. Also take care to check on your fish.
For the fish, the major sign that they are distressed from too much CO2 is gasping for air at the surface. Any time my fish have been ‘gassed’ they have behaved this way.
Starting out, I would generally suggest you make only one adjustment to the needle valve per day. Observe the tank after the CO2 has been on at least a few hours (the time it takes to settle out and the drop checker to respond). If the color is still blue, make note of the bubble count prior, make an adjustment in bubble rate (verifying by counting the numbers of bubbles in a minute) record this change, then leave it along. Observe the tank the next day; repeat until you get it in range. Please consider keeping a journal during this process to help you track your progress.
Turning it Up:
Once you get your CO2 flowrate adjusted to achieve a drop checker color of green (during most of your photoperiod), then you are at a good starting point. If your drop checker fluid is properly mixed (calibrated) you are achieving around 30 ppm of CO2 during your photocycle. This is a vast improvement over no CO2 and for many people, given their tank and goals, this may be perfectly adequate.
Having said that, advice that I have gleaned from other planted tank experts, including Tom Barr, recommend putting in as much CO2 as you can but not so much to distress the fish. I touch on this in my article on Planted Tank Basics – once you provide adequate lighting for your plant needs and provide nutrients (fertilizers) in excess of what the plants need, you then also need to provide an excess of CO2. If you short the plants of CO2, that will be your ‘limiting factor’ and the result will be stunted planted growth and more algae. To ensure that CO2 is not your limiting factor, you try to max it out for your tank. This is the approach that I have taken in our aquarium and I’m pleased with the results.
For myself, I quickly learned that my tank (and fish) could handle higher bubble rates, even up to the point where the drop checker turned yellow. I eventually broke my drop checker glass, which was a blessing. The drop checker eventually turns into a crutch, where you can become enslaved to getting and keeping it green. Green, or 30 ppm, or whatever measure you want to choose, may or may not be optimal for your tank.
Once I was confident that my system was consistent day to day, I started pumping up the bubble rate, just a bit every few days or once a week. Any change was very small and was given at least a full day to let the impact to livestock be observed. I ended up with a bubble rate almost 4 times over what I started with (required to get the drop checker into the green). The livestock has only once shown ill effects of being ‘gassed’ with too much CO2 (an event I will discuss later).
O2 / CO2 Saturation – Independent and Equally Important:
One reason people become so hesitant to push CO2 flowrates up is fear of harming fish. This is valid and you should keep a watch on them when you increase CO2. However, when you visualize what is going on inside your aquarium, you should not just consider the dissolved CO2 in the water, but also the dissolved oxygen (O2).
As it turns out, levels of saturated oxygen and carbon dioxide are independent of each other, and both can critically affect your fish. If you are pushing the limit by increasing CO2 to optimize plant growth and health, you need to make sure you also provide conditions to optimize saturated oxygen.
Maintaining conditions to maximize both saturated CO2 (for the plants) and saturated O2 (for the fishies) is a balancing act. You could just add an air pump and air stone and that would get plenty of oxygen into the water, Unfortunately, it would also cause much of the CO2 you put in to ‘outgas’, which will reduce saturated CO2.
To add oxygen without driving out carbon dioxide you need to create surface movement, but not enough to break the surface of the water. Look for strong ripples. If you are unsure of how much current is necessary, err on the side of too much so that oxygen is provided. Sure it will drive out a little more CO2 but all you have to do is compensate by opening the valve up a bit and find a balance point.
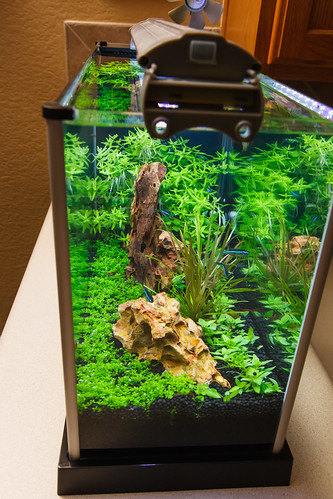
I found out first hand the importance of O2 saturation recently. I was having some trouble with our plants; it ended up being related to the fertilizer regimine. At the time, I was playing around with lots of things trying to find a solution. I was unsure if CO2 was being delivered to all parts of the tank. I decided to change the outlet nozzle on our Spec V from where it usually is, pointed up at the water surface, to downwards. It was in my mind small change that might give better flow of CO2 to plants that needed help.
A few hours later I noticed all the fish at the surface, gasping. Clearly, they were being gassed. Note that I never changed anything about the CO2 delivery; the regulator had not been adjusted for a week. By changing the nozzle down where it didn’t create surface ripples, saturated oxygen in the water was reduced and the fish suffered.
Moral: if you are pushing CO2 up to the limit, do not neglect oxygen saturation – keep that surface moving with ripples.
Final Thoughts on CO2 Flowrate Adjustments:
I hope this is helpful as you navigate making changes to your CO2 delivery system. A few thoughts to summarize:
- Start Low: less is more when setting up CO2 in a new tank. Start with a low CO2 flowrate and slowly increase.
- Small Changes: Any change in CO2 flowrate takes along time to fully affect the water parameters. Make only one small change to your needle valve and then wait to watch for results. Don’t adjust more than once a day (unless you are lowering the rate in an emergency [you see signs your fish aren’t doing well]).
- Drop Checker as a Broad Guide: Try not to get to tied up with analyzing the color of your drop checker. It’s best used as a very general indication that you are in a desired, broad range.
- Pump It Up: Don’t be afraid to increase your CO2 flowrate. You should be observant and careful when increasing, making sure to keep an eye on your fish behavior.
- Don’t Neglect O2: Make sure to provide adequate surface movement (ripples) so that your tank is oxygenated as much as possible. This is especially important to your fish if you are pushing the upper limit of CO2.
- Observe: Use hints from your plant health, algae growth, fish behavior, etc. to make adjustments to your CO2 flowrate.
- Make Changes as Things Change: Your tank is always changing. As plants fill in, or you trim heavily, you may need to adjust your CO2 accordingly.
That last point is really the key to all success in planted tanks. Learn to pay attention, to observe, and to use your intuition to make changes.


I know you said not to focus on the bubble counter. I am curious however when you said “ I started with around 30 bubbles per second.“ That seems high. Do you mean 30 bubbles per minute or roughly 1 bubble per 2 seconds by any chance? I can’t imagine trying to even count 30 bubbles in a second.
Great post. I followed your advice on the whole setup and am now going to further optimize my CO2 delivery.
Thank you!
I appreciate comments like this. That would be a typo – I meant 30 bubbles per minute. I’ll go through and change.
Awesome Nate. By the way, how’s that substrate holding up. I’m about to redo my SpecV and try some new stuff. Also, you should make a spot for those of us that want to post photos of our tanks that were inspired by your site.
It’s doing very good. Maybe breaking down a bit, but I generally see the same shaped sphere shapes (still intact). Good idea about the user photos.
Thank you for this info. I am such a type A person and tend to over complicate and want things fixed NOW. Everything you suggested was so logical, and gave me some peace. I recently planted my 2 year old Spec V (a Betta I’ve had for a year and a nertie). Then I decided to go high tech because I like gadgets and not doing things halfway. (See? Type A) I bought the Fluval CO2 88 even though reviews weren’t great. Mainly I didn’t want to have to replace canisters quite so often, and I hope to upgrade to a Flex soon. I’m a rule follower and figured many of the problems could be overcome by actually following directions. So far so good.
Hi. I’m using a LOT of CO2 just to get a 0.6 oH drop (8.1 to 7.5). I’m going through a 5lb tank every three weeks. Plant growth is slow. Fish are fine. To get more dissolved CO2, I need to increase the CO2 flow rate even higher. If course, this means I’d go through a 5lb tank every two weeks. Can’t afford that.
I’m diffusing CO2 through TWO external diffusers and there are no micro bubbles in the tank. No significant water turbulence in the surface.
Why am I going through so much CO2 to get marginal saturation?
You might need to ask on a forum like ThePlantedTank.net to get more help.
What size aquarium? What do you mean by “two external diffusers”?
It sounds like you have a leak. Have you checked by underwater dunk and/or brushing water on all your fittings/junctions on your CO2 system? That much CO2 – seems like it would have to be a leak. Or they are not filling properly (although your gauges should confirm it is full).