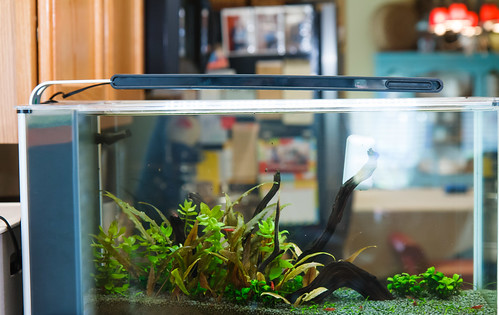
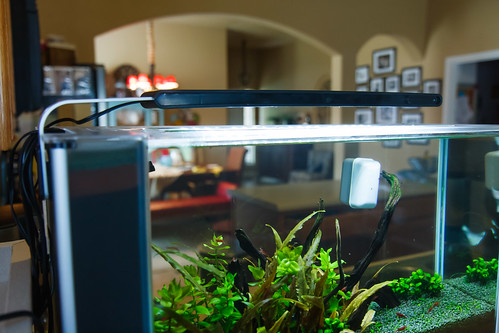
I very much appreciate the design of the Fluval Spec V. There are a few things I might change about the design, but it is well executed overall. The one glaring issue, one that I mentioned in my review, is light droop. Light droop is observed as a light that does not sit level with the top of the aquarium. It makes what could be a sharp looking setup appear sloppy. I gather from spending time on aquarium forums that light droop is a very common problem with Spec V aquariums.
I had an additional problem, that of a bent light. The plastic LED housing was curved (downward) and this further made the light appear droopy. I don’t know how widespread this is.
I quickly decided to upgrade the light for something more suitable for a planted aquarium and first put on a Finnex FugeRay Planted + (and now a Finnex Planted+ 24/7 HLC). However, I fully understand that many people will be well suited to keep the stock light. I wanted to revisit the droop issue and offer a few simple methods to get that light level again. They are presented in order of simple to more complex.
EDIT: To clarify, this light droop issue is experienced on the first generation lights on the Spec V. In 2016, a new version of the aquarium was introduced with an improved light that fixed the droop problem.
Method 1: Tighten the Screw
The light on the Spec V has a small plastic screw that is intended to be tightened to secure the light. The aluminum light bracket naturally sits a bit loose in the black plastic light mount; the screw is meant to take up this slack and set your light in a non-droop posture.
The trouble with the screw is that it is made of plastic and has very weak threads. The LED light is not heavy; however, using the screw to lift the light into place can cause the threads to strip over time.
The easy solution to this is to adopt a technique where you cantilever the light upwards fully in the bracket (by lifting the light at the furthest end) and then tightening the screw fully.
Lots of light droop may be because you don’t get the screw fully threaded in, and this often made difficult because of working against the weight of light. Lift the end of the light as you tighten the screw and that might make a big enough difference. It will also help that little plastic screw last longer.
Method 2: Bracket Shimming
If after fully tightening the screw you are still experiencing light droop, it may be time to exercise a little bracket shimming. You will simply need to experiment wedging some object into the spaces between the (black) plastic light mount and the aluminum light frame.
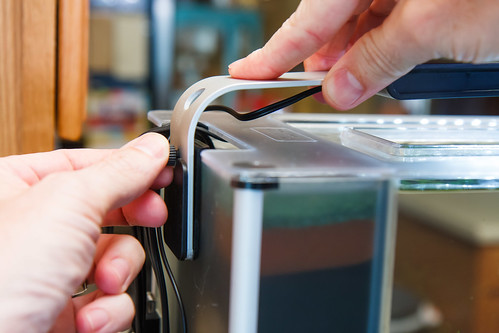
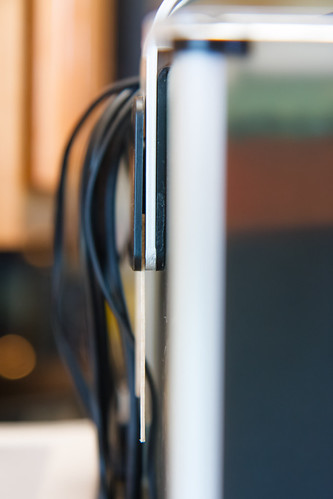
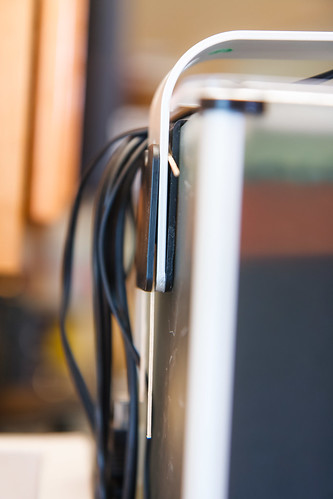
My first attempt at shimming had me wedging objects in the space at the bottom of the bracket, between the outside surface of the aluminum light frame and the outer plastic bracket (as shown in the picture below). This started to help lift the light upwards.
The light droop was alleviated even more when I went further and wedged some other objects on the inside face of the aluminum bracket, up high, between the aluminum light frame and the inside part of the bracket. See the picture below.
This helped even more to get that aluminum light frame lifted up. The light was almost level after I had the second set of shims in place.
I don’t have any great suggestions on what to use as your shimming material. I used toothpicks in the pictures here; after shimming you could cut the long ends off to make it look tidy. Someone else has commented they use the plastic mesh that I also suggest using to cover the outflow in my betta article. Someone else commented to use a little bit of filter foam shoved in there. I’m sure you can get creative and come up with even better ideas from things around your house, apartment, or dorm room.
About the only thing I wouldn’t advise using for a shim would be paper or cardboard as it won’t last very long after it gets moisture on it.
The shimming method is simple and will work for many people. The disadvantage is that every time you need to remove the light, the shims will come out and you will have to take the time to put them back in place.
Method 3: Bend It
As I sat pondering the trouble with my droopy Spec V light, I started to question everything. What is the deal with that little screw that is supposed to lift the light? Is it really needed? What if I don’t want to use it.
I don’t know about your place, but around our home, gravity is pretty much a constant thing. Once I place the aluminum light frame down into the plastic bracket at the end of our Spec, I can count on it sliding down into place and staying there. I guess I understand the screw helps to secure the light so it doesn’t inadvertently get dropped into the water. It’s not a concern for me – I’m reasonably careful and take my time not to do that.
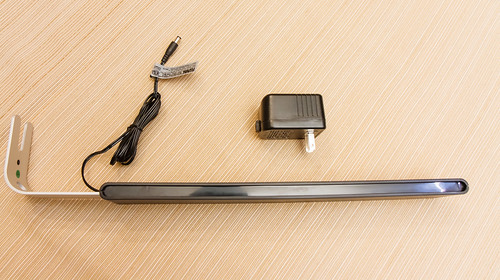
If you decide you don’t need the screw and are happy with the light frame sitting in the bracket free, then you can then fix your light droop permanently by applying a bend to the aluminum light frame. Since the light will be sitting loose in the bracket you will need to bend it beyond 90 degrees so that it will rest level.
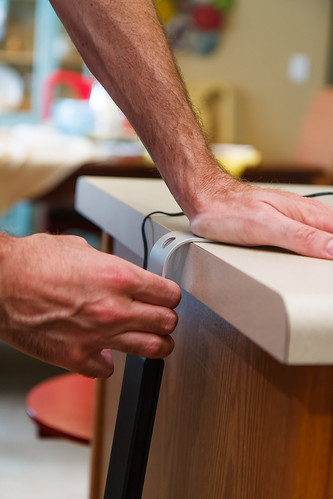
If you are a handy type who likes to use the proper tools, you will grab the end of the aluminum light bracket in a bench vise and carefully apply pressure with your hand. If you are like me, you will forego fancy tools and use the following method: brace the short end of the aluminum bracket firmly on a sturdy table or counter edge with one hand. Use your other hand to bend the light. Take care to only apply pressure on the aluminum portions of the light bracket, not the (black) plastic part that houses the LED’s. If you bend at the plastic, it will probably break. This picture shows off my light bend technique.
Despite the sturdy appearance of the aluminum, it isn’t that hard to bend. Bend it a little bit at a time, then take it over and test it in your aquarium. Keep bending it little by little until the light sits level when resting loose in your bracket.
Fixing Light Curve
As I mentioned, beyond light droop, my Spec V light was also curved. I never really got this fully fixed, but I found a way to make it better. I just placed it curved side down on a hard surface and pressed on it until it straightened out a bit. This is a little risky as you might damage the LED fixture with excessive force. If I was really gutsy I might try to add a little heat to help make the bend more permanent; heat might come from a halogen lamp or a hair dryer.
These suggestions are very basic but I hope they help you in your journey to fixing light droop and making your Spec V nice and tidy.



Just thinking you could remove screws and plastic and just bend the metal piece without risk of breaking the rest with Method 3: Bend It 🙂
The original plastic screw is an M5x6, standard course thread. If you’re able to get metric screws nearby, that’s a great option.