Below is the original review of the Spec V Aquarium we got in December of 2013. It is known as the “Pre-2016” – I have since obtained the updated Spec V and written a new review specific to it.
When I decided to get back into fish keeping, I went all around on the size and type of tank and equipment. What I was planning and dreaming of varied from saltwater, to planted; from 55 gallon to 17 gallon and other sizes. The problem that kept coming up as a limiting factor was space. We simply didn’t have room to spare for a separate tank and cabinet to house filters and heaters in a typical arrangement. I was looking for a simple but high-quality display to get us started. This led me to the Fluval Spec V, which has become a wonderful product for introducing our children to the hobby and the inspiration for the focus of this website. I will give an overview of the Fluval Spec V, its operation, and some of its strengths and weaknesses.
In The Box:
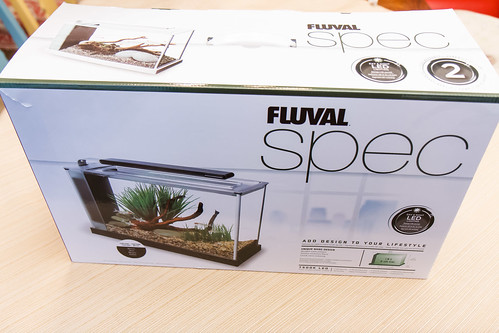 Everything comes in a very reasonably sized box. Nothing too spectacular, except to say that the packaging and protection is very good. One advantage that I see to this aquarium is that it is small and light enough to be shipped without concern of breaking in transit.
 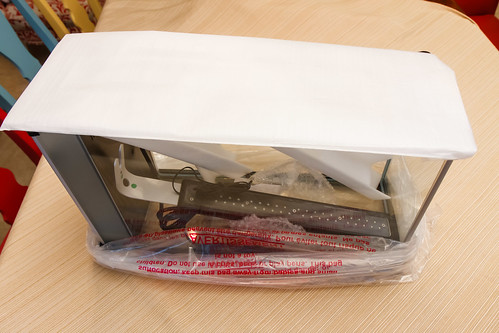 The thing that makes this aquarium so great for those who don’t have much room is that it is an all-in-one configuration where the pump, filtration, and light are housed inside a single package. Contents of the box include: tank, filtration sponge, carbon filter bag, biomax filter bag, pump, outlet tube, outlet nozzle, aquarium lid, and LED light.
Setup and Operation:
As simple as the Fluval Spec V is, the filtration system mimics the components of many high-end marine aquariums, which include a pump, overflow, and trickle filter section filled with media. 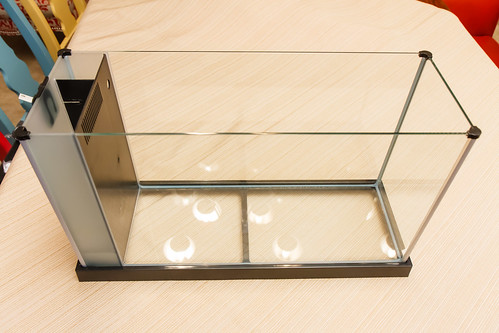 The aquarium corners are covered externally with aluminum round pieces. This feature initially seemed a bit cluttered, but I now understand a positive of these pieces; over time, silicone joints tend to become stained and look dingy, and these bits will always cover this from the outside. There are two versions of the Spec Aquariums: White trim and Black Trim. I have the black model. The aquarium is divided into three sections separated by black plexiglass baffles—the sections house: the main display, filter media, and pump. The filter media and pump sections have frosted glass to hide the insides from view – it is a very classy look and keeps the guts of the filtration system hidden.
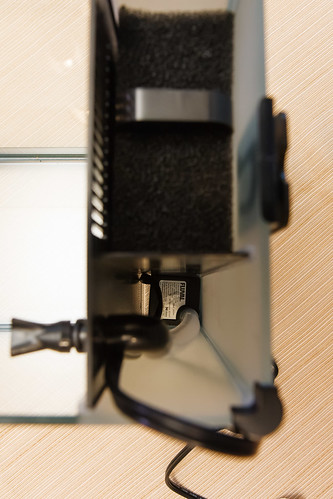
The flow starts at the pump located at the bottom of the pump section. In this picture, you can see the filter block at the top of the picture and the pump section at the bottom. 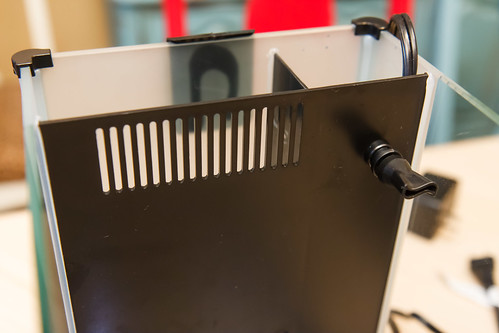 Flow from the pump travels up an outlet tube and through the outlet nozzle that is mounted on the tank side of the divider. This outlet nozzle is a ball/socket type of mount that allows you some limited movement to direct the flow where you want. I occasionally move this around to give the critters different flow patterns but usually leave it pointed up and slightly toward the adjacent side glass. I feel like pointing it up helps churn the water a bit to get oxygen back into the water column. Water is forced into the main display area and then overflows into the filter section.
 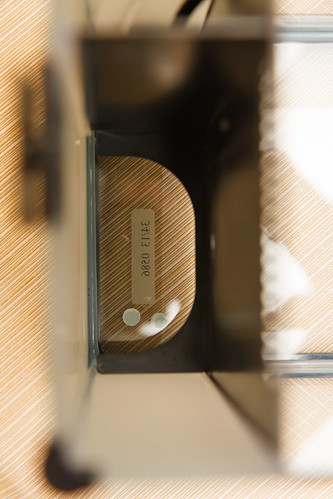 Water then travels downward through the filter media and to a lower section (separated by a partial horizontal baffle). This lower portion of the filter section is open to the bottom of the pump section, which leads to the inlet of the pump, and the cycle begins again. If you wish to put a heater in your tank, you can either put it into the display area or better yet, some heater models are small enough to fit inside the pump section sharing space with the outlet tube. This is the route that I chose. The instructions were not clear on exactly how to orient the pump at the bottom of the pump section; I found a position that worked best to fit everything in the space.
 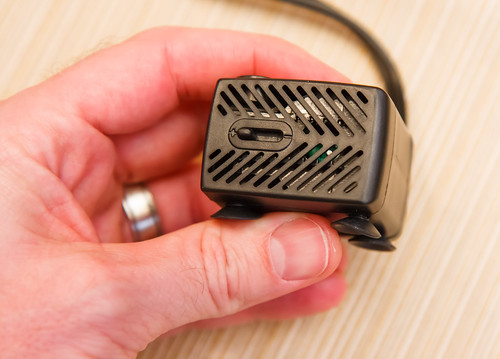 The pump is adjustable for flow rate by sliding a notch left to right. I initially thought that this would actually control the speed of the motor. In actuality, it simply slides a plastic plate to partially obscure the inlet slots of the pump to restrict flow. This picture shows the pump adjusted for maximum flow.
 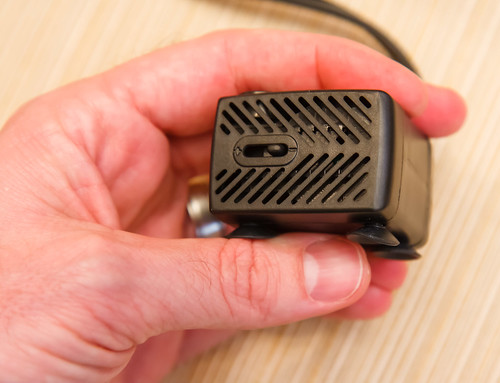 Here the pump is adjusted for minimum flow – note that you can see less of the silver motor beyond with the closed plastic plate.
  One thing to note about the flow pattern in the Spec V is that in addition to the overflow slots at the top, there is also a small slot a few inches from the bottom of the tank that allows an alternate path for water to get from the display tank to the filter section. This is clearly a safety measure for if the water level gets too low in the display tank (over time from evaporation) water will still be able to get to the pump return. Without this slot, if the water level drops below the bottom of the overflow slots, the pump will suck dry and fail.
The bypass slot unfortunately allows some of the water to bypass most of the filtration media altogether, which kind of defeats the point. Lots of people opt to modify this to force flow through the overflow. The flowrate with the supplied pump is quite high. I have set up my Spec V pump for full open flow; however, I have modified my outlet tube with a few holes to improve flow around my Hydor Theo heater. Even with losing some of the flow by recirculating through these holes, the flowrate in the tank is still quite high. The video below shows the aquarium after I added the Seachem Flourite substrate. This stuff tends to cloud badly for a few hours after you put it in, which gave a nice opportunity to see the flow pattern through the tank:
For people who raise livestock that prefer slower-moving waters (like betta fish), modifications sometimes must be made to reduce the flowrate. If you are in this position, I suggest modifying the outlet tube with holes to divert some of the flow and turning the pump flow adjustment to fully closed.  The filtration media that comes with the Spec has three parts: a foam block, a bag of ceramic ‘biomax’ rings, and a bag of charcoal. The foam block has two openings to house each of the bags of filtration media. Water flows downward through the various media. Fluval makes replacement filter media available specifically for the Spec line of aquariums.
The last two components to talk about are the Plexiglas lid and the light. The lid is a very good design. It is frosted along part of the surface, which does a nice job of hiding water spots and hard water deposits over time. The cover does not enclose the entirety of the tank – the middle portion is open to the air. The edge that terminates to air has a little lip internally and externally that seems to discourage critters from crawling (snails and red cherry shrimp) or jumping (fish) out. Four small pegs molded into the bottom keep the lid centered and fixed to the display tank. A small rectangular opening over part of the filter/pump section allows the cord to exit from the pump. I find this useful for dosing fertilizers or Excel right into this section without messing with the lid or dumping things directly at the fish. 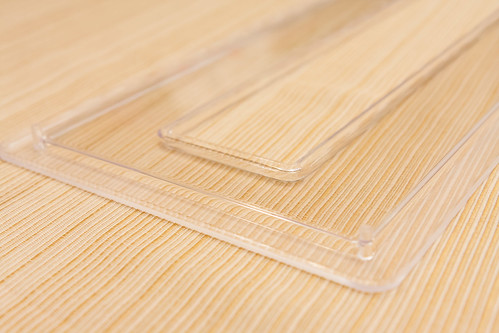 The light is a very unique and sleek design that reminds me of the stand design for modern Apple Mac computers. A bent aluminum frame is fixed into a slotted bracket on the back of the aquarium and secured with a plastic screw. The frame bends over from the end of the aquarium to hold the LED light over the main display section.
 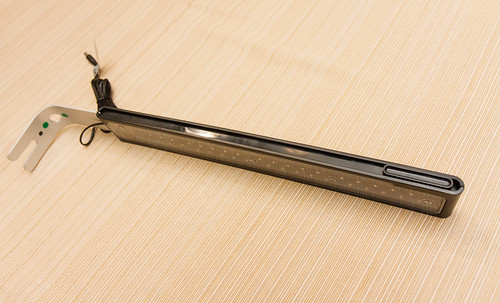 The light is direct current and includes a plug-in power brick. The light features 35 white LEDs and two blue LEDs. The blue LEDs are used during ‘nighttime’ mode. Light mode is controlled by a three-position switch: lights on, lights off, and nighttime. The light produces a reasonable light output for general fishkeeping. For those wanting to use the setup as a planted tank, the stock light is categorized as low light, even on the low end of low light (see light testing results below).
Maintaining a few low-light plants will be doable, but getting growth may be difficult. Those interested in improving plant growth or moving to medium-light plants will want to consider upgrading the light. 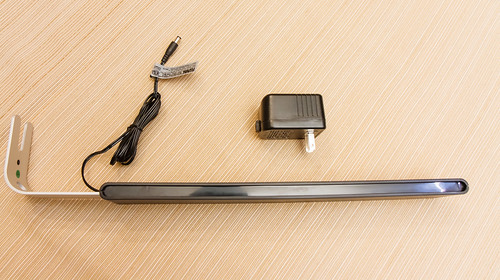 The light construction is the most significant shortfall to the setup. Generally, the stock light that comes with the Spec V tends to suffer from droop and does not sit level. Visually, it’s distracting but not a big deal to how the aquarium functions. There are a few options for alleviating the Spec’s light droop. The bigger problem with my example is that the light bar came curved; no amount of gentle coercion on my part would straighten it back out.
 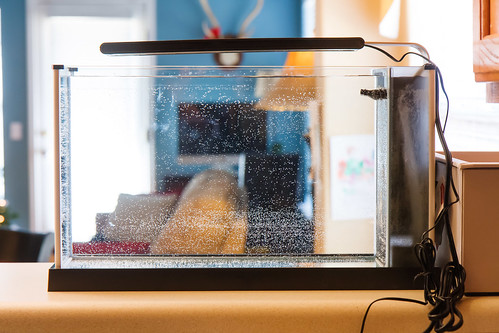 Before you get too far in aquascaping your tank, be sure to fill it and test for leaks in the silicone joints, cracks, or other functional defects. Here, you can see the dreaded light droop.
Dimensions:
Since the Fluval Spec V’s strong suit is its small size and ability to fit in tight spaces (like a kitchen bar, where we have placed ours), I want to provide some details on the dimensions of the aquarium, both for overall size and for the length of various compartments. I have measured my Spec V as carefully as possible, down to 1/16th of an inch. Metric values are conversions from English and rounded to the nearest mm. There will be some variance from unit to unit, but these numbers will be very close. I will keep it consistent – width is along the narrow dimension of the aquarium, and the length is along the long dimension.
- Overall Footprint: Length = 20-1/2″ (521 mm); Width = 7-1/2″ (191 mm). The footprint measures the black plastic frame at the bottom; the actual glass dimensions are less than this.
- Overall Height: 11-3/4″ (298 mm). This is measured from the surface that the aquarium rests on to the top edge of the glass.
- Overall Height Including Light: 12-3/4″ (324 mm)
- Main Display Section: Length = 17-1/8″ (435 mm); Width = 6-3/8″ (162 mm)
- Pump Section: Length = 2-1/16″ (52 mm); Width = 2″ (51 mm)
- Filter Section: Length = 2-1/16″ (52 mm); Width = 4-5/8″ (117 mm)
- Filter Section Height: 9-1/8″ (232 mm). This is from the top of the baffle that the filter media rests on to the top edge of the glass
- Inside Height: 10-9/16″ (268 mm). This is for all compartments, measured from the top of the bottom glass to the top edge of the glass.
Volume:
The ‘V’ designation in the model name is supposed to represent the listed volume of the aquarium, which is 5 gallons. From the above values, I calculated the following volumes. Actual water volumes will be diminished with added decorations, filter media, etc., but it’s an interesting exercise:
- Overall volume: 5.59 Gallons (21.14 Liters). This includes water in the pump and filter sections.
- Display Section Volume: 4.99 Gallons (18.89 Liters)
Spec V Light Performance:
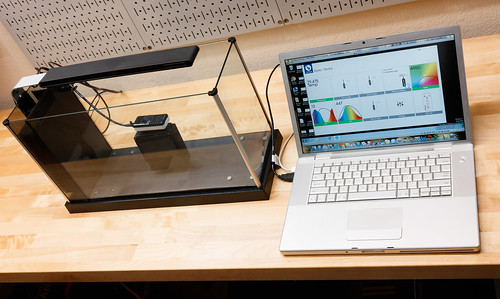
I tested the Spec V light output using a Seneye Reef Aquarium Monitor and PAR meter. You can read more on this page about my test methodology, but the basic premise is as follows:
- Use the Seneye light meter to test for PAR levels at five different locations in the tank: center and four corners.
- Tested at two different depths: 5″ below the water line and 9.5″ below the water line.
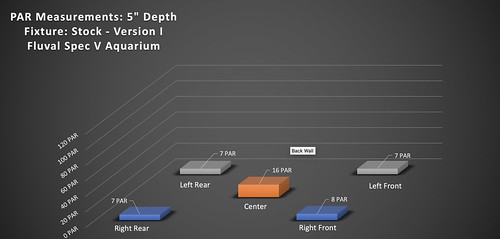
Here are the measured PAR values at 5″ below the water line (click on any graph or screenshot to enlarge):
16 PAR in the center. This is a very low PAR intensity, especially considering the location is midway down. Light falls off to around 7 PAR at the corners.
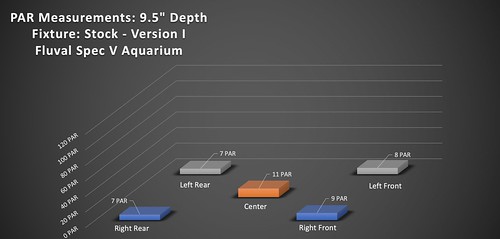
Here are the measured PAR values at 9.5″ below the water line (around the level of substrate at the bottom of the tank):
It drops down to around 11 PAR in the center. The corners remain around 7 PAR. This is very low-intensity light. It falls below what you will need for even a low-light aquarium.
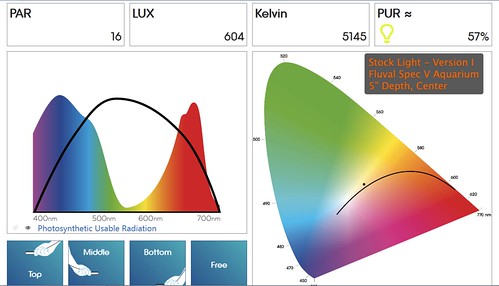
Here is a screenshot of the data from the Seneye Light meter reading. This is the center reading at 5″ depth:
The kelvin reading of 5145 is fairly warm for an aquarium light. I can’t complain about the quality of the light produced from the stock fixture; it doesn’t produce enough of it.
Overall Impressions:
I love this aquarium, and it has met my expectations. When filtered through the very reasonable price for the whole kit, all of the downfalls that I can think of are no big deal. With some ingenuity, most design deficiencies can be dealt with through simple modifications or upgrades. Even with no mods, it is an excellent aquarium, especially if it is a fish-only tank without the added dimension of live plants. Again, the all-in-one design is excellent. There are no filters hanging off the back or separate canister filters to hide. With some ingenuity, you can hide a heater in the pump section to hide it. The only things that exit the aquarium are the pump cord and the light cord. I can see some compromises in construction to keep the cost down, but I’m glad Fluval designed it to be affordable. For the price, the quality and design are exceptional.
Wishlist for Improvements to Future Spec Aquariums:
Again, I’m thrilled with the Aquarium, and taken as a whole, these shortfalls make little difference. Having said that, I wish that a few things could be improved for the Spec V: As I have alluded, the light could use some work. First, getting an LED light at this price point is very nice. The light quantity is a bit dim for most planted tank applications. Having said that, for general use, it is pretty good. The problems are with the construction and mount. 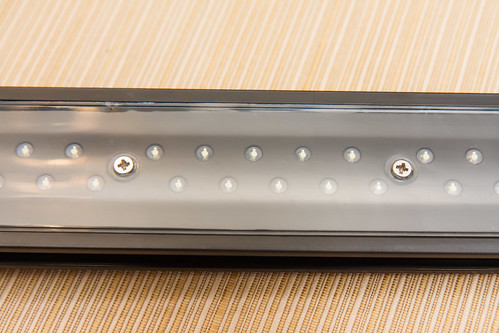 My unit came with a badly curved main light. The unit is made of two pieces of plastic that sandwich the aluminum backbone. It is held together with some shoddy-looking screws. The whole thing is very flexible – it should be made with more substantial plastic pieces and better hardware to keep it all together. The light droop problem is common for almost everyone with a Spec V. If you crank that plastic holding screw in all the way, it can get close to horizontal, but usually not all the way. The design and strength of the aluminum backbone is adequate; however, the mount at the aquarium needs to be changed. At a minimum, a metal screw should be provided. Design changes should probably go beyond this so that the fork wedges into the mount to self-level as it is inserted, possibly doing away with that screw altogether.
I wish the pump/filter sections had just a bit more length to make it easier to install the pump and fit a heater into the pump section. I got it all to fit, but an extra 1/4″ would have made a difference.
My unit actually came with a crack in the glass at the upper corner. It was disappointing seeing that, but it did not leak on my first test and is not a very big crack (less than a centimeter); I have not noticed it since.
I’m looking forward to updating periodically to show the progress of this aquarium and give some long-term feedback on its operation.


