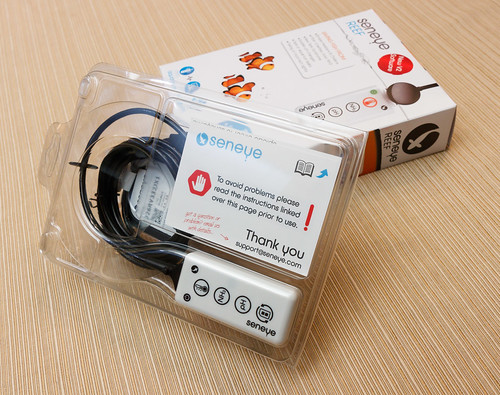
I bought the Seneye Reef Aquarium Monitor and Light Meter because I wanted to have a (relatively) inexpensive light meter to test aquarium lights that I use and offer reviews of. It has proven to be excellent in this regard, providing information beyond just intensity to also measure color spectrum output.
The product is interesting in that it offers a contrasting function of a parameter monitor, providing temperature, pH, and ammonia readings. It’s an interesting mix of capabilities and my usage of this product revealed very high capabilities in some areas, and some weaknesses in others. I will review what this product does and who will benefit from its features.
Seneye Reef Aquarium Monitor – Description and Specs:
Let’s start by mentioning that there is no logic to the name ‘Reef’ monitor. Seneye has two other models that are exactly the same. They are the ‘Pond’ and ‘Home’. I say they are the same because all three have exactly the same sensor. However, only the ‘Reef’ will give you PAR (light meter) capabilities. If you purchase the cheaper ‘Pond’ and ‘Home’ versions, then you can activate the light measuring capabilities in the future by paying a $80 ransom to Seneye, thus making it a ‘Reef’. There is one other difference between the models – the ‘Pond’ comes with a float carrier. Prices are $205 USD (Reef), $200 USD (Pond
), $154 USD (Home
). These prices are what is listed on Seneye’s website. The ‘Pond’ model’s pricing makes no sense as the float carrier it comes with only costs $26 USD (so it would be cheaper to buy the ‘Home’ and the float carrier separately).
Here are some of the features of the Seneye Reef Monitor:
- It functions as a light meter. It measures intensity in PAR as well as LUX and provides Kelvin (color temperature) and a graph that indicates the color spectrum of light measured.
- It is a monitor that measures the following: temperature, pH, and ammonia. It also serves as a water level indicator and will detect if it is out of the water (to alarm of a leak or excessive evaporation).
- It connects to a computer with a USB cable/connection.
- While connected to a computer, it will regularly (every 30 minutes) upload all the measured data (all the light data, temperature, pH, ammonia, submergance) to a cloud based service. This can be reviewed on a web browser from a remote computer or your mobile device.
- You can set your own high/low limits as desired for temperature, pH, and ammonia monitoring. If temperature, pH, or ammonia falls outside these limits (or if the sensor is no longer submerged), you can be notified by email and/or text message.
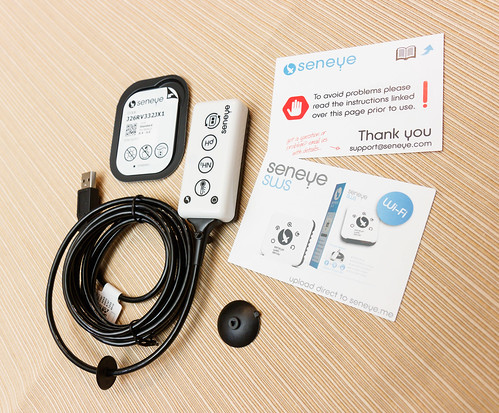
Here are the dimensions that I measured of the device:
- Seneye Reef Sensor: 3.1” (78 mm) long x 1.4” (35 mm) wide x 0.8” (20 mm) deep.
- USB Cord Length: 94″ (238 cm) long
The sensor itself comes with suction cup mounts to affix the monitor to your aquarium glass. Anyone with experience of using anything suction cup mounted can guess how those work (not at all). Seneye has probably received feedback on this issue and they now offer a magnetic mount. Great! It cost $41-51 USD (depending on the thickness of glass you want it to work on). Not so great. This will be a recurring theme with Seneye – to get it to work like you want, it will cost you.
Connecting to a computer is by way of Seneye’s software. We are a Macintosh (Apple) family and Seneye has only developed this software for Windows. So, to use it on a Mac, you will need to do something like we do and run it on Windows through emulation software. Not great.
The device is just a single sensor that has all the sensors housed in it. The light meter, temperature and water submergence reporting all operate for free. However, the pH and ammonia only report if you purchase a ‘slide’ and insert it into the device. It does come with one slide with the purchase of the system. Each slide last one month. You activate the slide in the software, then it will start providing pH and ammonia. One month later, readings will stop and will not restart until you prepare and put in a new slide. The best deal I found has (3) slides for about $35 USD – that’s $11.65 USD per month. Ouch.
Again, for this monitor to actively send data to be reviewed, it has to be connected to a computer with the USB cable. If you happen to have a computer within feet of your aquarium, then you are set. If, like most people, there is not a computer right next to your tank, then you are left wondering how to get this connected to a network. On this front, there are two solutions offered by Seneye. This is good news. The bad news, however, is the price.
The first solution is if you have an ethernet cable in the area of your tank. Then you can use the Seneye Web Server – Non-WiFi version. This costs about $200 USD. Having ethernet cables routed through a home is becoming more and more rare as almost all modern internet devices connect to the wireless network. Thus, most people will be more interested in option two, which is the Seneye Wireless Web Server. It costs around $280 USD.
Know that you don’t have to keep the Seneye connected to a computer or the network for it to operate. You can use a simple USB power converter. In this mode, the sensor will save data every hour. The next time you connect the Seneye, either to a computer or to a network (using one of the network devices listed above) it will upload all of this data to the cloud service for review. The functionality of parameter warnings will be limited to warning lights on the sensor while the unit is powered (but not connected to a computer or network).
Using the Seneye Reef Monitor as a PAR Meter:
This is where the Seneye product shines. I have another page that describes in detail how I use the Seneye PAR light meter to measure the output of aquarium lights I review and use. In short, it works excellently to give you all sorts of data about the light performance, from the PAR values (that tell you how effective a light is to grow plants and corals) to color spectrum information.
Some background on PAR meters: part of the reason the Seneye product is so valuable is that it is competitively priced in a segment that has very little completion. For many aquarist looking to measure PAR, there is only one alternative: the Apogee MQ-510. The Apogee is simpler as it does not connect to a computer. It has a handheld digital readout that displays the measured PAR value and . . . nothing else. No color spectrum information, no kelvin readings, etc. It has capability to store values to memory and also to average multiple readings for you, but that’s it. The Apogee PAR meter costs almost $500 USD, more than double the base Seneye Reef (at around $200 USD).
I consider the simplicity of the Apogee an advantage (namely, not having to connect to a computer) but I find the graphical output you get from the Seneye software very nice – it gives you much more information.
Using the Seneye as a light meter is simple. Know that it doesn’t measure anything near reality if it is suctioned to the side of the aquarium (like it would be in ‘monitor’ mode). It has to be horizontal to read PAR accurately.
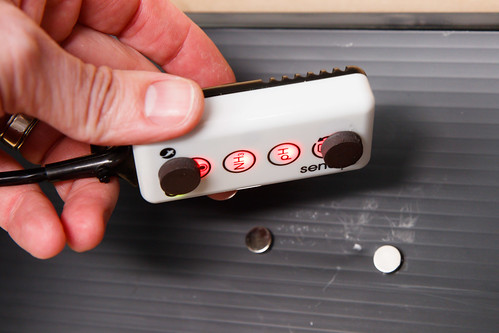
This is one of many instances of this product not providing the user with a practical way to implement. If you just hold it with your hand, you will not get accurate results (as your arm will partially block the light). I had to rig up magnets to hold the sensor at specific locations of a test aquarium. This worked great to get very repeatable results, but it’s not practical in an operating tank.
Apogee offers a ‘wand’ – a simple telescoping stick that allows you to hand hold the light sensor right where you want to measure. For all the added cost options that Seneye offers, this is one they need to add to be able to function as a light meter.
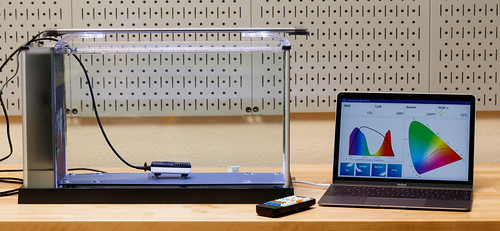
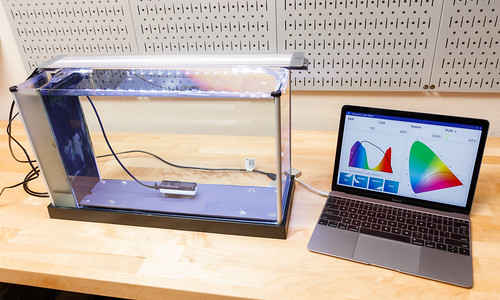
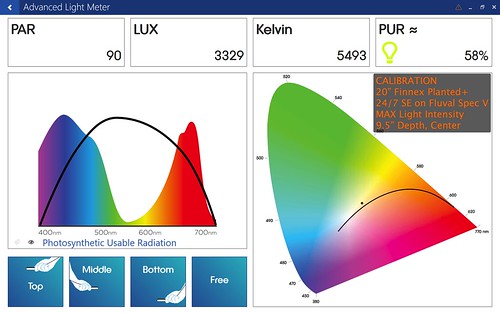
I don’t have an Apogee light meter to compare results with; however, I will say that the Seneye has very repeatable results. I setup our test aquarium for a first round of reviews. I got it out about 10 months later to review a new light. At the start of this second round, I got out a light I had previously reviewed and ran the same test. Here is the first result:
Here is the retest 10 months later:
Very satisfying to see results of almost the same (84 PAR vs 90 PAR).
I have only used in freshwater (planted tank) applications. However, I feel like where a PAR meter is really needed is in the Marine hobby. Reefers wanting to raise a particular coral species may want to test a particular location (on their rock scape) to verify that the measured PAR aligns with what that coral needs. Plants are not that picky about needing a specific PAR value. Corals, on the other hand, can thrive or die based on the light intensity not being on spec.
As a summary, if you can rig up a wand of some sort to hold the sensor in position (in the tank) and if you can deal with having a computer attached, the Seneye is one screaming good deal and a valuable tool for those needing to measure PAR.
Using the Seneye Reef as a Conditions Monitor:
I used the Seneye in ‘monitor’ mode for a month to see if the data produced was valuable to the operation of our aquarium.
To enable the pH and ammonia readings, I had to prepare and install the Seneye slide. You need to soak the slide in your tank water for 24 hours (for freshwater) and 48 hours (for saltwater). I scooped out some tank water in a Tupperware and let the slide sit to the side for a day.
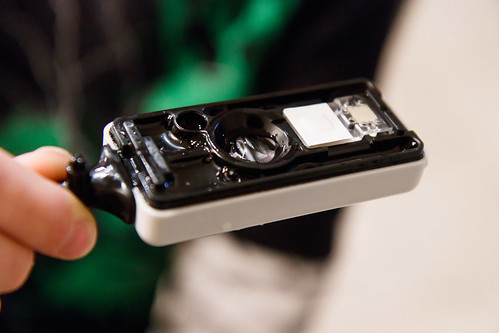
After that, you just remove the black cover from the sensor, install the slide (the notched corner makes it intuitive how to align), and reinstall the black sensor cover.
Next, you need to register the slide on the Seneye user website (Seneye.me) or on the Seneye App. At that point you are ready to monitor all available parameters.
Getting the sensor located securely in the tank is challenging. As mentioned before, the suction cups don’t work. Adding to the diffuculty is the cord – the material is very stiff and unyielding. It imposes force on the sensor that tends to either make it difficult for it to stay put or results in the cable looping awkwardly out of the tank. I never really got it secured and it just dangled in the corner.
Results are recorded and uploaded to the web (for viewing) about every half hour. If you want an intermediate reading, you can activate one at the website, but you are limited in the number of times you can take intermediate readings in an hour.
Of all the recorded data, temperature was probably the most interesting and valuable. Temperature varied a bit more than I expected. We control temperature with an Inkbird ITC-308 – it does a great job, but it does result in a few swings as the heater energized on/off.
pH was very interesting to watch. We have a CO2 injected planted tank. Adding CO2 makes the pH drop, so a daily cycle was observed that exactly followed our CO2 solenoid opening and closing. pH is one of those things that is interesting to know, but there really isn’t much you can do about the pH. Most people advise to not try and adjust pH up or down from what results from regular maintenance (water changes).
Ammonia was just as useless as I anticipated. This is an established aquarium – for a tank that has already been cycled and has the nitrifying bacteria established, ammonia will be zero. Oddly enough, the Seneye never read zero – it always had a reading of around 0.25 ppm. I tested with an API ammonia test, and it came to zero. I strongly suspect the Seneye reading was incorrect.
Seneye Reef Monitor – Final Thoughts and Recommendations:
The Seneye Reef is a great light meter. That you can get a full featured meter for PAR and color spectrum information for around $200 USD, about half what the comparable Apogee product costs is what makes this product amazing. For those planted aquarist and especially for Marine enthusiast, this is a great tool for a reasonable price. The only thing they need to do is offer a wand of sorts to allow the user to position the sensor deep in the tank without skewing readings and getting wet arms.
The Seneye Reef as a monitor is underwhelming. It basically operates as promised, but it brings about basic questions of value for the parameters being recorded. As alluded to above, pH is interesting to know and monitor; however, many users will not want to attempt to adjust pH from the returned readings.
For a properly maintained and established tank, ammonia is almost always going to read zero. The only time you would want to track ammonia is when you are setting up a new tank and performing a cycle. However, when you are cycling a tank, ammonia is only a small part of the story. You will also need to know Nitrite and Nitrate. Since the Seneye doesn’t test for Nitrite and Nitrate, you will still need to test the water with test kits.
The functionality of Seneye monitoring also brings up a question of monitor vs. control. If your heater fails in the ‘on’ position, the Seneye will monitor this and send you a notification that the tank is overheating. However, in this scenario, what would be better than a monitor is a controller – you need something to intervene and shut power to the heater off!
In considering an aquarium controller, most of these systems are more expensive than the base Seneye Reef. However, many people will be frustrated with the USB and connected computer limitation of the base unit. The Seneye does not have the functionality most people desire until the WiFi Web Server is added. This increases the total cost to about $480 USD. This is very near the base cost of a true aquarium controller, like the Neptune Systems ApexEL. That is WiFi capable, has temperature and pH monitoring, temperature control, and is expandable. I know these are different categories and that the Neptune system does not have a light meter, but that is the point. If it is a light meter you are after, then get the Seneye. If your main concern is monitoring – carefully consider what you need and why you need it.


