Water changes for our Spec V Aquarium have been performed using a home-brew ‘Python’ type water changer. This was perfect for our old house, where the sink was very close (a few feet) to the tank. When we moved to our new house last year, the distance was more like 20 feet. This led to a few issues with the Python and made me consider a new way to perform our weekly water changes.
Water Change Pump as an Alternative to the Python:
The Python water change system has some great characteristics. It’s relatively easy to use as one connection to your sink and allows both water removal and water addition. The downfall I ran into was difficulty in producing adequate suction to get the water removal started when the distance between the tank and the faucet increases. If the hose has some bends/twists up and down, it isn’t easy to get the air removed and replaced with water to fully start the siphon.
Other issues arose with the long (20′) hose getting in the way of kids and spouse as I performed a water change. I started to think that it might be better to have two buckets, some hose, and a pump.
Water Change Pump System for Small Aquariums:
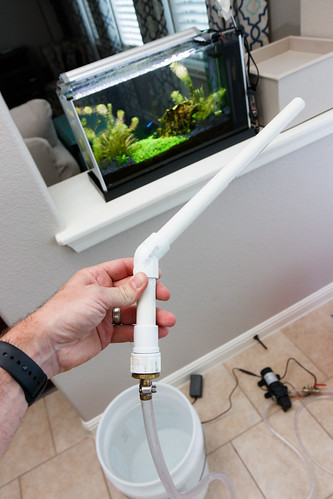
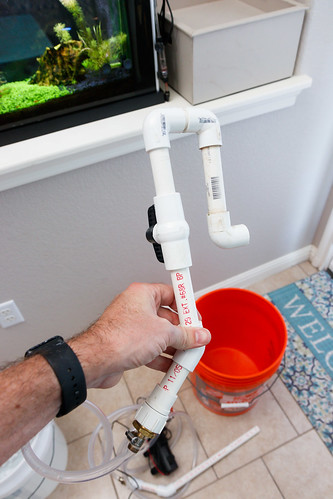
I elaborate on our new water change methodology in this post, but here is an overview. I have two buckets for our 5-gallon (19 liter) nano aquarium; one is filled with clean water to go in the tank, and the other is a ‘dirty’ bucket to receive the discarded water from the water change. I have a (PVC) straight wand attachment on the intake side, a section of hose, then the pump. On the discharge side of the pump, I have more hose and then my hang-over (PVC) attachment.
This system works well for water changes that are less than 5 gallons (for example, a 50% water change for a 10-gallon tank). For water changes beyond 5 gallons, this system may be at a disadvantage because you will need to have multiple 5-gallon buckets, or you will need to haul a larger barrel. For many, this is where the Python system will have an advantage.
However, a pump water change system could work well with the Python. I’d envision a pump to remove the water, with discharge to a sink or even out a window or door to water the yard. Then, fill the tank using the Python. The Python works better in ‘fill’ mode anyway. A properly sized pump will remove water as fast or faster than a python and gives you options on where to dump the water. I’ve always thought that if I had a large aquarium, using the discharge water on the yard would be resourceful.
Parts List and Build Instructions for Aquarium Water Change Pump:
Here is a list of parts I used to make the pump water changer:
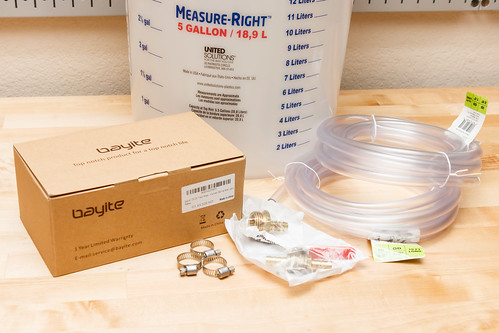
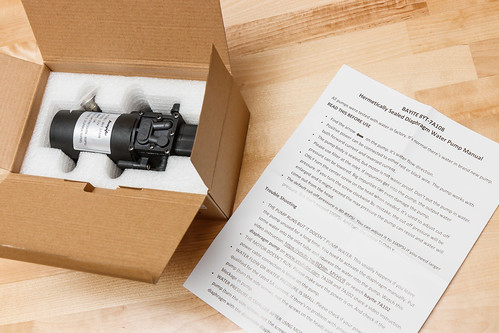
- Bayite 12v 1.2 GPM Diaphragm Pump
: The most important thing to look for in a pump is for it to be a self-priming, diaphragm-type pump. I mistakenly got a circulation pump that was not self-priming, which completely defeats the purpose because without self-priming, you have to get water fully in the hoses to ‘prime’ the pump yourself, which is a pain. The pump needs a 12v DC power source (which we will get to next). If this is for a larger aquarium, you might look into a larger pump. The listed flow rate (1.2 Gallons per Minute [4.5 liters per minute]) is with nothing connected. Actual flow with head loss from hoses, fittings, etc. will be slightly lower.
- AC to DC Power Converter: Almost all diaphragm pumps readily available need Direct Current (DC) power. I wanted to plug this pump into a wall outlet, so I got an AC to DC power brick. The pump will have listed on the nameplate the amperage required. The Bayite pump (that I used – listed above) draws up to 5 amps of power at 12 volts. The power source should provide no higher than the rated amperage, but it can provide less; it will just result in a flow lower than what the pump is rated for. I used a power brick I had lying around; it delivers two amps and 12 volts. The resulting flow works just fine for our small tank. If I used this for a larger aquarium, I would probably look for a power brick with a higher amperage rating. Here is one that delivers the full five amps
. There is a cheaper and simpler one that delivers 3A
.
- 3/8″ I.D. Clear Vinyl Tubing:
10′ was plenty for our setup. This vinyl tubing has enough rigidity to resist kinks.
- 3/8″ Barb to 3/4″ Male Hose Fitting
: I use these to transition from the 3/8″ vinyl hose to the water change fittings.
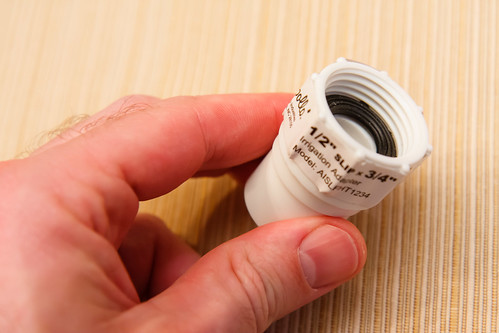
- DIY PVC Water Change Accessories: I detail how to make these on my DIY Python Water Change page. The concept is to use 1/2″ or 3/4″ PVC and fittings to make what you need to get water into and out of the bucket/tank. I used a mostly straight apparatus on the suction side and a ‘U’ shape on the discharge side (to hang over a bucket/aquarium hands-free. All you need are 3/4″ Female Hose to 1/2″ Slip fittings
, 1/2″ PVC, 1/2″ fittings, and PVC glue
.
- Stainless Steel Hose Clamps:
These secure the vinyl hose to barb fittings. The pump comes with some, but you may need additional to complete the project. I used the 5/16″ to 7/8″ size range clamps.
- Ball Valve – 3/8″ Barb Fitting
(Optional): I put this on the discharge side of the pump. My thinking was that the pump flow might end up too high (especially when filling the tank back up), and I might want to throttle the flow down a bit by partially closing this valve. With my lower amperage power brick, the flow is not too high, and I don’t need this valve (it remains fully open).
Putting all this together is fairly simple. Starting from the outside in, the PVC apparatus’ is fairly simple. Just cut the pieces of PVC into sections and press them into the various PVC fittings. Once you get everything set, you can glue the fittings together. Full disclosure: I have used mine for over five years and still have not glued them together. The end of these assemblies are finished by screwing in the male hose/barb fitting adapter.
Next, you have the vinyl hoses and barb fittings. Slide the stainless hose clamps on the hoses first (loose), then fully press the hose onto the brass barbs. Next, slide the clamps into position and tighten with a screwdriver. I left the hoses longer than I needed to at first. After a few weeks, I shortened the hoses to match my usage.
Lastly, and probably the most difficult, is wiring the power supply to the pump. You need to get down to bare wires from the power transformer. I did this by splitting the wires to separate (with a razor blade), and then I used wire strippers to remove a short section of insulation. The pump comes prepped with wires already stripped. I joined the two sets of wires by soldering and covered the joints with heat shrink. I understand this may be difficult for people without access to or experience with soldering irons. An alternative would be to use some crimp connectors. For this diaphragm-type pump, polarity does not matter – you can connect the positive (from the power converter) to either wire on the pump (and connect the negative to the remaining pump wire).
Water Change Pump Project – Cost and Final Thoughts:
Like many things in life, this project cost more than I anticipated. What gets the cost up is the quantity of small pieces that all add up. I’m not counting the PVC parts since I already had them. My costs were as follows:
- Pump: $23 USD
- Power Adaptor: $0 USD (I had one laying around)
- Vinyl Hose: $9 USD
- Barb to Hose Fittings (2): $13 USD
- Stainless Hose Clamps: $6 USD
- Ball Valve: $7 USD
The total is $58 USD. If you have to buy the power adaptor, then the total will be $8 to $12 higher. There are aquarium-specific pumps on the market, but most are more expensive than the diaphragm pump I found. In fact, some high-powered marine (aquarium) pumps cost more than this entire project.
For me, the resulting water change pump system is worth it. It works much better (for our new home layout) than the old python type system.








Cool water change system. I am a newbie and am trying to get more efficient. I schlep about 60 gallons of water from outside the house (before the water softener). Pouring five gallon buckets is a back breaker and makes a mess. Difficult to do gently. Your system will help a lot.
Also looking to make some kind of cart for hauling water to make that a bit more efficient. Maybe put four buckets on a four wheel cart. Roll to back door. Bring a hose to the back door. Fill. Roll back to fish room. Could also plumb water from before the water softener through to the fish room. But that would be a lot of work.
Cool site. I have bookmarked it and will revisit regularly.
For that quantity of water, consider a higher flow rate pump than what I’m using. Good luck!
where can i get this set up THANK YOU
The article has a parts list. Just purchase the parts and put it together yourself.