Given that creation of this site was inspired by the Fluval Spec aquariums, I thought it was well past time to get my hands on the little brother in the family, the Fluval Spec III.
Fluval Spec III Aquarium – Overview of Features:
The Spec III is the smaller of the two in the Fluval Spec Line. I have had a Spec V setup for about two years. It is the 5 gallon capacity model; the Spec III I am looking at here is 3 gallons – actually they say it is 2.6 gallons, but we will get into that more later. Here is an overview of features for the Spec III aquarium:
- All-in-one Design: This is an almost complete aquarium that includes a filtration system and light that all fits into one unified design.
- Listed water volume of 2.6 gallons (9.8 liters)
- LED light fixture with 31 LED bulbs.
- “3 Stage Filtration System”
- Acrylic top
- Available in two colors: White
and Black
The Fluval Spec III uses the same basic form factor including the same concept in light fixture and exactly the same filtration system, so much of what I wrote in my Spec V aquarium review will apply to this review. I will try to point out the differences between the two models as I go along but will make this a review that can stand alone so you can fully understand how this tank works.
Spec III – What’s in the Box and How Does it Work:
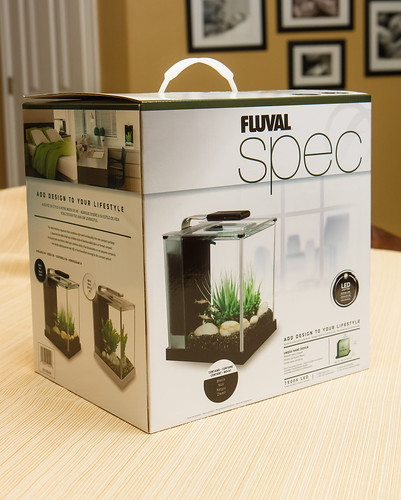
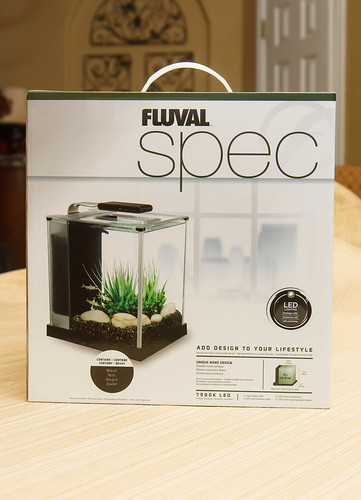
The Fluval Spec III comes in a very nice box with features and descriptions written all over.
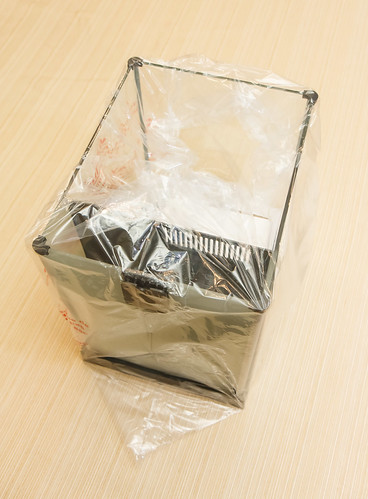
Inside I found everything very well packaged. The tank itself was plastic wrapped for protection.
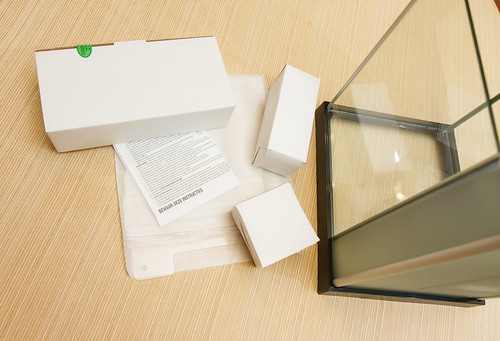
The pump/filtration parts came in separate boxes. The light fixture and associated power transformer also came in separate boxes.
The acrylic lid was hidden below the tank in the bottom of the box. It was covered in protective foam and was clean without any scratches.
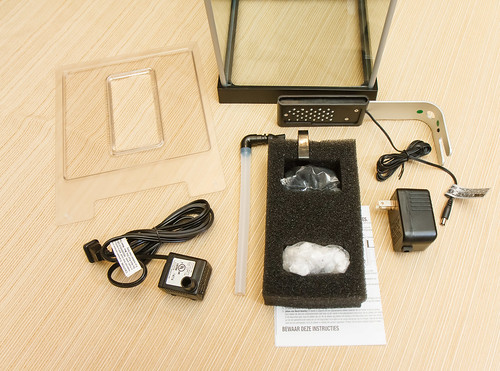
Here is everything that came out of the box
- Fluval Spec III Aquarium
- Acrylic Lid
- Light Fixture
- Power transformer (brick) for light fixture
- Water Pump
- Bottom ‘Collar’ for flow tube
- Flow Tube (made of silicone hose)
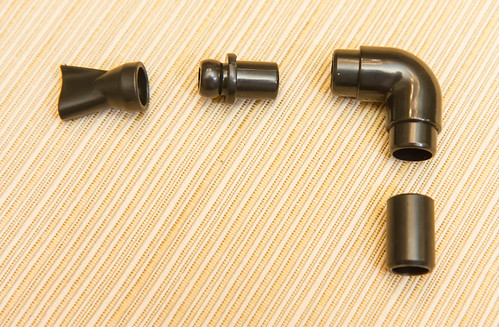
- Elbow
- Flow Nozzle
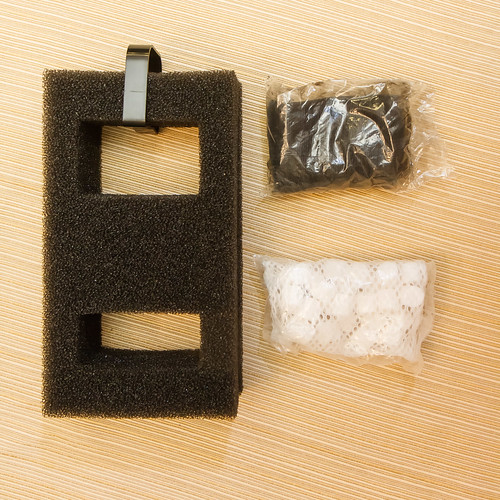
- Filter Foam
- (1) Bag of Activated Carbon
- (1) Bag of Biomax Ceramic Rings
- Instructions
What I love so much about the Spec Line of aquariums is that everything you need (almost) comes in one single cube. About the only thing that you might need to add to keep fish healthy is a heater.
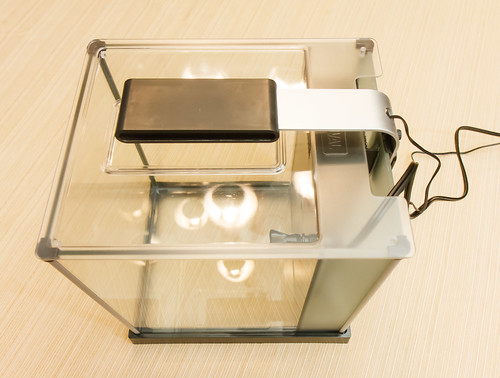
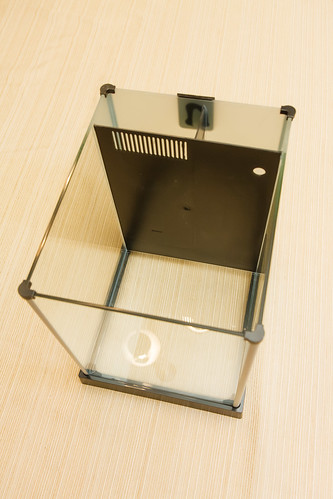
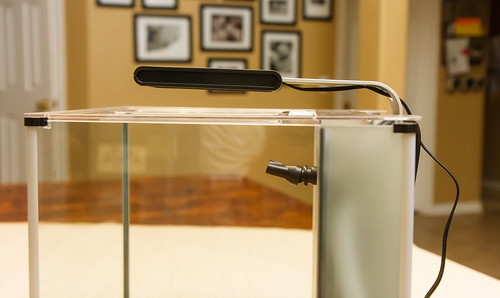
The tank itself is made of glass (I measure at 3.9mm thick). I like that it is made of glass and not acrylic as glass tanks are more resistant to scratches. The bottom of the tank has a plastic border around the perimeter that is either white or black, depending on what model you choose. The edges are covered by aluminum. The top edge is very nice looking. Instead of surrounding with plastic (like the bottom) the glass is exposed at the top so that it mimics the look of popular ‘rimless’ tanks.
I found the quality of this tank to be excellent. There was just a bit of excess silicone on one of the joints, but that was at the bottom of the tank; not noticeable when built up and filled with substrate. No scratches or cracks of any kind with the unit that I purchased.
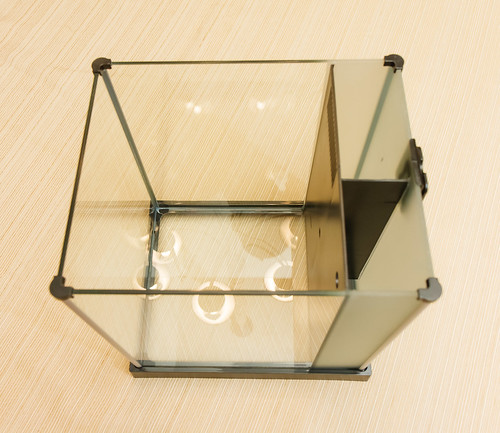
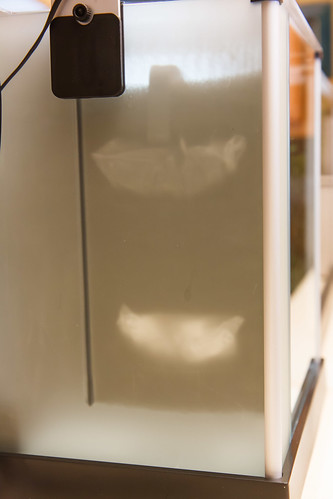
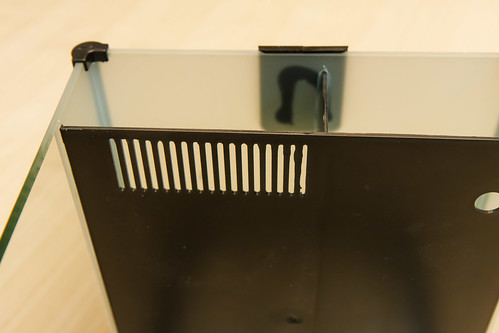
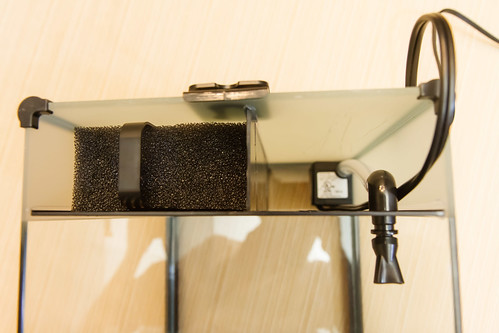
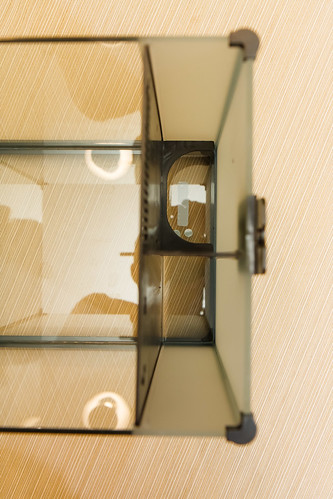
The tank is divided into three sections when viewed from above. The largest is the display section, where your critters live, The display section is separated from two other sections in the back by vertical pieces of black acrylic. These two sections make up the filtration section (where the filter media goes) and the pump section. These sections are obscured from outside with frosted glass. I love this feature – it looks high end but still serves the purpose of keeping the guts of the tank (filters, pumps, etc.) hidden. The frosted glass looks nice with the aluminum of the light frame.
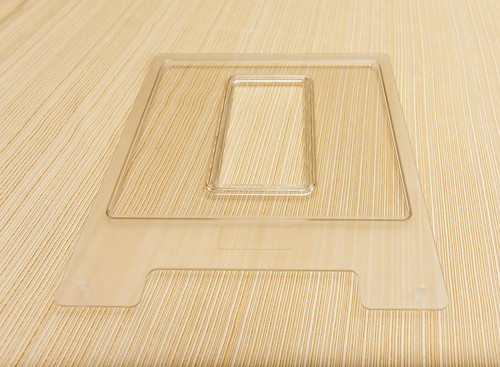
The tank comes with an acrylic (plastic) top. It is mainly clear, but with a frosted finish around the edges and at the back (to obscure the pump/filter sections). Being plastic, it will show age after a while from scratches and water deposits.
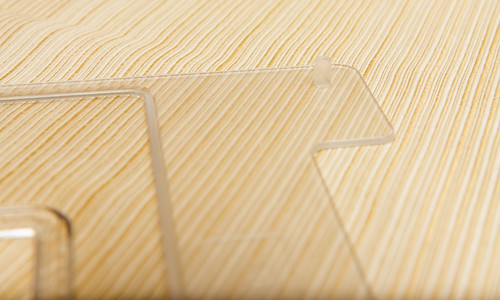
It has four pegs molded into the bottom that align with the inside edges of the tank and keep the lid from sliding around.
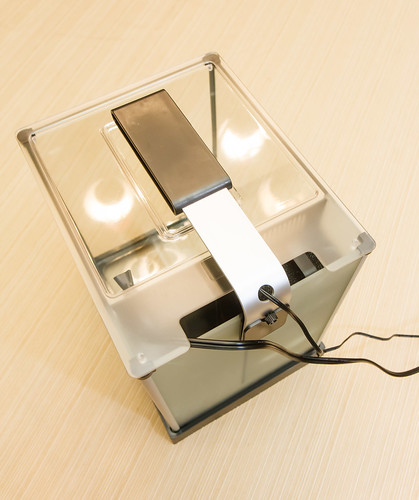
Right in the center of the lid is an opening that roughly matches the size of the light fixture head. There is also a cutout at the back to allow cords from the pump (and a heater if you install one) to pass out of the pump section.
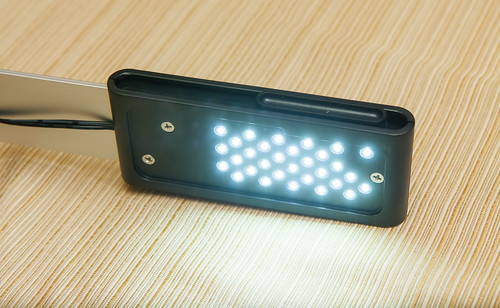
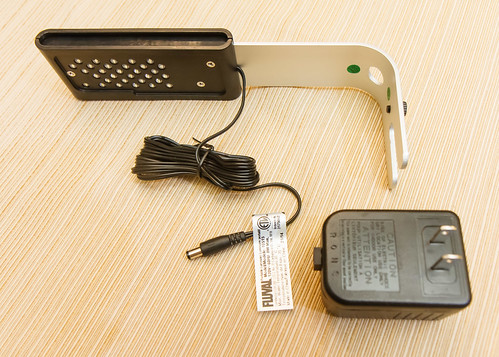
The light fixture is very nice on the Fluval Spec III. It matches the basic concept of the one that comes with the larger Spec V, but it is nicer because it doesn’t suffer from light droop. The fixture is made up of 31 LED lamps. They produce white/blue light. The intensity of light from the fixture is not overwhelming – quite dim actually, but it is suitable for tanks that don’t have plants or that have low light plants. For those that want to keep medium or high light tanks, an upgrade in light fixture to one with higher output will be in order.
The part of the light fixture that houses the LED’s is made of plastic (either white or black depending on the color of Spec that you choose). It has a two position sliding switch on the size – off and on. Unlike the Spec V model, there is no ‘moonlight’ mode with blue LED’s. I don’t consider this a loss as I never have used moonlight modes in any light that has it.
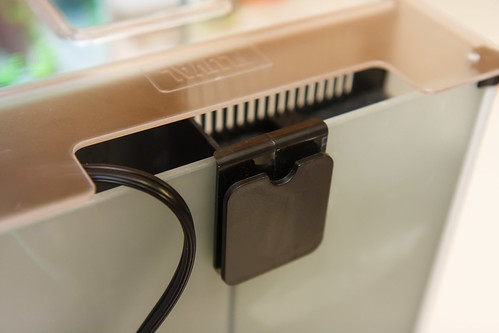
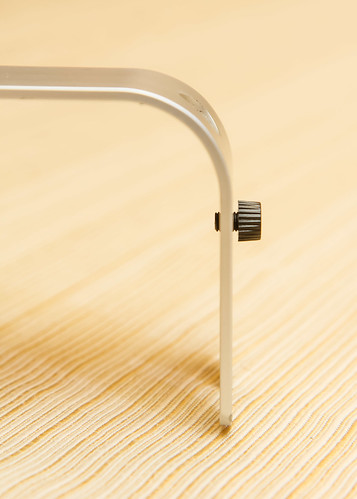
The plastic light head is mounted on a flat, bent aluminum frame. The ‘L’ shaped bracket slides into a complimenting plastic receiver that is glued onto the back of the tank. The fork shaped end slides into this plastic receiver. The light is secured by screwing in a plastic screw.
The cord from the light can be threaded through a hole provided to make the cable routing clean. This thin cord is plenty long; around 61″ from where it exits the fixture to where it connects to the power brick. It is nice that the wire to the power brick is not a hard connection but is a round plug; this makes routing cables easier if you are putting things in a storage box.
Again, the light mount works great and sits perfectly level and tidy on the aquarium. It is a great looking fixture – very contemporary and sleek, just like the rest of the tank. The only downfall to the light is that the output is quite dim, but this actually could be considered an advantage for many people as the low light level will keep algae growth at bay.
The filtration system is the highlight of this little tank, and here is how it works. As I mentioned, the tank has three sections: display, filtration, and pump. The three sections are divided by black acrylic. Water starts inside the tank and flows into the filter section by way of vertical overflow slots that direct water into the top of the filter section. People who raise fish or shrimp worry about the tiny babies getting drawn into the filter section. I have never had trouble with this, but there is a way to cover these openings to keep babies out if you feel the need.
After water flows into the filter section it travels downward through the media. The aquarium comes with three filtrations components: Filter block, activated carbon, and biological ceramic rings. Fluval calls this a “Three Stage” filter with the stages being Mechanical (the filter foam, to remove particles), Biological (the ceramic rings, to provide plenty of surface area for the good bacteria to live) and Chemical (the activated carbon).
The filter foam is good at getting the particles out of the water. My regular aquarium maintenance reveals the filter media to have much trapped detris (brown, dirt like stuff). That means that it is working to keep the water clean. The filter foam is coarse, meaning the openings are not overly small. This is good in that it keeps the media from completely clogging up with dirt. However, being on the coarse side means some of the finer dirt will pass through. I alleviate this by adding other finer media to the top of the filter section.
The little bag of ceramic bio rings that they provide is very good. This is just a mesh bag filled with little cylinder shapes made of ceramic. The ceramic is porous and this adds up to a lot of surface area. Surface area is what the good bacteria, the ones that are part of a healthy aquarium, transform ammonia into nitrite and then nitrite into nitrate. Remember that the surface area that this beneficial bacteria grows on is not just on the ceramic media; it is on every surface in the filter section and inside the display section. The ceramic rings do add up to give you a lot of extra surfaces for the beneficial bacteria to grow on.
The foam block comes with two cutouts to house filter media. The top opening is slightly larger. I take it from the instructions the intent is for the activated carbon to go in the top section and the biomax ceramic rings to go in the bottom section. I personally choose not to use the activated carbon and instead use a 100ml bag of Seachem Purigen in the bottom section and the bag of biomax in the top section.
Inside the filter section, the filter block is supported by a semicircle of acrylic that holds the filter foam off the bottom of the tank by about 40mm. After water flows through the filter media and to the area below the media support, it passes through a low opening between the filer and pump sections.
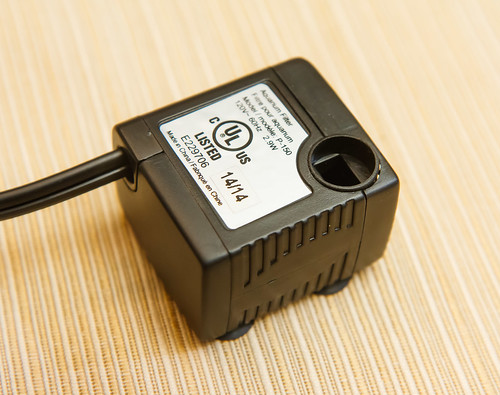
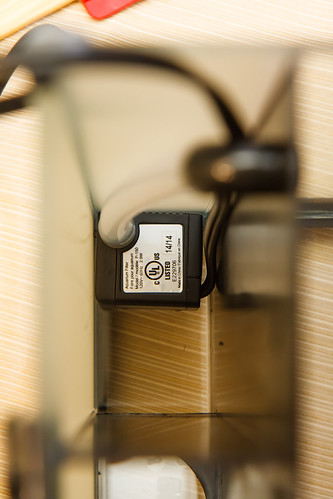
Once the water gets into the pump section it is drawn into the pump. The pump is a fully submersible unit. It has suction cups on the bottom that keep it in place.
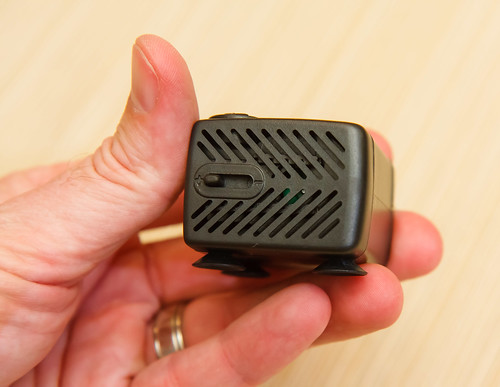
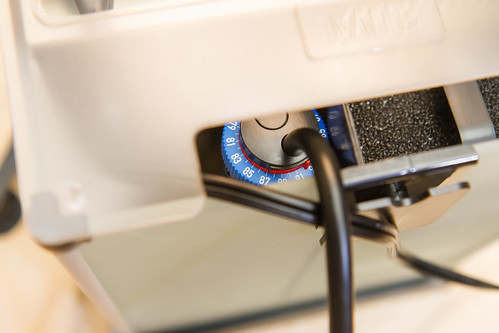
On the side of the pump is an adjustment baffle that helps to control the flowrate. It is designated with ‘+’ and ‘-‘. The plus is for maximum flow. In this position, the internal baffle is unobstructed. This view shows the inlet of the pump where water enters through the grating on the side.
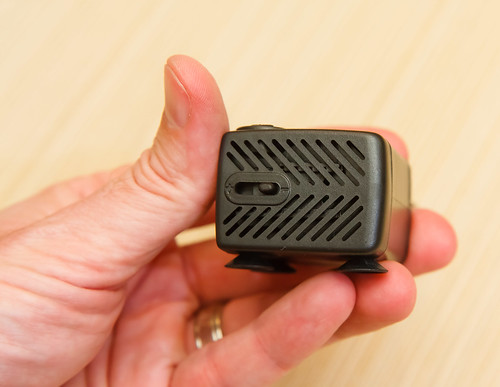
The minus is for lower flow where the internal baffle is closed off to restrict flow at the pump.
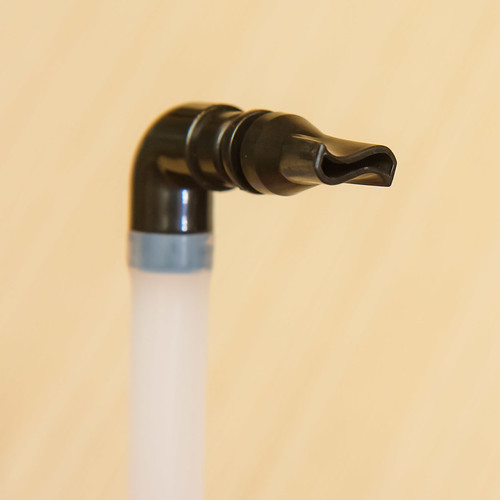
Water exits the pump at the circular opening at the top. From here it travels up through the flow tube, through the elbow, and this discharges out of the nozzle and into the display tank.
The nozzle is mounted on a two piece ball and socket mechanism that allows the nozzle direction to be adjusted inside the tank.
Water that is forced into the display tank circulates through the tank and then overflows back through the overflow slots, starting the cycle over.
Spec III Dimensions and Volume:
One big consideration people have for these all-in-one aquariums like the Spec III and V is their size and where they can be placed. The small size and relatively low weight (compared to larger aquariums) allows these aquariums to be placed on kitchen bars or counters. To help people in planning for their new tank, I will provide all the dimensions that I can. Dimensions are measured down to the nearest 1/16 of an inch. Metric is converted to the nearest mm. Width is always oriented the same as the filter section; length is the same direction as the light points.
- Overall Footprint: Length = 10-7/8″ (276 mm); Width = 9″ (229 mm). The footprint measures the plastic frame at the bottom; the actual glass dimensions are less than this.
- Overall Height: 11-9/16″ (294 mm). This is measured from the surface that the aquarium rest on to the top edge of the glass. The acrylic top adds 2 mm
- Overall Height Including Light: 13″ (330 mm)
- Main Display Section (inside dimensions): Length = 7-3/4″ (197 mm); Width = 7-15/16″ (202 mm)
- Pump and Filter Section Length = 2-1/8″ (54 mm)
- Pump Section Width = 3-9/16″ (90 mm)
- Filter Section Width = 4-5/16″ (110 mm)
- Filter Section Height: 9-5/16″ (237 mm). This is from the top of the baffle that the filter media rests on to the top edge of the glass
- Inside Height: 10-3/8″ (264 mm). This is for all compartments, measured from the top of bottom glass to the top edge of the glass.
The ‘III’ designation in the model name is roughly the listed volume: 2.6 gallons, rounded up. As a fun exercise, I calculated the volume based on the dimensions measured. Actual water volumes will be diminished with added decorations, filter media, pump, equipment, etc. but it’s an interesting exercise:
- Overall volume: 3.53 Gallons (13.36 Liters). This includes water in the pump and filter sections.
- Display Section Volume: 2.78 Gallons (10.51 Liters)
Fluval Spec Pump Flow Test
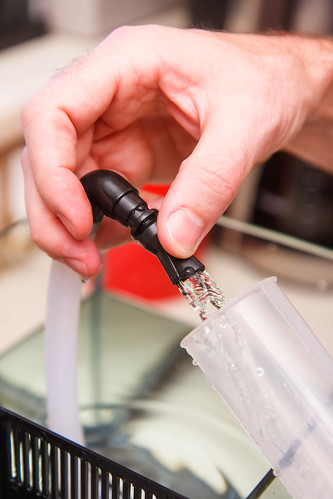
I have always wondered what the capacity of the pump is in the Fluval Spec aquariums. The Spec V and III both come with the same model of pump. I performed a relatively simple test where we measured the volume from the pump by discharging into a graduated cylinder and measuring a duration with a stopwatch.
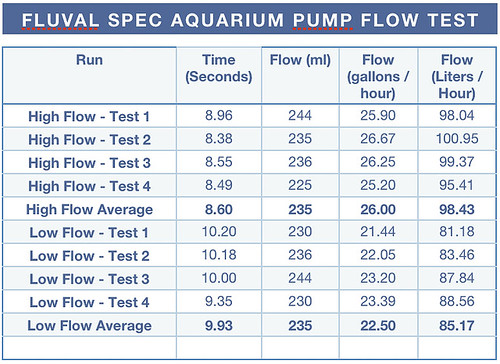
I then calculated the rate of discharge by dividing the volume measured over the stopwatch time. I performed the test 4 different times with the pump on the highest flow setting and 4 times on the lowest flow setting (click to enlarge):
I don’t know how accurate this is, but it’s the best test I could come up with. The high flow setting tested at 26.0 Gallons per Hour (98.4 Liters per Hour). The low flow setting had an average flow of 22.5 Gallons per Hour (85.2 Liters per Hour).
Fluval Spec III – Tips for Installation and Thoughts on Use:
Overall, I love this Spec III. It has all the great features that I love about the larger V model: sleek design, everything in one box, very quiet, high quality filtration system. Here are some thoughts on strengths of the aquarium and some tips and thoughts on setting it up.
- I find the stock filter system works very good. The pump is excellent – very quiet. I can’t hear any part of the aquarium operating from more than 3 feet away.
- I did quite a bit of fiddling to figure out the best way to put the pump in the Spec V. I think the same orientation is the best for the III as well.
- The size and dimensions are very different from the Spec V. It is almost cube like in the ratios of depth x height x width. I think it is a bit challenging to aquascape, but there are so many possibilities to make it beautiful. The smaller water volume and size makes picking occupants somewhat challenging.
- There are two bypass slots in the Spec: one low in the filter section baffle, and another in the baffle between the filter and pump sections. It is worth considering plugging these bypass slots and it will be easier to do this when you are first setting up the aquarium.
- The flowrate of the stock setup, even when set on minimum pump flow, may be higher than desired, especially for Betta and other long finned fish. There are several options for lowering the flowrate and diffusing the flow.
- In keeping with the sleek form factor, there are many heater options for the Spec III – lots of them will fit in the pump section to remain completely hidden. Since the pump section is bigger in the III than the larger V model, it is easier to get it all to fit. The excellent Eheim Jager is shown below.
- If you do put a heater in the pump section, it is worth considering modifying the flow tube with a few holes – I explain why and how here.
- The light is very good. It is a bit on the bluish/white spectrum (I tend to like aquarium lights that are a bit warmer/yellow). It is somewhat difficult to find an aftermarket light for the Spec III because you are reliant on clip models; the stock plastic mount and the stock acrylic lid interfere with some clips. I got a Finnex Stingray Clip to work with a few compromises.
Wishlist for Next Generation of Spec Aquariums:
Some of these I list on my previous review of the Spec V, but I have a few additional wish list Items that I have come up with:
- The pump section is wider in the III which is nice, but I wish they would make it a bit longer to foster getting the pump in place and to give it a bit more room for flow into the inlet. Even 1/4″ added would be plenty.
- For many fish, the stock pump is entirely too harsh, with flow that is too high and a flow pattern that is too focused and harsh. I wish they designed a pump that allowed for more turndown to get the flow lower. It would be nice if Finnex would also provide a stock (and optional) solution to diffuse the water from the outlet nozzle if users so desired.
- I certainly understand why they provide the flow bypass slots, but not everyone needs those. They could provide rubber or plastic grommets to close those openings if the user wanted, but allow for removal.
- As I mentioned previously, I feel the light hue is a bit on the white/blue side and could be a bit warmer. I wish the light had more LED’s for greater intensity, and incorporated a dimmer so that the user to dial in the perfect amount of light for their setup.
I understand that some of these changes would increase cost and that may or may not be beneficial to the market; however, they would be substantial improvements to make what is now a very good setup a great setup.
Conclusion – What a Great Aquarium:
I love the Spec series of aquariums, as you can tell from my dedication to this site. I think the III is wonderful in that it has all the great features of the bigger brother model V, but it is a more manageable package that may fit better for some people and their intended use, vision for aquascaping, and intended critters. Even with some wish list items, I am very impressed with what Finnex has done with this series. I’m also excited to think about what Finnex and other companies will come up in future nano all-in-one aquariums.



Awesome blog, very helpful and I’ve been following it to set up my spec v. Keep up the good work. You should show off full tank shots and stuff
Thank you so much! It will take a while for me to get the III presentable (if ever).
I’ve had a Spec 3 for a few years now. Overall I like the tank design, but I think I will do the bypass block off soon. I get a lot of surface film that I wish would get skimmed off. Also, I am considering heating the return spout and shaping it into a cone shape to diffuse the flow. I had good luck growing java fern and anubias with the stock fixture. With the addition of a small heater I have kept neon tetra, glo-lite tetra and otocinclus along with some white clouds and ghost shrimp. I had a decent sized piece of mopani wood that caused a pH drop that I countered with some crushed shells in a mesh bag. I have my eye on a Spec 5 or one of the plain glass cube nano tanks in a similar size. I have enjoyed your site for some time now, keep up the good work!
Hi Nate,
I’ve recently purchased a Spec III tank and am so happy to have stumbled upon your site! Your in-depth reviews and tips are extremely valuable and such a terrific resource for someone like me who is just getting started with this line of nano-aquariums, can’t thank you enough for putting this all together and saving me hours of trial and error to get this tank running at it’s max potential!
One thing I don’t think I’ve seen mentioned or reviewed on your site however, is the alternate filter setup for the Spec III or V using the secondary market “inTank Fluval Spec Media Basket”: http://www.amazon.com/dp/B00H56OH4M
I see that you do not use this setup, but was curious to have your opinion on it as this media basket has pretty high praise in online reviews and in some forums I’ve read.. It is however a somewhat pricey modification and I am trying to determine if its truly worth the consideration as a potentially more efficient setup for the filter section of the tank (bypass holes have been plugged on my Spec btw).
Would love to know your thoughts on this and if this product for Spec tanks was on your radar at all?
Thanks!
-Dan
I’m aware of that product. I have not used it, but the pricepoint is not good. It cost more than half the Spec Kit price. On top of that, you might need to buy various filter media to go into it; more money. I see some design flaws with it.
I hope to design a similar solution that people can make themselves out of household items for dramatically less money. By all means, If you get it and try it, come back here and leave a comment on what you think.
I just purchased a Spec III and had a nice surprise. The light unit has been upgraded. I saw the pics and description of the light unit here on Spec-Tanks while I was waiting for my tank to come in. (I ordered it from Petco on Thursday night before Memorial Day 2016 and UPS didn’t pick up until Tuesday, that was a long week of waiting, checking that tracking over and over- I got a chance to really explore your website a lot in anticipation). So, they’ve added one more LED to the light; it’s 32 now. It also has a touch switch rather than a slider, I’m enjoying that. And it has the moonlight blue lights now (4 LEDs). I use the blue lights a little throughout the day: when the kids want to see it of course, and and night I do a little reading before my wall timer switches it off, I’ll tap it to the blue light so it’s easier on my eyes. This is better to wake up to come 8 am also.
The box says the light is 20% more powerful than the previous model. Having never seen another Spec III in person I can’t attest to that here’s the specs as listed on the box.
Watts: 6.4W
Lumens: 748lm
Color Temp: 7000k
LEDs: 32
Hours 50000
So there’s the new info, I didn’t know what the old light was like but I’m liking this one.
Jay, Thanks for the information on the updated Spec III. I hope to get an updated version of the III and the V sometime to have a look myself.
We are first-time fish owners (and therefore, first-time aquarium purchasers). We got the newest generation of the SPEC III. The instructions for it were not all that specific, so I found your site to help me install the pump. Thank you! Now I have a question. Does the water level in the tank need to cover the top spout of the pump? Or, does the water level rest just below the pump nozzle, and it sort of waterfalls in?
Thanks!
It will work so long as the water level stays above the overflow slots (back to the filter section). Other than that, just keep the water level where it looks good and seems to give good flow from the outlet nozzle.
Great. Thanks!
Thinking about getting one of these tanks to play with. I already have an old 2g hexagon tank with an under gravel filter that I purchased about 20 years ago, still runs like a champ, added one of those flat heaters under the grate, my betta loves it. I understand the concept of the over flow filtration system but I keep thinking if they moved the intake to the bottom, reversed the way the water flows on the filter side and used the over flow from the filter to the pump chamber, you would have a natural flow for a heater as the water would be drawn back down past the heater to the pump. Or maybe I should stop overthinking it and just get it already. Great info here, thanks.
What fish or inverts do you recommend for this fluval spec iii. I got this tank free from a friend.
Awesome – best of luck with your new tank! Check out this article on stocking nano freshwater tanks.