I’ve discovered CO2 delivery in a high light planted aquarium to be more complex than it appears. When I first assembled and commissioned our paintball CO2 system it seemed like a simple affair of just adjusting the needle valve to get as much CO2 into the tank as possible. This is a necessary start to the CO2 supply chain, but what I now understand is that the remaining part of CO2 delivery, from dispersion and through the path to the plants, is equally as important.
Dirty CO2 Diffuser – A Broken Link in the CO2 Distribution Path:
The complete path will get CO2 dissolved into the water column and then have that CO2 saturated water flow over the plant’s leave surfaces. Plant growth and algae issues over the past year have proven that this full path is very important.
One aspect of CO2 delivery is good flow throughout the planted tank. I have made a few interesting improvements over the past few months in our Spec V on this front – an upgraded pump as well as a new Radom Flow Generator (return nozzle) from VCA. I will write about that in the near future.
Before flow, however, there is the issue of efficiently dissolving the CO2 into the water column. I have found that over time, the CO2 diffuser that creates the very fine mist of CO2 bubbles will become dirty – either clogged with detritus or coated in algae. This affects the ability of the diffuser to create a fine mist and it makes more along the line of large bubbles. Large bubbles of CO2 don’t dissolve as readily as the fine mist. It doesn’t take much dirt/algae to make a difference in how much CO2 actually get’s dissolved into the water.
How to Clean a Planted Aquarium’s CO2 Diffuser:
I’m going to discuss my go-to method of cleaning our planted tank’s in-tank CO2 diffuser. It involves using bleach. Bleach is not something that plays well with aquarium occupants. Getting bleach into your tank can possibly kill your fish and/or inverts, so it takes a bit of care to pull it off without issue. If you can’t stomach using bleach in the diffuser cleaning process, then I have an alternative process I will offer in a bit.
- Remove the CO2 Diffuser from the Aquarium: I turn off the CO2 (by shutting off power to the regulator solenoid). Then disconnect at the nearest fitting (in our case, that is a 90° pneumatic elbow), and remove the in-tank CO2 diffuser. If you have an in-line type CO2 diffuser, you will need to disassemble to get to the ceramic element. It’s best to not touch the ceramic part as your skin oils can further clog the surface. Scrubbing the ceramic surface with anything (rag, brush, etc) is also a no-no. The surface will be damaged and it will produce larger bubbles (permanently) instead of the fine mist of tiny bubbles. Again – avoid the temptation to scrub it with anything to clean.
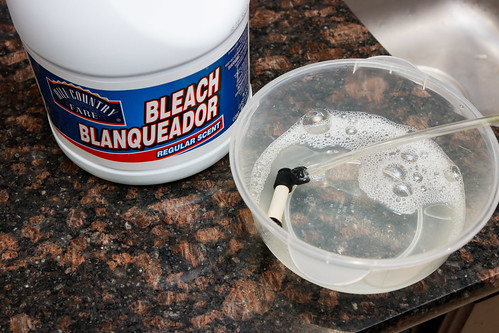
- Put the CO2 Diffuser Into a Small Container: Using a small container (just big enough to contain the ceramic diffuser) will reduce the amount of bleach you use in the process. I use Tupperware and mark the piece as one that will only be used for this purpose (to make sure if it has bleach on it afterwards, it doesn’t get used in the future in a way that would contaminate the tank).
- Add 50% bleach and 50% Tap Water to the Container: Use enough of the 50/5o bleach and water mix to cover the ceramic entirely.
- Let the Ceramic Diffuser Percolate in the Solution a Bit: I don’t know if the duration matters. I usually swish it around every once in a while and let it soak for about an hour. Usually, algae has disappeared within 20 minutes and the ceramic is much cleaner (if not white as a brand new unit).
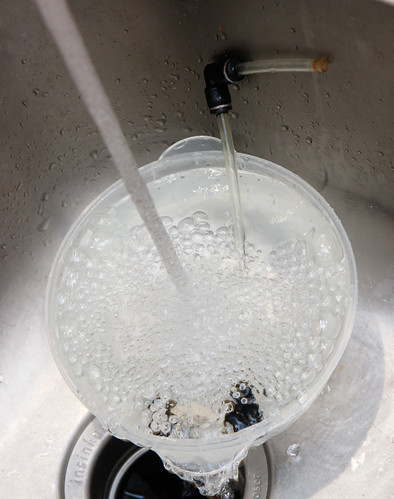
- Rinse the Diffuser with Tap Water: At this point, dump all the bleach/water mixture from the container. Rinse the diffuser thoroughly under running tap water. Then, rinse out the container with tap water as well.
- Fill the Container with Tap Water and Add Dechlorinator: Don’t skimp this time. Fill generously with as much clean tap water as possible. Then, add a double (or even triple) dose of a dechlorinator, like Seachem Prime.
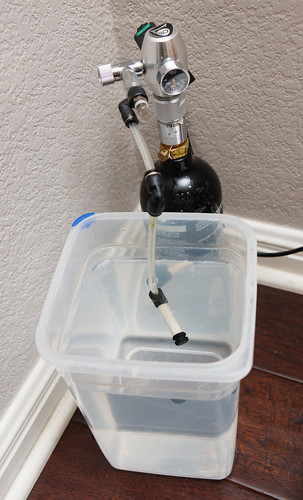
- Soak in Dechlorinated Water: Let the ceramic diffuser soak in this dechlorinated water for at least an hour. As an additional measure to help push the bleach out of the diffuser, I also hook the in-tank diffuser directly up to the CO2 regulator.
This extra step is a little insurance to safeguard against a mishap with leaving some of the bleach soaked inside the stone.
- One Final Rinse in Tap Water: Before reinstalling back into your tank, give it one last rinse in tap water; shake off the excess, and put the diffuser back into service.
Alternative to using Bleach to Clean a CO2 Diffuser:
It is understandable if you don’t want to risk using bleach in any part of your aquarium. The good news is there is an alternative. Instead of using bleach, use Hydrogen Peroxide. In step three above, use regular household hydrogen peroxide (which is 3% concentration). No need to dilute in water – use it straight. Also, you can skip steps 6 and 7 above. After you are done soaking in the hydrogen peroxide, rinse and reinstall.
How Often Should You Clean Your CO2 Diffuser?
You should clean it before the performance degrades to the point it interrupts CO2 delivery to the plants. That is a vague answer but it is my way of saying . . . It depends.
In our planted aquarium (using an in-tank atomizer), it seems like every four to six weeks is what is needed to keep the diffuser clean and the bubbles bubblin’ in a fine mist. An easy indicator is if algae is growing on the ceramic portion of the diffuser, it needs to be cleaned.
In-Line diffusers are usually not subject to the tank’s light and therefore don’t have the high level of algae growth; they can go longer between cleanings.
The process of cleaning the ceramic CO2 diffuser is a bit involved and it can discourage me from even starting the process. For this reason, consider having two diffusers (or at least an extra ceramic insert if you use an in-line type); one in the tank, and one clean and ready to swap out. The tank will remain in good shape and you have a little leeway in timing to get the spare cleaned up again.


I’m looking forward to the post about the new pump and flow nozzle! I have wondered what to do about the dead spots in my Spec V.
I have used high concentration H2O2 (35%) on them with a syringe.
basically you inject peroxide with a syringe and push it through the diffuser.
Usually 4-5mL treatment takes care of all junk on the diffuser.
I get this commercial grade one but with 3% it may not give you a good result.
occupational benefit so may not be feasible to the most.
at this concentration it is very dangerous so gloves and if unfamiliar with chemicals face shield would be needed, in case the connection pops and splash. But it works and no worries about Cl residue.
I tried soaking it but it took too long, even with this concentration. Yet, once I inject it through the tube… quick rinse and put it back, within 24hrs heavily infested with algae diffuser cleared up.
CO2 tube may not be able to tolerate this strong oxidizer so I have to keep checking for the damage but I recommend trying with 6% (should be easy to obtain) H2O2 with multiple days with bit more volume.
No fish/shrimp/water plants were damaged.
Do you have any suggestions for cleaning the valve on the CO2 tank? Pressure is great but the valve seems to be clogged. Air line from valve to tank and check valve all seem to be fine. It’s the valve on the CO2 tank that appears to be the culprit. What do you think about maybe soaking the valve assembly in clear white vinegar to dissolve any residue?
Do you mean the regulator? Not sure I’d recommend soaking in anything. While disconnected from the aquarium, maybe start by fully opening / closing any valves to see if debris breaks free from the internals.