I recently finished an article detailing the water change pump system I put together. It goes through the in’s and out’s of how I built it, but I wanted a compliment write-up to detail how I perform water changes for our Spec V Aquarium using this new pump system.
I will give a disclaimer that this detaills a water change for a freshwater tank. Marine aquarist will use different methods and equipment. That’s a whole other world, but one that I hope to be entering sometime in the future.
This is an evolution to the guide I wrote on Spec V aquarium maintenance. That is a good resource for starting out. However, this article gets into the specifics of how I have learned to use the new water change pump system to perform our weekly aquarium maintenance.
Water Change – Supply List:
I have all the items I need to perform our weekly water change and aquarium maintenance located on a shelf in our Garage. The supplies I normally use are:
- Dirty Bucket: This bucket is what receives the dirty water removed from the aquarium. Nothing special about it – just a 5 gallon bucket from the hardware store.
- Clean Bucket: Same size and shape as the dirty bucket, but I spent a few more dollars to get one that is ‘food grade’ since it will hold the clean water (to be transferred into the aquarium). Honestly, what I like best about this bucket is the foam on the handle – makes it a bit more comfortable when hauling it around.
- Thermometer: I use this Coralife electronic
version.
- Pump/Hose Water Changer: I detail how this is put together on this page.
- Seachem Prime:
This is used to dechlorinate the new water.
- Glass Scraper: I use a razor blade in this aquarium scraper handle.
- Trimming and Planting Tools: These include my aquascaping tool set (scissors and pinsettes), an old credit card, extra small cosmetic scissors, etc.
- (1) Small Tupperware
Weekly Maintenance for our Spec V (Using the Water Change Pump and Bucket System):
This is probably way more detail than anyone wants, but I figure it may help others to see how I do my weekly maintenance and water change. None of this is set in stone and I’m sure there are better ways to do this and that. Here is how it goes down:
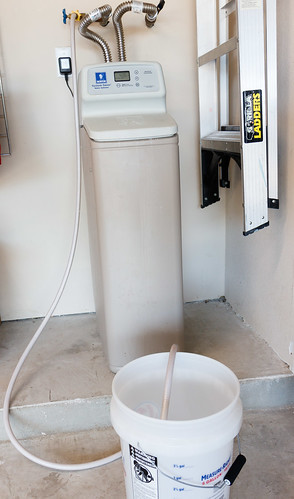
1) Fill clean bucket with tap water: We have a water softener and I have decided to not use the water downstream of this unit (fro the faucets) because of the added sodium (ions). I instead fill from a ‘bypass’ spigot just upstream of the water softener.
I keep a 10′ potable water hose attached and at the ready. I fill the clean bucket with around 3-4 gallons of water, which is more than enough for the 50% water change of our tank.
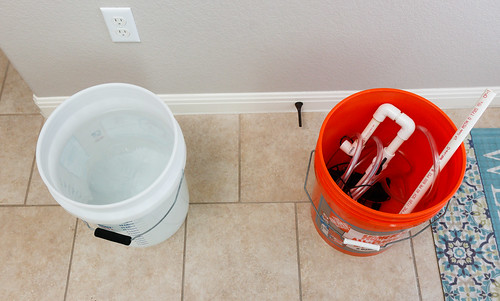
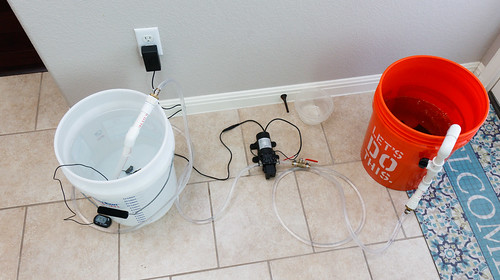
2) Move supplies to the Aquarium: This includes the pump, dirty bucket, clean bucket (now filled with water), all other supplies listed above. I arrange things as shown in the pictures here – dirty on right, clean on the left, pump between. If I have lots of plants to trim or rearrange, I setup a TV tray to hold all of that paraphernalia.
3) Check and adjust water temperature: This is important. I think the number one way we stress fish is by performing a water change in a manner that shocks the tank temp. First, check the aquarium temp. I do this by looking at the temperature controller display. We keep our tank at 24°C (75°F). I put our Coralife thermometer in the clean bucket and give it a few minutes to register.
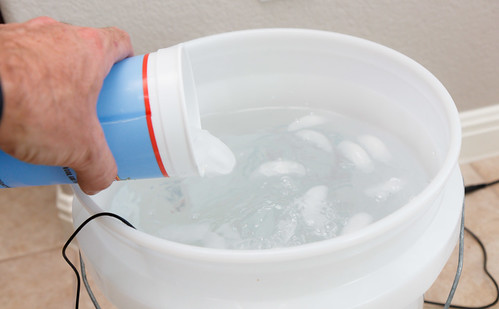
In the summer, it is almost always higher than the target temp. I deal with this by adding ice cubes.
Yes, the ice contains some of the aforementioned ‘softened’ water, but it is a small enough amount to not matter. I have a particular large drinking cup that I use – one full dump of ice lowers the water temp by about 5°F. I am usually pretty good at guessing the amount of ice to add. The temp does’t have to be exactly matching (the tank), but the closer the better.
Conversely, in the winter, it will be necessary to heat the water. If you are filling from a faucet inside, you can just mix in some hot water. For myself, having to use water upstream of the home water heater, I will need to use my spare aquarium heater. It will be interesting to see how long it takes to get up to temperature.
4) Dechlorinate: Dose the appropriate number of drops of dechlorinator to the clean water bucket (about 5 or 6 drops in this case). I dose using disposable pipettes.
Notice that I perform this after the ice is melted, just to make sure I’m treating all the water.
5) Clean Glass: I use our razor scraper to remove algae from the tank’s glass. By cleaning the glass before water removal, you can get it in suspension so that some of it will be removed during the water change.
6) Turn off the Aquarium Pump and Heater: In our tank, both are controlled by a smart plug, so I can use a voice command to turn them off (by way of my Apple Watch). I also shut off the CO2 system (if it is in ‘flow’ mode).
7) Remove Tank Water: I use my pump water changer to start removing water from the display section of the Spec V. Start by hanging the discharge end (with the ‘U’ shape) over the edge of the ‘dirty’ bucket.
Plug the water change pump into an electrical outlet. I use the straight wand end (inlet) to suction water out. I can often see debris floating around – I try to chase those bits down and suck them out of the tank. If I have plant work to perform, I may only remove a few inches of water – enough so that I can get my hands in and not displace water over the edge. Ultimately, I will remove slightly less than half of the water from the display section of the tank.
8) Plant Work: With a little bit of water removed, I can get in and do my plant maintenance. I rarely work on more than one species of plant in a given water change – I choose to rotate through them. It might involve just trimming (like with the HC) or it might involve pulling up stem plants, trimming, and replanting the tops. After I’m done, I use a net and try to gather as much of the clippings as I can and discard.
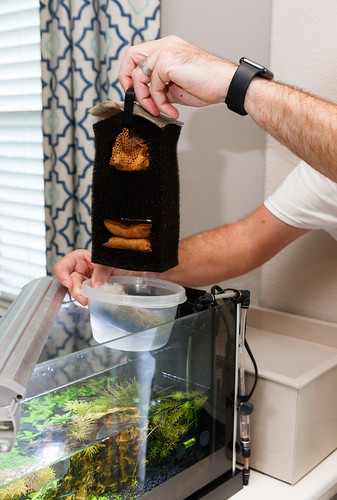
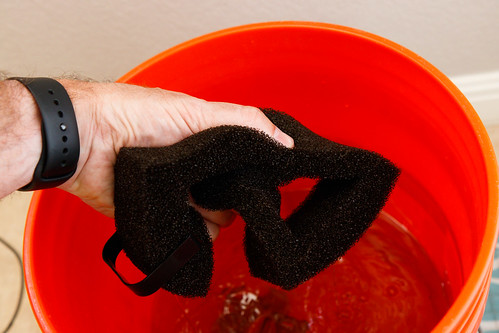
9) Clean Filter: Every week, I rinse out the filter media and clean out the filter/pump section. I remove the filter media and place over a Tupperware (so I don’t drip all over the place) to transfer into the ‘dirty’ bucket.
The filter media consists of: Stock Spec V foam filter and Biomax Ceramic Rings, Seachem Purigen 100 mL bag, Poly Pad and Polishing Pad. Once I get all those filter pieces into the dirty bucket, I separate and clean them. The sponge gets a vigorous squeezing (which releases massive detritus).
The bags of ceramic rings and Purigen gets swished around. I squish the poly pad repeatedly between my palms to clean it out. I then reassemble the filter media stack and put it aside (sitting in the Tupperware).
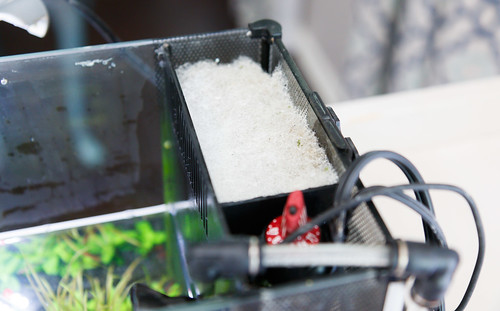
With the filter media out of the way, I crank the water change pump back up and remove all the water from the pump/filter section of the tank. Doing this makes sure to keep detritus from building up (and potentially clogging up the tank’s pump over time).
After the pump/filter section is cleaned out, I put the filter media back in place and wedge the temperature controller sensor probe next to the sponge filter.
10) Clean out the Water Change Pump: It took a few tries to realize this, but the water change pump and hose now has dirty water in it. I drop the suction side into the clean water for a few moments to get the dirty water fully purged (and dumped into the dirty bucket). Then I unplug the pump.
11) Refill the Tank: I then hang the discharge end over the aquarium and put the suction end in the clean water bucket. Plug in the pump. The hardest part of this step is to pay attention to when the tank is full and pull the plug.
12) Drain the Water Change Pump: It’s a good idea to run the pump as dry as possible before storing. I do this by moving the discharge end back to the dirty bucket. Pull the suction end out of the clean bucket, then lift it and the pump up to snake as much water down and out as possible.
13) Turn the Aquarium Equipment Back On: This includes the aquarium pump, heater, and other equipment (cooling fans, CO2, etc.). I like to check the temperature after the water is added and see if the heater or cooling fans are energizing as expected (if needed).
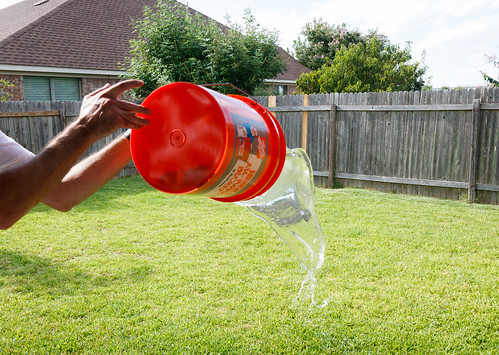
14) Clean up: I dump the dirty water out in the yard in a place where it looks like the grass needs some extra love. I rinse the dirty bucket out and let air dry. Lastly, I put everything back in its spot, ready for next week.
After reading through all this, I’d like to emphasize that this is the process for weekly water changes that has been refined to work best for us. Everyone is going to find ways that works best for their time, equipment, maintenance tasks, etc. I hope it gives helpful ideas to others, especially on using the pump water changer instead of a python water changer or just dipping and pouring.












This is awesome. I have to change my water using buckets and this will make things easier. I had a thought reading through this that a foot pedal switch to turn the pump on and off would make it easier to control the suction while cleaning substrate etc without pulling too much water out of my tank. Thanks for the write-up.
Foot switch would be handy – good idea!