Fishkeeping requires a certain level of commitment. Water changes, regular cleaning, feeding, and attention to your tank. I try to keep my maintenance regimen simple, but there is a minimum level of effort to keep everyone in the tank healthy. Inevitably, there comes a time when you have to leave town and then the reality sets in: what am I going to do with the fish!
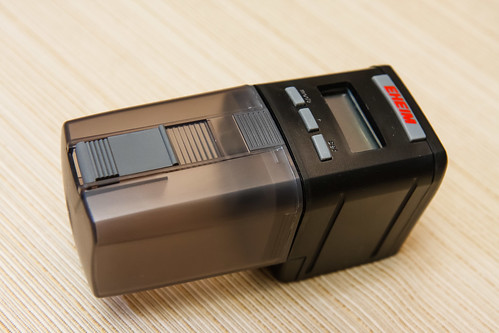
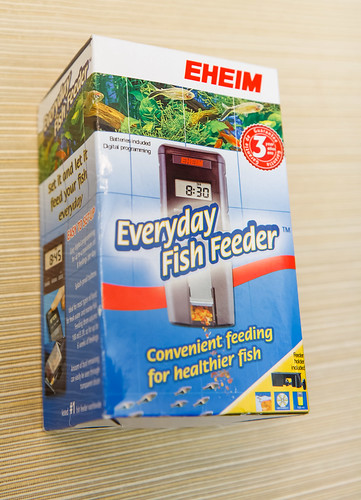
Enter the Eheim Automatic Fish Feeder, Model 3581. In my research, this model of fish feeder had very good user reviews. User reviews don’t lie – if something as critical as a fish feeder doesn’t work, people are going to hammer it with bad reviews. Most people are giving the Eheim auto fish feeder very good reviews with only a few negative comments. I was hopeful that it would meet our needs and decided to set one up for our holiday vacations.
Description of Eheim Automatic Fish Feeder:
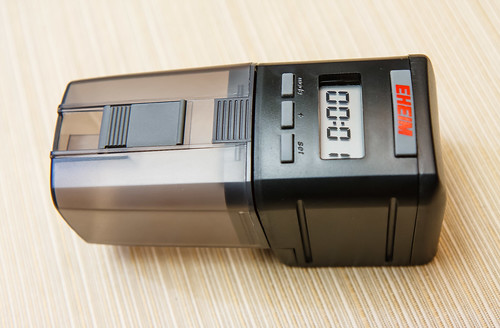
The Eheim 3581 fish feeder works by rotating a drum containing the fish food. This translucent drum has an opening on one side with an adjustable door. The door’s position controls the opening size and how much food is dispensed with each feeding cycle. A feeding cycle takes place when the unit rotates this food bin where the opening (which is normally located at the top) cycles to point down to dispense food, then back up in the normal position.
Here are some of the features of the Eheim automatic fish feeder:
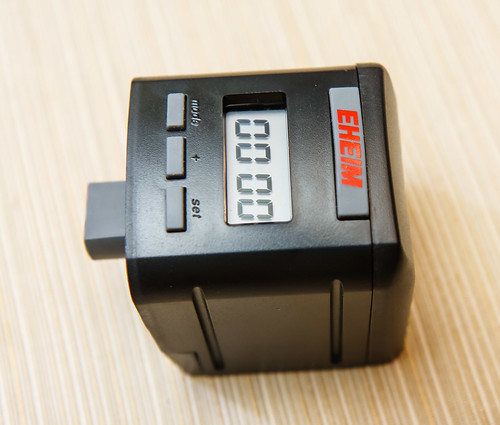
- The unit is controlled by a digital timer and display.
- The feeder is powered by two (2) AA batteries – no need for a power cord.
- It can dispense any dry fish food, from flakes to granules. The quantity of food dispensed is controlled by way of the adjustable dispensing door on the food bin – slide the door further open for more food dispensed and slide it further closed for less food dispensed.
- The timer can be programmed for 1 to 4 feeding events per day, with each feeding event time set by the user.
- Each feeding event can be programmed to have a single turn of the food bin, or a double turn, where the unit turns the bin once to dispense food, waits a minute, and then turns the food bin a second time.
- There is a button (labeled ‘Eheim’ on the top) that you can press to feed your fish. Great to give them an unscheduled snack or to test the unit.
- The feeder incorporates a fan that cycles on to keep the food in the bin dry. This helps to ensure that the food does not stick together and jam up the dispensing opening.
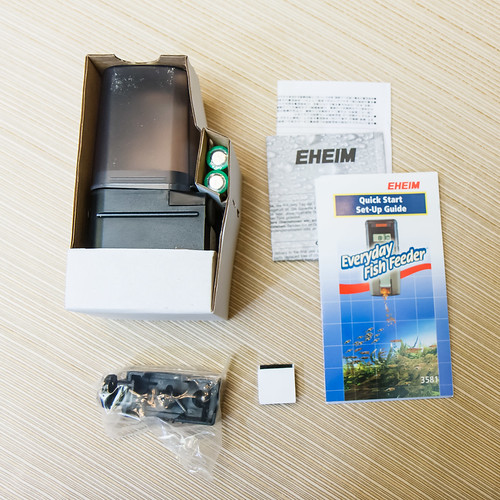
It is a simple product that doesn’t have many accessories – here is what comes in the box:
- Eheim Automatic Fish Feeder model 3581
- (2) AA batteries
- (1) small square of hook/loop Velcro® fastener (to hold feeder to flat surface)
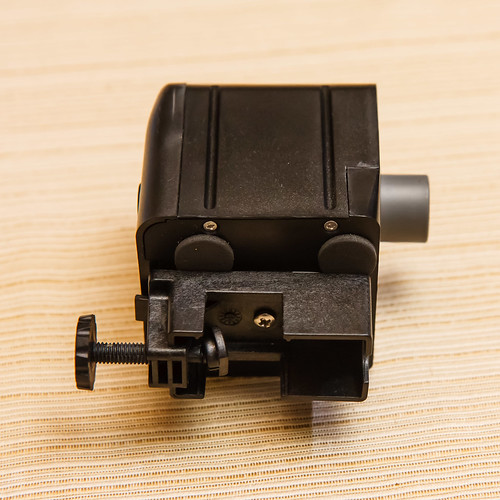
- glass mount hardware with screw (to attach to bottom of feeder)
- instruction manual
I thought that giving dimensions of the feeder would be helpful to those planning on where to mount the unit, so I have measured as carefully as I can, down to the nearest 1/16th of an inch. Metric values are conversions from english and rounded to the nearest mm:
- Volume of feeding bin: 3.38 fl. ounces (100 ml)
- Weight: 9.2 ounces (261 grams) (food bin empty, with batteries installed)
- Length of unit: 5.51″ (140 mm)
- Width of unit: 2.36″ (60 mm) (is also the height of the food bin)
- Height of unit (when sitting on flat surface): 2.72″ (69 mm)
- Width of food bin door: 0.63″ (16 mm)
- Length of food bin door – maximum opening: 0.63″ (16 mm)
- Length of food bin door – minimum opening: 0.02″ (0.5 mm)
Mounting Options for the Eheim Auto Feeder:
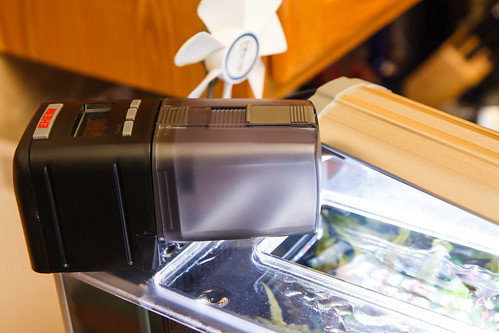
There are two main options for mounting the Eheim fish feeder. The first is the simplest, and that is to simply set the unit on a flat surface with the bin portion of the feeder hanging over the surface of your aquarium water.
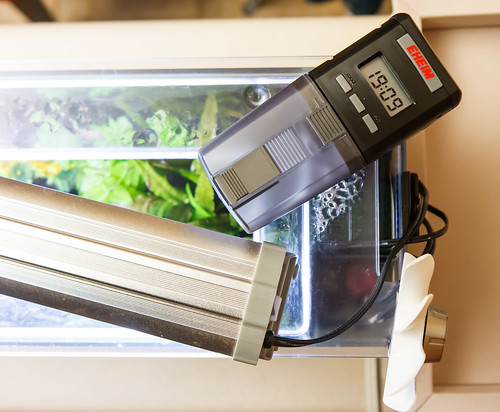
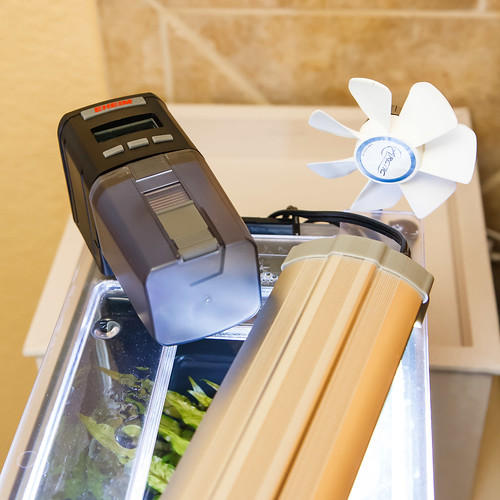
This setup works well with aquariums that have a canopy or other flat surface on top of the aquarium. This is the mounting method used for our Fluval Spec V aquarium. It has a clear acrylic top with an opening in the center. I rearranged our light to make room for the feeder to dump into this center opening. Everything is tight, but it works.
The unit comes with a set of adhesive backed Velcro® squares to secure the feeder to a flat surface. These are generally not needed as the unit is weighted so that it sits securely with the main base sitting on a surface and the feeding bin hanging over the water. The Velcro® would help to keep the unit from being bumped out of position; otherwise, I wouldn’t use it.
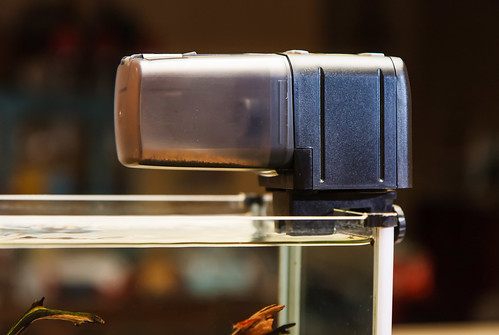
The second option for mounting is a clamp that allows the feeder to be clamped on a glass aquarium wall. The mounting clamp is attached to the feeder’s bottom with an included small phillips head screw.
The clamp works well to secure the feeder bin over the water. This option works well for open tanks.
Eheim Automatic Fish Feeder in Use – Setup and Tips:
There isn’t much to programming the feeder – just follow the instructions (Eheim’s instructions are here). The only confusing part is after you set the time for your desired feeding event, you then have to select how many times the feeding bin will turn to feed (one rotation or two). You know you have completed this step when little arrows show up next to the event number (one arrow for one feeding turn, and two arrows for two feeding turns). I made the mistake of setting the event without selecting the number of turns. The event time came and went with no action. Glad I discovered this during testing; otherwise, my fish would never get fed.
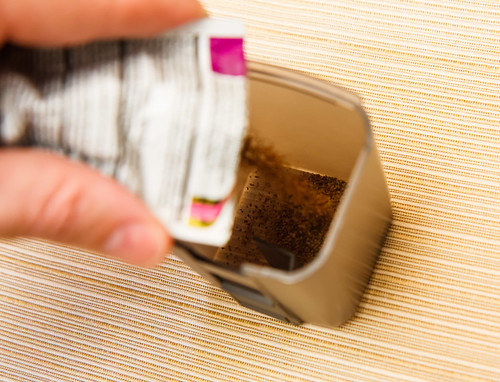
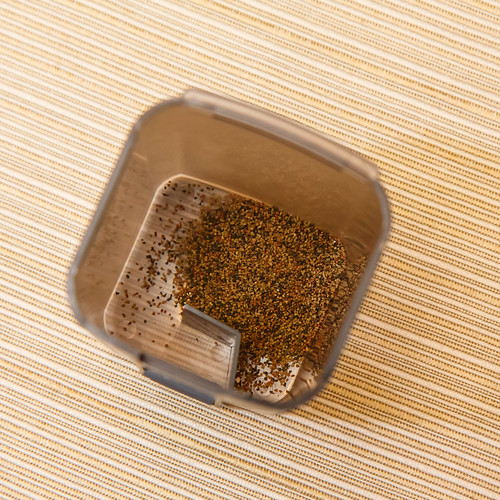
Filling the unit is easy. You don’t need to put food into the feeding door; just take the food bin off the feeder body, remove the large end cap from the food bin, pour the desired amount of food in, and put it all back together. Take care to hold the bin with the feeding bin door not pointed down so that the food doesn’t spill out and make a mess in this process.
I’ve already discussed the two mounting options. When setting up the feeder in tight quarters, make sure to take into account the room that the bin requires as it turns. The bin is square shaped and those corners will need some room as the bin turns during feeding time.
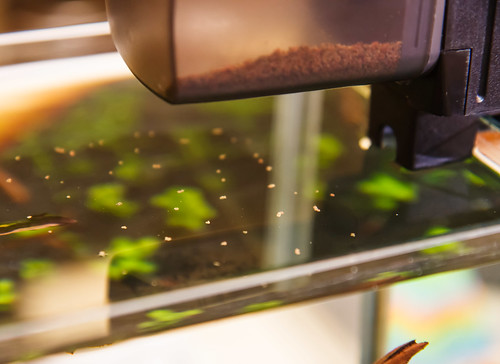
It’s important to experiment with the feeder operation to get a feel for how it works with your fish food. I am using this feeder on a nano aquarium with very small fish, so I wanted to test it to get the smallest amount of food possible while still being reliable. I tested the feeding action by setting the unit up over a white bowl and hitting the feed button. I am using a very fine grain food, Hikari Tropical Micropellet Fish Food. I adjusted the food bin door as narrow as possible with only a sliver of light showing in the opening. One tip I read about on other reviews said to put a piece of tape over the food bin door to secure at the desired opening. I decided this is a good idea and used a small piece of black electrical tape to keep it in place.
Make sure and setup your fish feeder several days, (if not a week or more) ahead of your departure so you can be sure it works as you intend. I set mine to feed at 6:05 pm and made sure I was hanging around the tank at this time to watch and verify how it works. You are of course checking to see that it actually feeds, that the bin turns the number of times you intend, that the food falls into the tank (not accidentally on the cover instead for example), and that the quantity of food dropped is as desired.
Once you get it working as intended, make sure to leave things alone from that point on.
Assessment: Good and Bad of Eheim Auto Fish Feeder:
I am pleased with the operation of this auto fish feeder. I have observed it in use and it is very consistent and reliable in feeding our fish. I’m very thankful that Eheim has developed this product as it is a great help for the times when we want to get away on vacation. With some effort to get it setup properly, it works very well. I generally like the display and the ease of programming. I like that they put the ‘snack’ button to make the unit feed. I wouldn’t normally use this to feed the fish, but it is invaluable during setup and testing to verify the quantity of food dispensed. The food bin is plenty big – huge for a nano aquarium.
On the negatives, for my use in a very small nano aquarium, I wish the entire feeder was constructed smaller. It is difficult to find room for the unit on the acrylic top of our aquarium, fighting for space with the light. The food bin is entirely oversized for small aquariums. The reason for this is that Eheim has this product doing double duty as a turtle feeder. It’s the same unit with the same sized bin and obviously the bin would need to be big enough to meet the needs of a turtle. It’s good for Eheim to make a single product that covers multiple uses, but not great for the consumer.
The feeding door on the food bin generally works well. However, I wish that it was narrower so that when the food bin door is at it’s narrowest opening, less food would be dropped in. I got it to work adequately for our nano aquarium, but even with the door adjusted with as small an opening as possible, it still drops more food than is optimum.
As good as the digital timer is, I wish that it could be adjusted to feed the fish every other day instead of every day. My fish can survive on reduced food for a time, especially when I’m gone and trying to keep the tank in good condition, i,e., not overfed. As it is, the timer has to be set to dispense at least once a day. As I have already mentioned, I wish that the programming for the number of bin turns would always be either one or two and not zero as this sets up users for failure if they don’t understand the programming.
Other than these issues, I’m very happy with the unit and glad to use it. It works for our needs. The biggest wishlist item is that they would develop a feeder that is smaller in size to better work for small, nano aquariums.
Using the Eheim Automatic Fish Feeder on a Fluval Spec V Aquarium:
Since this site is focused on nano aquariums, specifically the Fluval Spec line of aquariums, I want to discuss the use of the Eheim Automatic fish feeder for this application.
For our Spec V, I had a challenging time finding the best location for the feeder on our setup. I intend to use this only when we go on vacation. When we leave and the tank is unattended, another concern besides feeding is water evaporation. With no one around to top off the tank, I want to reduce evaporation as much as possible and this means leaving the stock acrylic top in place. That therefore limits the mounting option to setting the unit on top of the lid. As previously mentioned, it was challenging to find space for the unit to sit and be able to dump in the central opening to the water. I do not use the stock light and instead have a Finnex Planted+ HLC (20″ long) light sitting on the lid spanning over the opening. To make room for the feeder, I had to cant the light at an angle across the aquarium. This leaves a space for the Eheim feeder to sit (also at an angle) at the end over the filter section and dump over the water. It looks funny and isn’t the best position for the light, but it works for when we are away.
For those that are using the stock light, I would suggest leaving the top off and using Eheim’s clamp mount to put the feeder at the end of the tank opposite the filter/pump sections. This will allow the feeder to fit over the tank’s water and the stock light can remain in place in the center. This will be a very secure location but will mean that water will evaporate at a faster rate. If you do not have anyone coming to check the water level while you are away, I would test without the lid on to get a feel for how long you can go before the water level gets too low. For those that have not plugged the bypass opening on their Spec aquarium, this is not such a critical issue because if the water level drops below the bottom of the overflow grates, it can still flow into the lower bypass opening to feed the pump.
Use on a Spec III would be similar. With the small confines and the light in the way, it is best to clamp onto the glass, offset to miss the light. This would be setup without the acrylic top.
I took one additional step in setting up our Spec V for when we are away. I normally unplug the pump before I feed the fish (by hand) so that the food stays in one place and they don’t have to chase it all over the place. It gives them a better chance to eat all of it without the food getting back into the filter or dropping before they can eat it. I wanted the same function when we are gone, so I decided to add another Leviton plug-in timer (I now use smart plugs) to make this happen. The timer turns off the pump and our temperature controller so that the heater or fan also turns off. Having the temperature controller off ensures that the heater doesn’t come on when the pump is off (could overheat water in the pump section where I keep the Hydor Theo heater) and also keeps the fan off, which pushes the food around a bit when it is on.
I have it scheduled so that this timer turns off at 6:00 pm to shut down the pump/temperature controller. At 6:05 the Ehem feeds the fish. Then at 6:20 the timer turns back on to energize the pump and temperature controller. The lights are already scheduled with a separate timer that I have operating year round.
We have tested this setup for more than a week with us gone on vacation. It worked very well. The only extra maintenance for us upon return was to catch up with a water change and clean the glass. I think it probably overfeeds a bit, but I don’t expect operation from a machine that is as intuitive as I am with feeding.





Does the clamp come with it?
The clamp pictured does come with the fish feeder.
Hello,
Nice write up.
Do you know if the tank glass mounting bracket can be purchased separately and if so where ?
If you are not using the one that came with your feeder, would you consider selling it to me ?
Just curious – why do you need just the bracket?
To answer: I don’t know if they sell by itself; you can’t have mine.
I bought a used one on eBay and it came without the bracket. I prefer to mount the feeder with one rather than let it sit on the cover. Every so often one of my cat decides to take a trip across the top of the tank. I can see it bouncing off the floor as the cat passes by.
In the mean time I looked at a small circular shaped feeder that I have and it’s mounting bracket slides out of the feeder assembly. I’m going to try and use that bracket It’s a little wider than the space between the rubber feet so it’ll have to rest on top of them. I will also need to drill a mounting hole in the bracket for a screw. Not a big deal but I would rather have the real thing.
What is the battery life for this .. can it go for two weeks !?
I’m not sure what the battery life is, but it can certainly get you much more than 2 weeks. To give you the best odds, start with a fresh set of alkaline batteries.
I have one and it can not be set. I have put in fresh batteries, the colon blinks I can press mode and see the 4 different modes. The timers runs, but I can not set the time or the feedings. Very disappointed.
It can be frustrating to set. I have to get the instructions out every time I do it. The key is the arrows on the display when you are setting. Those confirm that it will actually turn and dump food (one turn per arrow) at the set time.
For what it’s worth, I got the Eheim to feed for vacations, but man, does it dump a ton of food into the tank! I never actually used it, as the door just isn’t reliable enough for me – it’s either too much food or I’m worried all vacation that they’re not getting anything. I got the Fish Mate F14 carousel style feeder, and after filing a ramp on the leading edge of the “drop zone” (known “issue”), I actually use it as a daily feeder now. It has a clockwork mechanism that turns the feeding drum, which at first drove me nuts – I thought “Man, I want to see my fish getting fed!” But, once I was confident that it was actually dropping the food, which it does very slowly over the course of, say, 20 minutes, I actually prefer it to just a bunch of food dumped in! I’ve got it feeding twice a day, and my ember tetras are most active during those 20 minutes! A micro-pellet will descend down every few seconds, almost creating a more natural feeding situation than the whole pinch being dropped at once. While it’s not exactly pretty sitting on top of my Spec V, it isn’t terrible. I lift the light a little, and just place it on top, no mounting, I pull the whole thing out to fill it. It’s easy to see when it needs to be filled, and easy to put in the exact amount that you want fed out. I do vacuum water changes once a week or every other week, usually at least 50% (with only 5 gallons, by the time you’ve vac’ed the bottom half the tank is empty!), but I test water beforehand, and I nothing ever shows up on API master test tubes. I definitely feel like less food gets to the bottom to rot by feeding this way. Just my 2 cents!
Also, using Micro Pellets, have never had a problem with the food getting damp or sticking. I imagine that’s a problem with flake, but with Micro Pellets it hasn’t been a problem at all, no air hose hooked up to the feeder.
Thanks for the suggestion on the auto fish feeder. Sounds like it might do better with a nano tank feeding nano food.
Thank you for this! I have banged my head on the wall with adjusting the feeder. Everything came together when I read your tips. These small arrows were new to me and they resolved my problem. I’m grateful 🙂
Awesome – Glad it helped! We went on vacation a few weeks ago and the Eheim feeder was back in action. I still have to look at this web page to figure it out!