

I have wondered how long you can go in a planted aquarium before you need to rescape. It is definitely less than two years. I know this because that is how long our tank has gone since the last rescape and it is long overdue.
We were blessed with some free time on New Year’s Day, 2019, and decided to dive in and makeover the Spec V.
Why (and When) Do You Need to Rescape a Planted Aquarium?
I have previously written an article about how to rescape an aquarium. I won’t rehash the whole thing here, but the high points are basically about the degradation of your substrate, equipment, etc.
Over time, detritus (decomposed organics – that looks like dirt) builds up in the substrate of any aquarium, especially in a planted tank with so much living and dying going on. Also, those that use a clay or dirt-based substrate, like the Up Aqua Aquasand that I have been using in our tank since December 2014, experience a degradation in substrate quality. The pieces of hardened clay start to dissolve and break apart from plants boring roots into them. As they break down, they produce more dirt in addition to accumulating detritus. The result is an aquarium that becomes cloudy and dirty with any disturbance.
Additionally, the substrate becomes deficient in nutrients. Plants are constantly extracting nutrients as they grow. Also, nutrients dissolve from the substrate material and into the water column. Regular plant trimming and water changes remove some of these nutrients permanently.
In a planted tank, you also battle overgrown plants that must be removed and replanted on a large scale. It’s not only what you see but what you don’t see – a massive collection of roots that are causing unhealthy competition.
All this causes a need to occasionally break down the entire planted tank and re-aquascape, or ‘rescape’ your tank.
Regarding our tank, I have neglected the tank over the past year, so the issues that normally occur with an old tank have been magnified. Algae has taken over, and we are dealing with unhealthy plants from overcrowding.
Aquarium Rescape Process:
I’m in a unique situation (from past tank rescapes) in that I have a new Spec V tank that we are switching to. The old tank that has been in use since 2014 has taken a beating. It is eaten up with algae and has some scratches on the glass. Having a new tank as a spare makes the process easier.
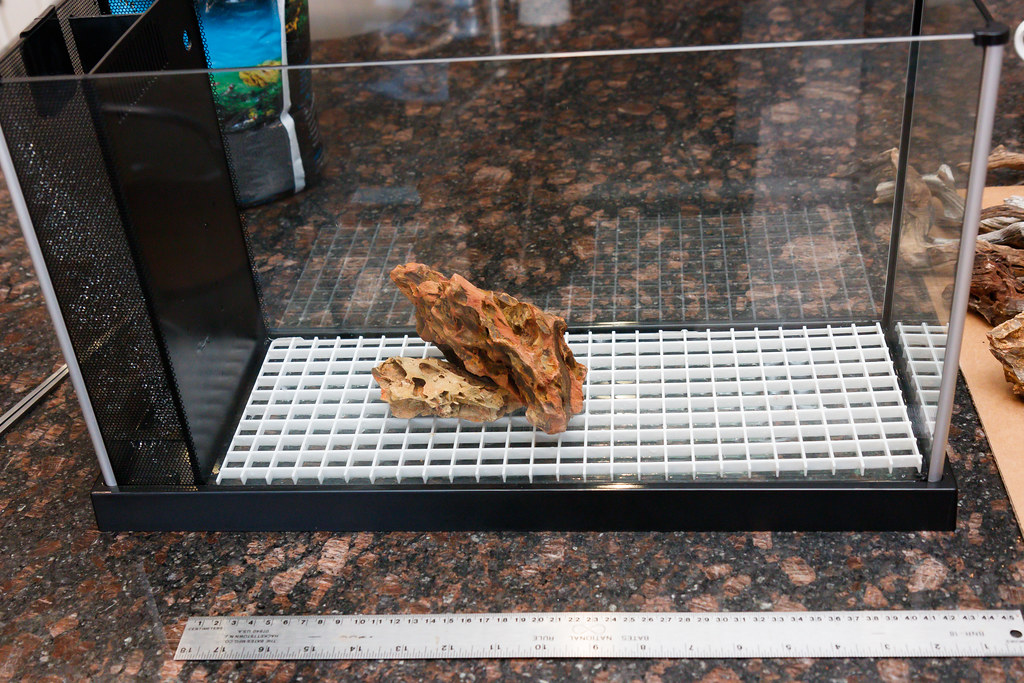
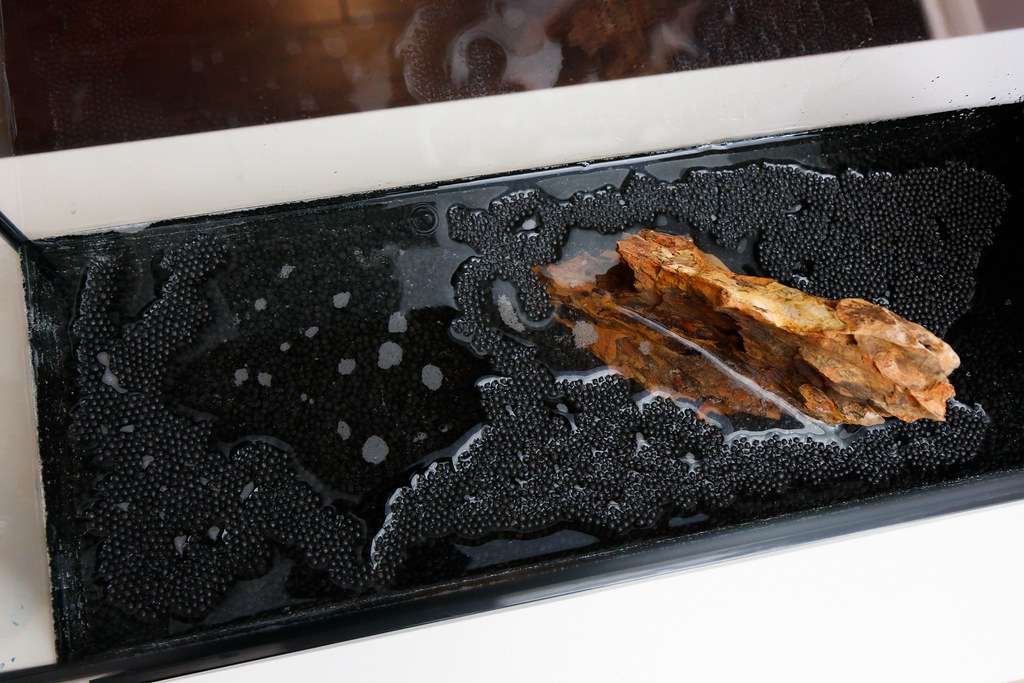
I first removed all the aquascaping hardscape materials – some driftwood and some Ohko stone.

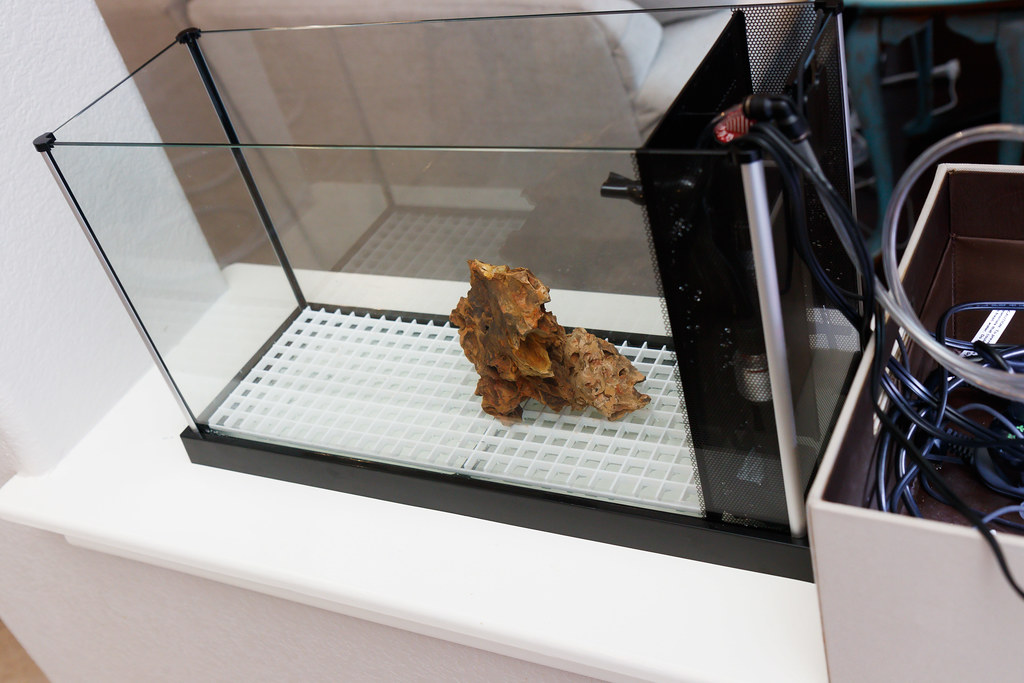
I put down one layer of plastic light grid to protect the bottom from the rocks. Then, it’s time to play around with different stones and layouts to see what works.
Aquascaping a nano tank like the Fluval Spec V is challenging. There’s not a lot of room to play with. I ended up with a single central stone for the aquascape. It seemed that another stone or two would be nice, but real estate is precious, and I know I will ultimately want room for plants, not rocks. At least the one rock is somewhat large-scale in this tank. I had one other stone in there that was used to prop up and stabilize the main stone.
I siphoned the water out of the old tank as much as possible, leaving all the critters inside. This includes dozens of red cherry shrimp and a single Green Neon, ‘Uno’.
With most of the water and weight out of the tank, I unplugged everything and lifted the tank onto another staging area. I added Seachem Prime dechlorinator and refilled the old tank in its temporary location. I plugged in the pump and heater as life support. With the tank setup in a new location, I could take my time getting the new equipment set up.
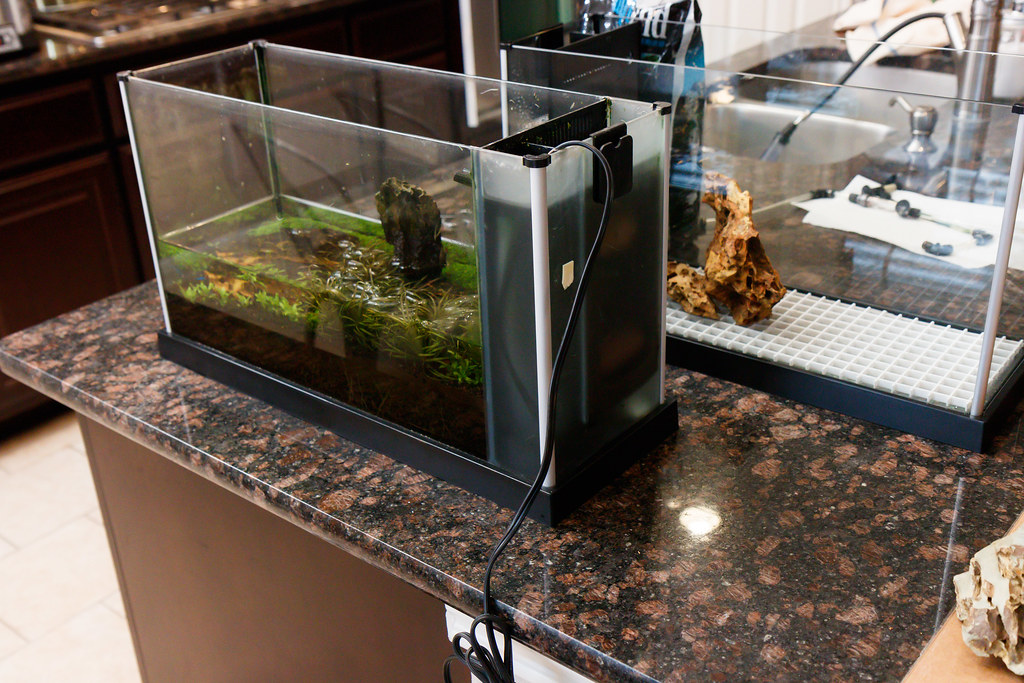
Setup for the new tank involved first getting it into the new location, and taking care to center it properly.
Next, I used a small cup to fill in with new substrate. I am still using Up Aqua Aquasand. Once happy with the level of substrate, I carefully started adding water.
I ended up filling it by putting the straight attachment from our DIY Python water changer directly into the filter section. I turned the water on as low as possible and let it overflow into the main display section. If you do this very slowly, the substrate will stay put.

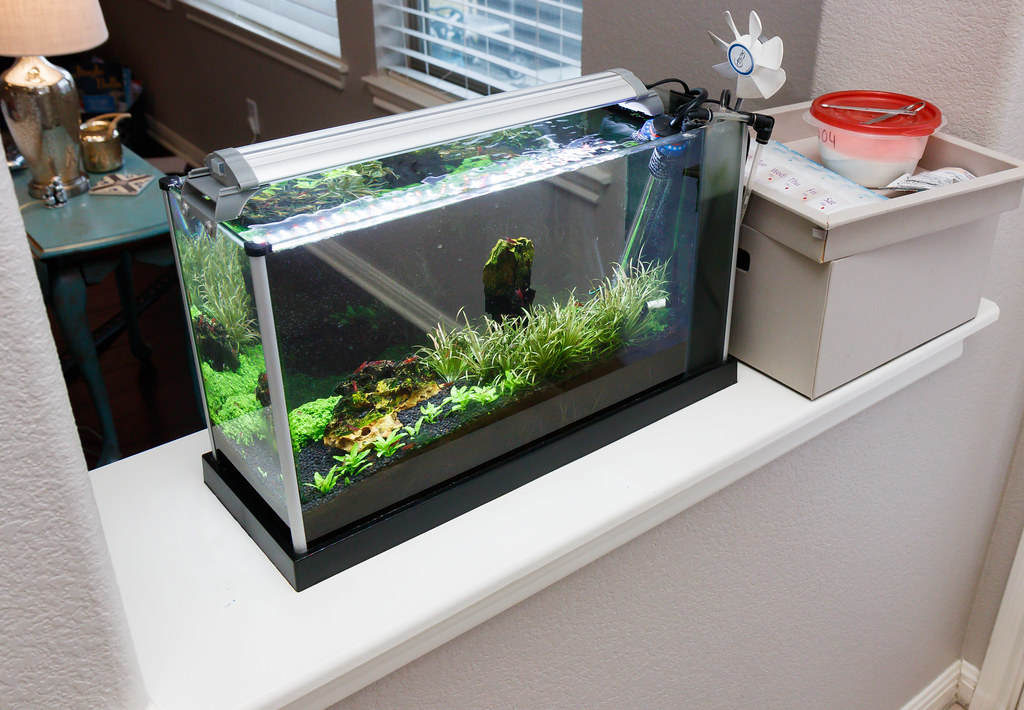
Once full of water, I hooked up all the electronics. The tank is new along with a new pump and filter media. The light (a Finnex Planted+), temperature controller, and automation plugs are the same as we have used previously.
One notable change in equipment is with the CO2 system. I previously used a diffuser stone inside the display tank to diffuse the CO2 into the water. I have incorporated an inline CO2 diffuser with the new tank and hidden it in the pump section along with the heater and pump. I’m still testing, but I hope to be writing about this soon.

Planting Time
After letting the new tank percolate for a night, I took to getting it planted the following day. I did not get any new plants – the plan was to move over existing plants from the old tank. I started pulling up various species and going through them to trim down good examples for planting.
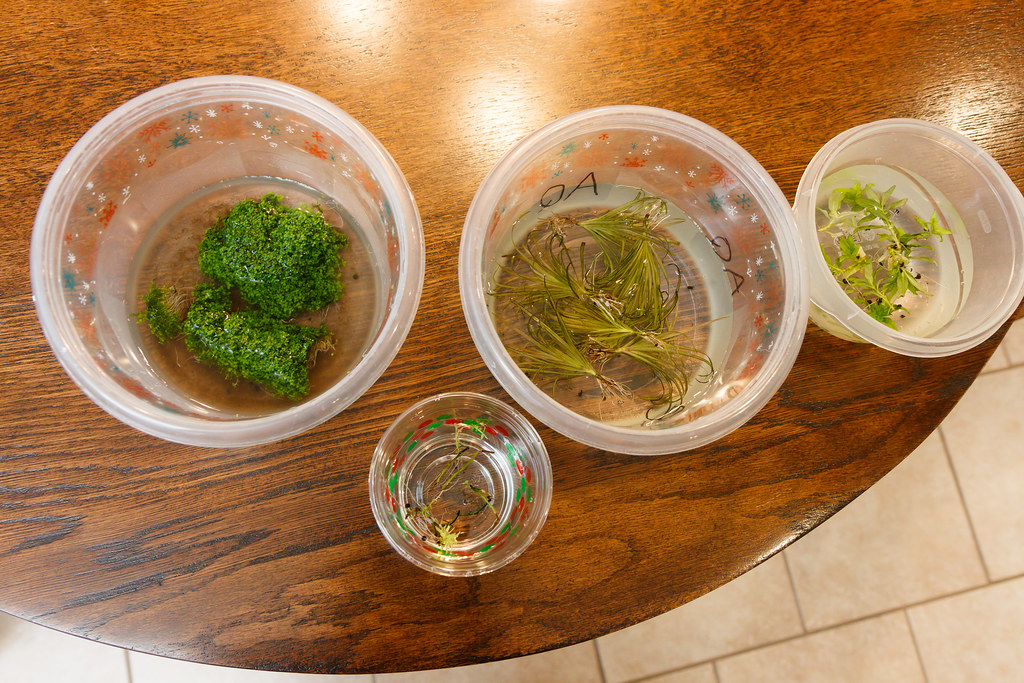
I’m going back with Rotala Rotundifolia, Staurogen Repens, Blyxa Japonica, and hemianthus callitrichoides ‘Cuba’. Since the rescape, I got a few stems of Rotalla Wallichii from eBay. It is a lovely addition!
Planting in Up Aqua Aquasand is very easy. Push the plant in with pinchers, wiggle a little, and give a quarter twist. Then slowly move the pincer tips up and away. My replanting of HC was sparse – not many chunks, and they are spaced a reasonable distance apart. We will see how fast it fills in.
Later that evening, we rounded up ‘Uno’ and as many shrimp as possible and put them in their new home. The activity level of the shrimp was amazing – they were zooming all over the new tank.
Two Week Status
Two weeks in, the new tank is doing very well. My big battle in the old tank was green dust algae. It is returning a little on the new tank, but I’m working on some new techniques to limit its accumulation. HC growth is slower than expected; however, it is alive and looks healthy. I trust it will take off. There is not much growth with Staurogen Repens, but I trust it will start spreading soon.

The two sprigs of Rotala Rotundifolia I planted were absolutely pathetic. That is a plant I was having major trouble with late in the lifecycle of the old tank. The little sprigs are now taking off, and I trust it will soon take over that portion of the tank.
The new plant, Rotala Wallichii is super enjoyable. The lower parts (the portion that was shipped and possibly grown emmersed) are not great looking, but the top few inches are the new growth that looks much healthier. I hope the tops will turn redder when it gets closer to the light.
I’m super excited about the future of the tank, and it will motivate me to get back in gear with regular maintenance and fertilizing dosing so that this planted tank can reach its potential.

I also put an in line diffuser for my spec v so I could take all of the cords out of the display. I used a GLA 12/16 mm in line diffuser which fit the pump outflow tube perfectly. The heater is a tight fit in the same compartment as the diffuser, but it does fit. I definitely got better CO2 saturation/distribution with it and noticeably better plant growth. My blyxa exploded and took over the tank until i recently thinned it out.
I also modded the spec v lid by fixating BRS clear mesh over the opening and securing them with drilled clear nylon screws. With all the cords out of the display so my lid would sit flush with the edges. I had a few shrimp and fish jump to their deaths and wanted to put a stop to it. The BRS mesh allows for light penetration with minimal compromise of the PAR.
I also started my tank about 7 months ago with 5 endlers, but like you, I am now down to a single blue endler (we call him the “lone ranger”), 2 amano shrimp. and 1 nerite snail.
Quick question: when you rescaped it to a new tank, you mentioned that you used all new filter media and really only transferred your livestock and plants. Did you go through a new cycle or not? One neon and the shrimp shouldn’t be much bioload, but I wanted to know if you had any issues with ammonia/nitrite etc. Thanks!
.
Sounds like you have a great tank! The inline diffuser is working well; although, I will want to write about some of the quirks of switching from the in-tank atomizer.
Yes – all new filter media but I did realize I needed some bacteria from the established tank. Some came from the plants, but more than that, I took the bag of biomax ceramic from the old tank and laid it on top of the sponge in the new tank. I tested a very small amount of ammonia at day one, but haven’t bothered testing since. I’m confident it is re-established now.
This is so intriguing to me! I have a similar tank setup and am thinking this might be a good thing for me to do as well! Love your blog and can’t wait to see more.
Did you find that the bubbles were dissolved by the time they come into the aquarium? My water always looks “bubbly” with my in-tank atomizer .
The performance of the inline CO2 diffuser is definitely different than the in-tank atomizer. It’s still bubbly. But, the bubbles come out larger and seem to go away quicker. I’m guessing some of the CO2 bubbles dissolve before they come out the outlet nozzle – bubbles that do come out are for some reason larger.
Overall, the plan growth is good and algae is down so I’d say it’s working well. I like the way it cleans up the equipment much better.
What is the layer of filters in the back of the tank you have?
You can read a bit about how I added Poly and Polishing Pad filer media. Below that, I have the stock sponge filter with the two openings filled with Biomax Ceramic Rings and a 100ml bag of Seachem Purigen.